

Are you looking for a cozy project that keeps your feet warm? Crocheting house slippers is a perfect weekend craft that anyone can learn, even beginners. These handmade treasures can be customized to fit any foot size and styled to match your personal taste.
You can create comfortable house slippers from a simple rectangle that’s folded and sewn together, making this an ideal project for those new to crochet. The basic technique requires just a few basic stitches, and you can complete a pair in as little as one hour once you get the hang of it.
Want to add some flair to your slippers? Try adding ribbed textures for better grip, cable patterns for style, or even faux fur yarn for extra coziness. With just a hook and some yarn, you’ll soon have beautiful, practical slippers that are perfect for chilly mornings or relaxing evenings at home.
Understanding Crochet Fundamentals
Before diving into making your house slippers, you’ll need to grasp some basic crochet concepts. These skills will set you up for success as you work through your slipper project.
The Basics of Crochet Stitches
Learning a few essential stitches will help you create beautiful house slippers. The chain stitch (ch) forms your foundation. You’ll make a loop, pull yarn through, and repeat to create a chain.
The single crochet (sc) is perfect for beginners and creates a tight, sturdy fabric ideal for slippers. Work your hook into a stitch, yarn over, and pull through twice.
Double crochet (dc) works up faster and creates a taller stitch. You’ll yarn over before inserting your hook, then yarn over and pull through in stages.
Slip stitches (sl st) help you join rounds without adding height. They’re essential when working in circles for slipper soles.
Practice these stitches before starting your slippers. Small swatches will help you get comfortable with tension and movement.
Tools and Materials Overview
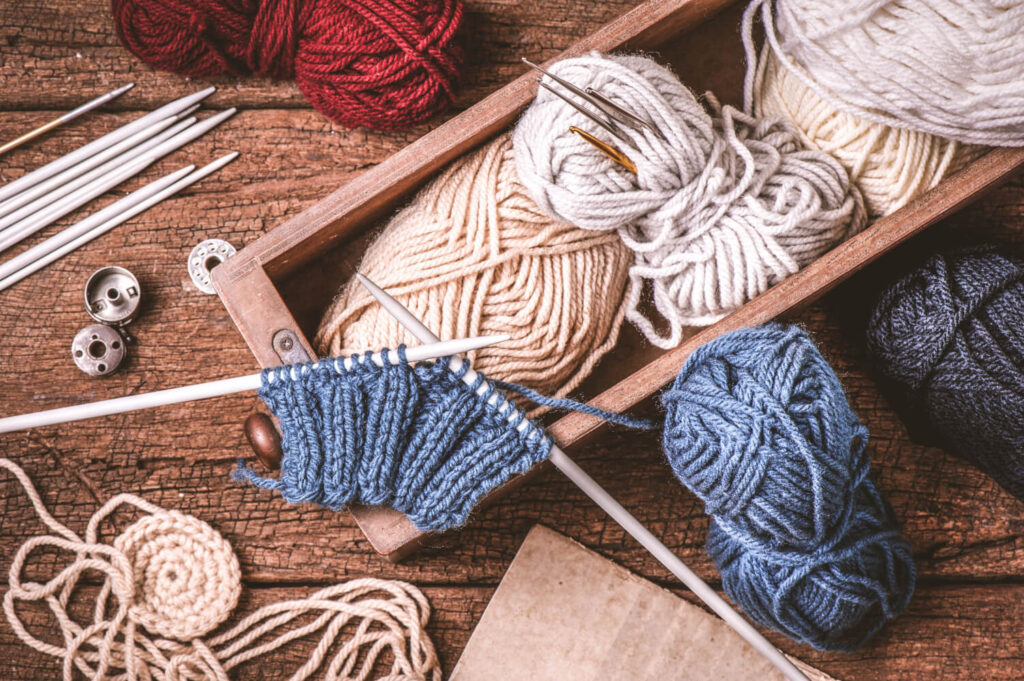
You’ll need a few basic supplies to crochet cozy house slippers. A crochet hook (sizes G/6 to J/10) works well for most slipper patterns. Choose a hook that feels comfortable in your hand.
If you’re gathering your first supplies, this guide on what you need for crochet can help you choose the basics.
Worsted weight yarn is ideal for beginners and creates durable slippers. One skein usually provides enough yarn for a pair of adult slippers. Consider machine-washable yarn for practical use.
Don’t forget these helpful extras:
- Tapestry needle for weaving in loose ends
- Stitch markers to keep track of your rounds
- Scissors for cutting yarn
- Measuring tape to check size
Choosing soft, warm yarn will make your slippers extra cozy. Wool blends offer warmth while acrylic provides easy care.
If you use acrylic, it can help to block acrylic yarn projects before assembly for a neater shape.
Choosing Your Yarn
Picking the right yarn is super important for making comfy, long-lasting slippers. Your yarn choice affects how your slippers feel, how long they last, and how warm they keep your feet.
Decoding Yarn Labels
When you’re at the craft store, take time to read yarn labels carefully. Look for the fiber content first – this tells you what the yarn is made from. For slippers, you’ll want something that lists wool, acrylic, or a blend with nylon.
The weight of the yarn matters too. Medium (worsted) to bulky weight yarns work best for slippers. These create sturdy fabric that holds up to walking around.
Don’t forget to check the care instructions! If you want to be able to wash your slippers, look for “superwash wool” or blends that say “machine washable.”
Yardage is important too. Most adult slipper patterns need about 200-300 yards of yarn, but always check your pattern first.
Selecting the Right Wool
Superwash wool is fantastic for slippers because it’s soft, warm, and can be machine washed. Look for wool blended with 10-25% nylon for extra durability, especially for the soles.
Some popular choices include:
- Wool-nylon blends: Great balance of comfort and strength
- Acrylic-wool blends: More affordable but still warm
- Cotton blends: Good for warmer climates but less stretchy
If you’re making slippers that will get lots of use, consider using a different, tougher yarn just for the soles. Some crafters use Phentex, a synthetic yarn known for its incredible durability.
For beginners, a medium-weight wool blend in a light color makes it easier to see your stitches as you work. Your feet will thank you for choosing something soft that doesn’t itch!
Getting Started with a Crochet Pattern
Before diving into making your cozy house slippers, you’ll need to understand how to read patterns and check your gauge. These skills will help ensure your slippers fit perfectly and the project goes smoothly.
Reading a Free Pattern
Free crochet patterns for slippers are widely available online and in craft magazines. When you first look at a pattern, don’t panic at all the abbreviations! Most patterns start with a key that explains what each shorthand means (sc = single crochet, dc = double crochet).
Look for these important sections in your pattern:
- Materials needed (yarn type, hook size)
- Skill level (beginner, intermediate)
- Finished measurements
- Step-by-step instructions
Many slipper patterns begin with a simple rectangle that gets folded and sewn in clever ways to fit your foot. This technique works great for beginners since you don’t need to worry about complex shaping.
Try reading through the entire pattern before starting. This gives you a mental roadmap of the project.
Gauge Matters
Gauge is simply how many stitches and rows you make in a specific measurement, usually 4×4 inches. It’s super important for slippers since you want them to fit your feet!
To check your gauge:
- Make a small test square using the same yarn and hook as your project
- Count how many stitches and rows you have in 4 inches
- Compare with what the pattern states
If your gauge is too tight (more stitches than recommended), try a larger hook. If it’s too loose (fewer stitches), go down a hook size.
For house slippers, being off by just a little can make them too tight or floppy. Taking time to check your gauge will save you from disappointment when your project is complete.
Crocheting the Slipper Base
The foundation of your house slippers is crucial for comfort and durability. Getting this part right ensures your slippers will fit well and last a long time.
Creating a Strong Foundation
Start with a foundation chain that matches your foot length. For most adult sizes, chain about 30-35 stitches, but you can adjust this based on your foot size. Make sure your chain isn’t too tight!
Work single crochet (sc) stitches into each chain for the first row. This creates a firm base that won’t stretch out with wear.
For the second row, continue with sc stitches in each stitch from the previous row. This basic crochet stitch is perfect for beginners and creates a sturdy fabric.
Try to maintain even tension throughout. Count your stitches at the end of each row to ensure you haven’t accidentally added or dropped any.
For a thicker base, you might want to work in both loops of each stitch rather than just the back or front loops.
Shaping the Toe Section
Once you’ve created a rectangle about 5-6 inches long (or whatever fits the ball of your foot), it’s time to shape the toe area.
Fold your rectangle in half and single crochet the short edges together. This creates the toe pocket of your slipper. Make sure your stitches aren’t too tight here to allow comfortable toe room.
If you want a rounded toe, decrease a few stitches at the corners. For example, sc2tog (single crochet 2 together) at each end of the seam.
Try the slipper on before finishing to check the fit. You can adjust by adding more rows if needed.
For extra cushioning in the toe area, consider working a few rows of half double crochet (hdc) instead of single crochet. This makes the toe area slightly thicker and more comfortable.
Forming the Slipper Body
Once you’ve created your foundation rectangle, it’s time to transform it into an actual slipper. This part involves careful stitching to create the three-dimensional shape that will comfortably hug your feet.
Working in Rounds and Rows
After completing your rectangle, you’ll need to join the short ends together to form a tube. This creates the base of your slipper. Use a needle to sew the edges together with a whip stitch or slip stitch.
Next, you’ll work in rounds along one open edge of the tube. This creates the toe section of your slipper. Make sure to mark your starting point with a stitch marker to keep track of your rounds.
For the heel portion, you’ll fold the opposite end of the tube and stitch it closed. Some patterns may have you decrease stitches to shape the heel, giving it that curved form that cups your heel nicely.
Remember to keep your tension consistent throughout this process. Too tight, and your slippers won’t fit; too loose, and they won’t provide proper support.
Achieving the Perfect Slipper Size
Getting the right size is crucial for comfortable house slippers. Most patterns offer guidelines for different foot sizes, but you can easily adjust your project to fit perfectly.
Try on your slipper as you go! This is the best way to ensure a custom fit. If the slipper feels too tight, add an extra row or two. If it’s too loose, consider decreasing more stitches or using a smaller hook.
Pay special attention to the width. Your slippers should be snug but not constricting. Many patterns offer 4 different width options to accommodate various foot shapes.
The toe box should have enough room for your toes to wiggle freely. If your toes feel cramped, add a few more stitches to the toe section before closing it up.
Remember that most yarn will stretch slightly with wear, so it’s okay if your slippers feel just a tiny bit snug at first.
Designing for Comfort and Fit
Creating well-fitted slippers means paying special attention to the shape of your foot. The heel and overall fit are crucial elements that make your handmade slippers comfortable for everyday wear.
Constructing the Heel
The heel is often the trickiest part of crocheting slippers but getting it right makes all the difference. Start by measuring the height of your heel from the floor to where it curves. This measurement helps you determine how many rows you’ll need.
For a basic heel, work in rows of double crochet, decreasing at the edges to create a cup shape. You can use the formula: work half the stitches, chain 2, then turn and work back – this creates the heel pocket!
Tip: For extra cushioning, try working the heel section with a double strand of yarn or in a tighter stitch like single crochet.
If you’re making slippers for someone else, add about 1/4 inch to their heel measurements to ensure comfort.
Ensuring a Snug Fit
Your slippers should hug your feet without being too tight. Measure the widest part of your foot and subtract about 1/2 inch to account for the stretch in your crochet fabric.
Try this simple test: after completing the sole, place it under your foot. It should be slightly smaller than your foot to ensure a good fit when completed.
Adjusting for different sizes:
- Small (Women’s 5-6): 8-8.5 inches long
- Medium (Women’s 7-8): 9-9.5 inches long
- Large (Women’s 9-10): 10-10.5 inches long
Always check your fit as you go! Create your first slipper, try it on, and make adjustments before starting the second one.
Double crochet creates a stretchier fabric than single crochet, so keep this in mind when choosing your stitch. For a custom fit, work in the round from toe to heel, trying on frequently.
Finishing Touches
Once you’ve completed the main body of your slippers, adding those final details will make them both prettier and more functional. These finishing touches transform basic crochet slippers into cozy footwear you’ll love wearing around the house.
Adding Soles for Durability
Leather soles are perfect for making your slippers last longer and preventing slips. Cut pieces of thin leather or suede to match the shape of your slipper bottoms. Use a leather punch to create small holes around the edges, about 1/4 inch apart.
Attach the soles by working slip stitches through both the sole and the bottom of your slipper. A tapestry needle and strong thread work great for this step. Make sure your stitches are tight and secure.
If leather isn’t available, you can use non-slip fabric or even puffy fabric paint applied in dots on the bottom. Just make sure to let it dry completely before wearing your slippers.
Decorating with Shells and Edges
Shell stitches make beautiful decorative edges around the opening of your slippers. Work a round of shells by making 5 double crochets into one stitch, then skip the next stitch and repeat.
You can also add buttons, pompoms, or small flowers to the tops of your slippers. These little details make your handmade slippers special and unique.
Don’t forget to weave in all loose ends securely. Check all your seams to make sure they’re strong. Go over any weak spots with additional slip stitches to reinforce them.
A contrasting border color can really make your slippers pop! Try working one final round in a complementary color to give your project a finished, professional look.
Caring for Your Crocheted Slippers
Taking good care of your handmade slippers will help them last longer and stay looking beautiful. With some simple maintenance and occasional repairs, you can enjoy your cozy creations for years to come.
Washing and Maintenance Tips
You only need a few basic supplies to clean your crochet slippers properly. Gather a sink or basin, gentle detergent (laundry or dish soap works well), warm water, and two dry towels before starting.
Hand washing is usually the safest method for cleaning your slippers. Fill a basin with warm water and add a small amount of mild soap. Gently submerge your slippers and softly squeeze to allow the soapy water to penetrate the fibers.
Avoid twisting or wringing as this can damage the shape and stitches. Rinse thoroughly with clean warm water until all soap is removed.
To dry, press (don’t wring) excess water out with a towel. Lay your slippers flat on a second dry towel away from direct heat or sunlight. Reshape them while damp to maintain their proper form.
Repair and Longevity
The soles of crocheted slippers often wear out first with regular use. You can extend their life by adding non-slip features that also protect the bottom stitches.
Try using puffy fabric paint or hot glue to create dot patterns on the soles. These act as grippers while preventing friction damage on the yarn. For a more durable solution, consider crocheting into a flip flop sole with holes poked around the edges.
Small holes can be fixed with a darning needle and matching yarn. Catch the loose strands and weave in new yarn to rebuild the damaged area.
Store your slippers in a dry place when not in use. If they become misshapen, a gentle wash and reshaping while damp can restore their form. With proper care, your handmade slippers can remain comfortable and beautiful for many seasons.
Exploring Advanced Techniques
Once you’ve mastered the basics of crocheting slippers, you can take your projects to the next level with some special techniques. These methods will help your slippers look more professional and last much longer.
Creating Texture with Back Loops
Working in the back loops only (BLO) creates wonderful texture and stretchiness in your slippers. Instead of inserting your hook under both loops at the top of each stitch, you’ll work only through the back loop.
This technique creates a lovely ribbed effect that looks like parallel lines running across your work. It’s perfect for cuff areas where you want extra stretch!
Try using back loops with double crochet stitches for a more pronounced ridge. This works great for the top portion of slippers, giving them a cozy, sock-like appearance.
You can also alternate between working in both loops and back loops only to create interesting patterns. This simple change adds visual interest without requiring you to learn complex stitch patterns.
Adding Non-Slip Features
Nobody wants to slide across the floor in their new slippers! Adding non-slip features is easy and makes your slippers much safer to wear.
One simple method is to apply fabric puffy paint in dots or patterns on the soles. This creates grip and extends the life of your slippers. Apply it in a thin layer and let it dry completely before wearing.
Another option is sewing premade soles to your slippers. Many craft stores sell leather or suede soles specifically for this purpose.
You can also crochet an extra-thick sole using a tight stitch pattern. Double or triple-thick soles last longer and provide more support for your feet.
For a quick fix, attach adhesive non-slip pads from the hardware store to the bottom of your finished slippers.
Finding Inspiration and Resources
Once you’ve mastered the basic crochet techniques, you’ll need patterns and ideas to create your perfect house slippers. The crochet community offers countless resources that can help you find the right pattern for your skill level and style preferences.
Discover Free Crochet Slipper Patterns
Looking for free crochet slipper patterns is a great way to start your slipper-making journey! Online platforms like YouTube offer tutorial videos that walk you through the process step by step. According to the search results, there are many “super easy” patterns designed specifically for beginners.
Websites dedicated to crochet often compile collections of free patterns. For example, HiCrochet offers 22 free crochet slipper patterns with different styles, techniques, and skill levels. This variety allows you to find something that matches your taste and ability.
Try searching for terms like “easy crochet slippers for beginners” or “2-hour crochet slippers” to find quick projects. Many of these patterns use simple shapes like rectangles that you can fold and stitch into cozy footwear.
Leveraging Communities like Ravelry
Ravelry is a fantastic online community where you can find thousands of crochet patterns, including many options for house slippers. Creating a free account gives you access to both free and paid patterns that have been tested by other crocheters.
On Ravelry, you can filter patterns by difficulty level, yarn weight, and even foot size. This makes finding the perfect slipper pattern much easier, especially if you’re making them as gifts.
The community aspect of Ravelry is incredibly valuable. You can join groups focused on slipper-making, ask questions when you get stuck, and share photos of your finished projects. Other members often provide helpful tips and modifications that might improve the pattern.
Don’t hesitate to use the forums to ask for pattern recommendations based on your specific needs. Fellow crocheters are usually happy to suggest their favorite patterns!
Step-by-Step Tutorials and Help
Learning to crochet slippers is easier with good guidance. Many tutorials are available to help you create cozy footwear, whether you prefer visual instruction or community support.
Following a Video Tutorial
Video tutorials are perfect for beginners because they show you exactly how to make easy crochet slippers. You can watch someone create a slipper from start to finish, pausing and rewinding as needed. Many videos show how to crochet slippers from simple rectangles that work for any foot size!
Look for tutorials that match your skill level. Complete beginner? Find videos labeled “for absolute beginners” or “easiest slipper pattern.” These often use basic stitches and simple shapes.
Pay attention to the video length too. Some tutorials, like the “2-Hour Easy Crochet Slippers,” tell you upfront how much time you’ll need. This helps you plan your project realistically.
Take advantage of the visual format by watching how the yarn is held and how tension is maintained. These details are easier to understand when you see them in action.
When and How to Use Help Forums
Even with great tutorials, you might get stuck sometimes. That’s when crochet help forums come in handy! These online communities connect you with experienced crocheters who can answer your questions.
Before posting, search the forum for similar questions. Someone might have already asked about that tricky ribbed slipper pattern you’re struggling with.
Take clear photos of your work when asking for help. Show where you’re stuck and include details about the yarn and hook size you’re using.
Be specific with your questions. Instead of saying “My slipper looks wrong,” try “My slipper is curling at the edges. How can I fix this?”
Remember to thank those who help you and pay it forward by answering questions once you gain experience. The crochet community thrives on this kind of sharing!