
Have you ever touched something soft yet sturdy and wondered how it was made? Wool felt is a unique material created without weaving or knitting. Wool felt is a non-woven textile made by compressing and matting wool fibers together using heat, moisture, and pressure until they bond into a solid piece. This ancient craft turns loose wool into a durable fabric that can be both practical and beautiful.
The magic of wool felt comes from the natural properties of wool fibers. When these fibers are exposed to the right conditions during the felting process, tiny scales on each fiber open up and lock together. This creates a material that’s warm, water-resistant, and can be either soft or firm depending on how it’s made. You might find wool felt in everything from cozy slippers to designer bags or decorative items for your home.
Unlike synthetic craft felt, true wool felt comes from natural animal fibers, mostly from sheep. The felting process can be done by hand using simple tools and soapy water, or by machine for commercial production. You can even try making your own wool felt at home as a fun craft project!
The Basics of Felt Wool
Felt wool is a unique textile made through a special process involving wool fibers. Understanding its origin and definition helps you appreciate this versatile material.
History and Origin
Felt is one of the oldest textiles known to humans. People have been making felt for thousands of years! Archaeological findings suggest that nomadic tribes in Central Asia first developed felting techniques around 6500 BCE.
These early felt makers discovered that wool fibers could stick together when exposed to moisture, heat, and pressure. They used felt for clothing, tents, and rugs that protected them from harsh weather.
Felt-making spread across cultures through trade routes. Each region developed unique styles and techniques. Traditional felt-making remains important in countries like Mongolia, Turkey, and Iran where artisans still create beautiful felt products using ancient methods.
The process hasn’t changed much over centuries, showing how effective this simple technique truly is.
Defining Felt and Felting
Felt wool is a non-woven textile made primarily from sheep’s wool without any weaving or knitting. Unlike woven fabrics, felt has no thread or yarn structure.
The felting process works because of wool’s special structure. Each wool fiber has tiny scales that open when exposed to moisture and heat. When you apply pressure, these scales lock together, creating a dense material.
There are two main felting methods:
- Wet felting: Using water, soap, and friction to bind fibers
- Needle felting: Using barbed needles to tangle and compact dry wool
The quality of felt depends on the wool type used. Different sheep breeds produce different textures of wool. Merino wool creates soft, fine felt, while coarser wools make more durable felt products.
Natural felt wool is breathable, water-resistant, and biodegradable, making it an eco-friendly textile choice for many projects.
Types of Felting
Felting transforms loose wool fibers into solid fabric through different techniques. Each method creates unique textures and has specific uses depending on your project goals.
Needle Felting
Needle felting uses special barbed needles to tangle wool fibers together. You repeatedly poke the wool with these needles, causing the fibers to interlock and compact. This technique is perfect for creating three-dimensional sculptures, decorative items, and even flat wool “paintings.”
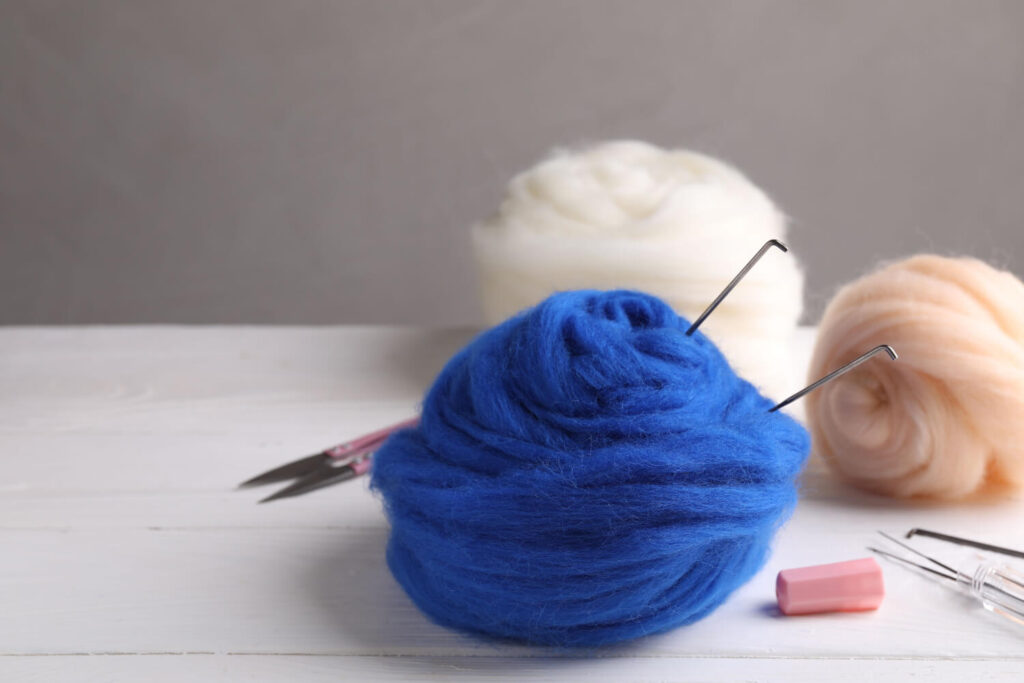
The barbed needles have tiny notches that catch and push the fibers downward as you work. You can build shapes by starting with core wool (an inexpensive inner wool) and covering it with colored Merino or other decorative fibers.
Merino wool is the most popular choice for needle felting because it comes in many colors and felts easily. Other options include wool from sheep, alpaca, llama, and even dog fur. There are also vegan alternatives if you prefer not to use animal fibers.
Wet Felting
Wet felting is one of the oldest textile techniques, using water, soap, and agitation to mat wool fibers together. You arrange loose wool fibers in layers, then add warm soapy water and apply pressure and movement to encourage the fibers to tangle.
The soap helps the scales on wool fibers open up, while the agitation causes them to lock together permanently. As you work, the wool shrinks and becomes more dense and strong.
This method is excellent for creating flat pieces like rugs, wall hangings, and fabric. It typically works faster than needle felting for covering large areas. The process of heavily agitating wet wool is sometimes called “fulling.”
Nuno Felting
Nuno felting combines wool with another fabric, usually silk, to create lightweight, flexible material with interesting texture. You lay wool fibers across the base fabric, then use wet felting techniques to bond them together.
The wool fibers migrate through the weave of the base fabric, creating a permanent bond. This technique produces fabric with beautiful drape, making it perfect for scarves, clothing, and decorative textiles.
You can create various effects by controlling how much wool you use and how you arrange it. Thin layers create subtle texture, while heavier applications produce more dramatic rippling effects as the wool shrinks during felting.
Materials and Tools
To create beautiful felt wool projects, you’ll need specific materials and tools. These items help transform loose wool fibers into solid fabric or shaped objects through the felting process.
Choosing the Right Wool
Wool roving is the most common material for felting projects. This unspun wool comes in many colors and textures. When shopping for roving, look for high-quality wool with long fibers that will felt easily.
Core wool is perfect for the inside of three-dimensional projects. It’s less expensive than colored wool and provides structure. You can use it as the base, then add colored wool to the outside.
Wool yarn can also be felted in some projects. Choose yarn labeled as “100% wool” that isn’t superwash or treated to resist felting.
For beginners, Merino wool is a great choice because it felts quickly and easily. Corriedale and Blue-Faced Leicester are also popular options.
Essential Tools for Felting
Barbed needles are must-haves for needle felting. These special needles have tiny barbs that catch and tangle wool fibers together. They come in different sizes – thicker needles for core shaping and thinner ones for details.
You’ll need a foam pad or brush mat to protect your work surface and needle. This gives you something safe to poke into while working.
For wet felting, you’ll want:
- Bubble wrap or a bamboo mat
- Mild soap (olive oil soap works well)
- Spray bottle for water
- Towels for drying
Don’t forget protective finger guards if you’re needle felting! These rubber thimbles will save your fingertips from painful pokes as you work with the sharp barbed needles.
The Felting Process
Turning loose wool into felt is a magical transformation that happens through heat, moisture, and movement. The process relies on the unique structure of wool fibers and their ability to interlock when certain conditions are met.
Preparing the Wool Fiber
First, you’ll need to select and prepare your wool fibers. Good quality wool roving or batting works best for felting projects. Merino wool is popular because its fibers have more scales, which help with the felting process.
Lay out your wool in thin, overlapping layers. For flat felt, place fibers in alternating directions to create strength. For 3D projects, shape the wool roughly into your desired form.
The wool fibers have tiny scales on their surface that will eventually lock together. These microscopic scales are key to successful felting. They open up when exposed to warm water and soap, allowing them to grip neighboring fibers.
The Role of Agitation
Once your wool is arranged, you’ll add warm water and soap. The soap is crucial – it helps break down the natural lanolin in wool and allows water to penetrate the fibers.
Gently press the soapy water into your wool. Don’t rush this step! The fibers need to be thoroughly saturated.
Now comes the fun part – agitation! You’ll need to rub, roll, or otherwise move the fibers against each other. This movement causes the scales on the wool fibers to catch and tangle with neighboring fibers.
Start with gentle pressure and gradually increase as the felt begins to form. The agitation creates friction, which along with the warm water, causes the scales to lock together permanently.
Shaping and Fulling
As your felt begins to form, you can start shaping it more deliberately. This might involve rolling in a bamboo mat, using a resist for hollow forms, or manipulating by hand for sculptural pieces.
The fulling process follows initial felting. Fulling compacts and strengthens your felt through continued agitation, sometimes with temperature changes between hot and cold water.
You’ll know your felt is ready when it holds together firmly and doesn’t pull apart easily. The fibers should be densely matted together, creating a solid material.
Final rinsing removes soap residue. Some projects benefit from blocking – stretching the felt to specific dimensions while drying. Your finished felt will be remarkably strong considering it started as loose fibers!
Creative Applications
Wool felt offers endless possibilities for creative expression. This versatile material can transform spaces, wardrobes, and artistic projects with its rich texture and natural properties.
Felting in Fashion
Wool felt has become a staple in fashion design. You can find it in stylish hats that keep you warm while making a fashion statement. These hats range from classic fedoras to contemporary berets, all benefiting from felt’s ability to hold shape beautifully.
Shoes with felt details are gaining popularity too. Designers incorporate wool felt insoles for comfort and natural moisture-wicking properties. Some eco-conscious brands even create entire shoe uppers from compressed wool felt.
Clothing made from felt adds texture and warmth to your wardrobe. You’ll find:
- Vests and jackets with excellent insulation
- Mittens and gloves that naturally repel water
- Decorative appliqués on everyday garments
- Scarves that provide lightweight warmth
Home Decor
Your home can be transformed with wool felt decorative elements. Throw pillows made of felt add cozy texture and vibrant color to any room. You can easily swap them seasonally to refresh your space.
Furniture pieces featuring felt upholstery create visual interest while providing practical benefits. Felt naturally absorbs sound, making it perfect for busy households.
Decorative bowls and organizers help keep your space tidy while adding artistic touches. Many people use felt rugs to add warmth and comfort to hard floors. These rugs are naturally stain-resistant and durable, perfect for high-traffic areas in your home.
Artistic Expression
Wool felt opens up exciting possibilities for artistic creation. You can craft detailed wall art by layering colored felt pieces. The material’s rich texture adds dimension that canvas paintings can’t achieve.
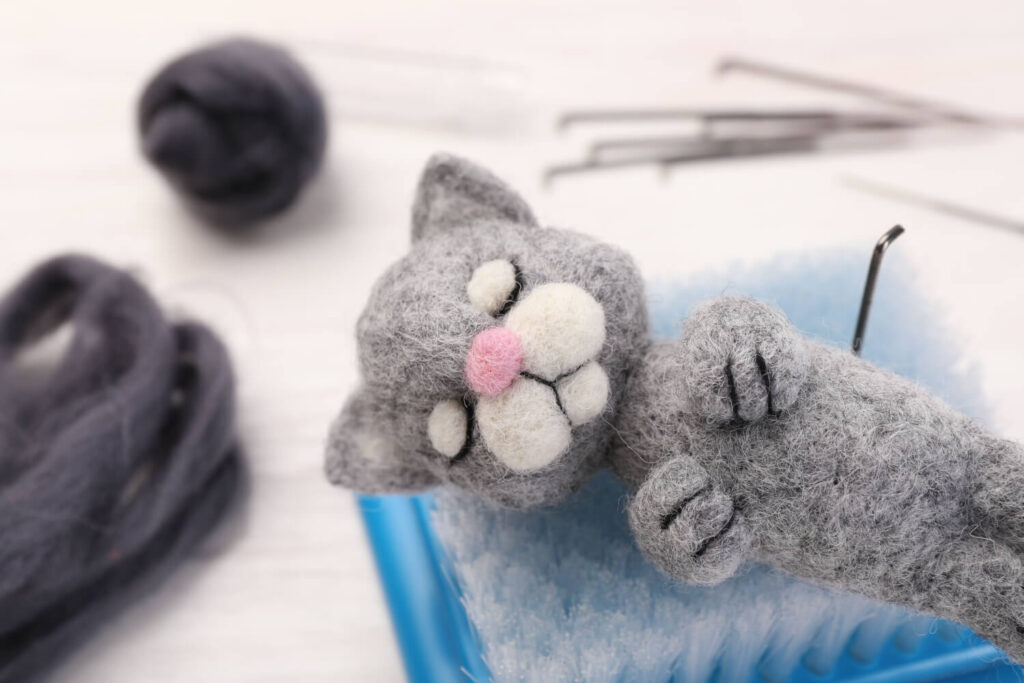
Try creating 3D sculptures from felt using special needles to shape and mold the wool. This technique allows you to craft everything from realistic animals to abstract forms.
Felted jewelry offers a lightweight, hypoallergenic alternative to traditional materials. You can experiment with:
- Beaded necklaces combining felt with other elements
- Statement earrings in bold colors
- Bracelets that incorporate natural wool textures
- Pins and brooches with intricate designs
Many artists combine felting with embroidery to create mixed-media pieces with incredible depth and detail.
Differentiating Wool Types
When working with felt wool, understanding the different types available helps you choose the right material for your project. Various wool types offer different textures, durability, and felting properties.
100% Wool vs Wool Blends
Pure 100% wool is ideal for felting projects because it contains natural scales that lock together when exposed to moisture, heat, and agitation. This natural property makes it excellent for needle felting and wet felting techniques.
Wool blends combine wool with other fibers like nylon or rayon. These blends might be cheaper and sometimes more durable than pure wool, but they don’t felt as effectively.
When shopping for felting materials, check the label carefully. A higher wool percentage means better felting results. For beginners, Merino wool (100% pure) is a great choice because it’s soft, fine, and felts easily.
Comparing Wool with Cotton and Silk
Wool differs significantly from cotton and silk in felting projects. Cotton fibers lack the scales found in wool, making them unable to felt naturally. You might find cotton in some blended felt fabrics, but it’s there for other properties like softness or cost reduction.
Silk, while luxurious, also doesn’t felt on its own. However, you can combine silk fibers with wool to create interesting textures and visual effects in your felt projects.
Unlike cotton and silk, wool fabric can be intentionally felted after weaving – this is called “felted wool” as opposed to “wool felt” which is created directly from fibers. This distinction matters when choosing materials for different craft projects.
Felting Projects for Beginners
Starting with simple felting projects helps you build skills while creating cute items. These beginner-friendly projects require just a few basic supplies and teach fundamental techniques.
Basic Shapes and Techniques
To begin needle felting, you’ll need some basic supplies: unspun wool (roving), felting needles, and a foam pad as your work surface. Upholstery foam works great for this purpose!
Start by practicing simple shapes like balls and flat circles. Take a small piece of wool roving, roll it between your palms, then begin poking it with your felting needle. The tiny barbs on the needle push the wool fibers together, causing them to tangle and compact.
Remember to always poke straight up and down to avoid breaking needles. Keep rotating your work as you go. This helps create even felting all around your shape.
For wet felting, you’ll use warm soapy water instead of needles. The combination of moisture, soap, and agitation makes the wool’s tiny scales lock together permanently.
Simple Project Ideas
Needle felted macarons make adorable first projects! Just felt two circular shapes, flatten them slightly, and join them with a thin layer of contrasting-colored wool for the “filling.”
Lazy llamas are another fun beginner project. Start with a basic body shape, then add a neck, head, and legs. Their simple structure makes them perfect for practicing your skills.
You might also try making a small felt mat with decorative elements. Begin with a base layer of wool, then add simple designs on top using different colored roving.
Tiny flowers work well for beginners too. Make a small yellow ball for the center, then add flat petal shapes around it in any color you like.
Don’t worry about perfection – each piece will have its own unique character! The more you practice, the more your felting skills will improve.
Advanced Felting Techniques
Once you’ve mastered the basics of wool felting, you can explore more complex methods that create stunning projects. These techniques allow you to expand your creativity and make unique felted items.
3D Felting
3D felting takes your projects beyond flat surfaces into sculptural forms. You’ll need special barbed needles that help you shape the wool into dimensional objects. Start with a core of wool that will form the base of your creation.
Build your shape gradually by adding small amounts of wool and repeatedly needle felting to secure them. The notches on your needle catch the fibers and tangle them together, creating a firm structure.
Try creating animals, flowers, or decorative items. Glass eyes can add realism to animal figures – simply poke a dot of black wool for simple eyes or insert pre-made glass eyes for a professional touch.
Work slowly and be patient! 3D projects require more time as you build up layers and create definition in your piece.
Incorporating Different Textiles
Mixing wool with other materials creates beautiful texture and visual interest in your felting projects. Nuno felting is a popular technique where wool is felted onto a lightweight fabric base like silk.
To try nuno felting:
- Lay out a piece of silk or other thin fabric
- Place wool fibers on top in your desired pattern
- Apply warm soapy water
- Gently rub until the wool attaches to the fabric
The wool fibers migrate through the weave of the fabric, creating a unique textile with incredible drape and texture. This technique is perfect for scarves, clothing, and wall hangings.
You can also incorporate yarns, threads, and ribbons into your felted pieces. Simply lay them on your wool base before felting, or needle felt them into an existing piece for added detail.
Caring for Felt Wool Items
Wool felt is a wonderful material that’s naturally dirt and odor resistant! This means you’ll rarely need to deep clean your felt items, but proper care will keep them looking great for years.
For regular maintenance, simply brush off any loose dirt with a soft brush or vacuum with a low setting. This keeps your wool felt looking fresh without any harsh treatments.
If your wool felt gets a bit smelly or has some light stains, there are natural solutions that work well. Try these gentle cleaning options:
- Mild soap and water – Use a fragrance-free soap with lukewarm water
- Vinegar solution – Mix white vinegar with water for natural cleaning
- Lemon and water – Great for freshening up wool felt
- Baking soda – Helps absorb odors naturally
When spot cleaning, dampen a lint-free cloth with your chosen solution and gently dab the area. Don’t rub harshly or you might damage the felt fibers.
For storage, keep your wool felt items in a cool, dry place. This helps prevent moth damage and maintains the wool’s natural qualities.
Remember that felt is made through a process involving moisture, heat and agitation. This means you should avoid hot water or machine washing, as it can cause your felt to shrink or lose its shape.
With these simple care tips, your wool felt items will stay beautiful and functional for a long time!
DIY Tips and Tricks
Making your own felt wool at home can be rewarding and fun once you master a few basic techniques. These tips will help you create beautiful felted pieces while avoiding frustrating setbacks.
Enhancing Efficiency
Start with good quality wool roving or batting for best results. Merino wool felts particularly well because of its fine fibers. When wet felting, use hot water with a small amount of dish soap to help the fibers bind together faster.
Try using bubble wrap under your project – the texture helps speed up the felting process! Roll your wool in a bamboo mat or towel at least 100 times, applying firm pressure to help the fibers interlock.
For needle felting, invest in a foam pad to protect your work surface and fingers. Different needle sizes produce different effects – coarser needles work quickly for basic shaping, while finer needles help with details.
Keep a spray bottle handy to dampen wool that’s drying out during wet felting. This maintains the right moisture level for fiber bonding.
Avoiding Common Mistakes
Don’t rush the felting process! New felters often apply too much pressure too quickly. Start gently and increase pressure gradually, especially with wet felting. This prevents uneven results and distorted shapes.
When needle felting, avoid stabbing too deeply or at extreme angles. This can break your needles and damage your foam pad. Keep your strokes consistent and shallow.
Avoid using too much soap in wet felting – it can be difficult to rinse out. A small amount goes a long way! If your wool isn’t felting properly, you likely need more agitation rather than more soap.
Watch out for accidentally felting your project to your towel or mat. Place a piece of sheer fabric like tulle between them to prevent sticking.
Remember to alternate directions when laying out wool fibers for wet felting. Creating perpendicular layers strengthens your final piece and prevents it from falling apart.