
Lazy daisy stitch is a simple looped embroidery stitch used for petals, leaves, teardrops, tiny sprigs, and decorative accents. The basic motion is: bring the needle up, insert it back near the same point, catch the thread under the needle to form a loop, then anchor the loop with a small stitch. Once you understand that the loop is the shape and the tiny straight stitch is the “lock,” you can adjust lazy daisy for modern florals, minimalist borders, and playful stitched details.
What Is Lazy Daisy Stitch?
Lazy daisy stitch is a detached chain stitch. Instead of making a continuous chain, each loop stands alone, which makes it perfect for flower petals and small leaves. In modern embroidery, it often appears in simple botanical designs: five-loop daisies, scattered wildflowers, leafy stems, wreaths, and abstract patterns.
The stitch can look soft and rounded, long and narrow, or tiny and delicate depending on how far you pull the loop and where you place the anchoring stitch. That flexibility is why it is useful for both beginner samplers and polished hoop art.
Supplies You Need
You only need a few basic tools to learn lazy daisy stitch:
- Embroidery hoop
- Cotton or linen fabric
- Embroidery floss
- Embroidery needle
- Small sharp scissors
- Water-soluble pen or pencil for marking
- Optional: needle minder and good lighting
For beginners, stranded cotton floss is the easiest choice. Try using three strands for a clear, visible stitch that is not too bulky. A medium-weight cotton fabric is also helpful because it holds tension well and lets the needle pass through smoothly.
Set up Your Fabric and Thread
Place your fabric in the hoop so it is taut but not stretched out of shape. The fabric should feel firm like a drum when you tap it lightly. If it is loose, your lazy daisy loops may pucker or sit unevenly.
Cut a thread length of about 18 inches. Longer thread tangles more easily, especially when you are learning looped stitches. Separate the floss strands, then recombine the number you want to use. This helps the thread lie more smoothly.
Mark a small dot for the base of the petal and another dot for the tip if you want consistent shapes. For a flower, mark a center point and lightly draw petal guides around it.
How to Do Lazy Daisy Stitch Step by Step
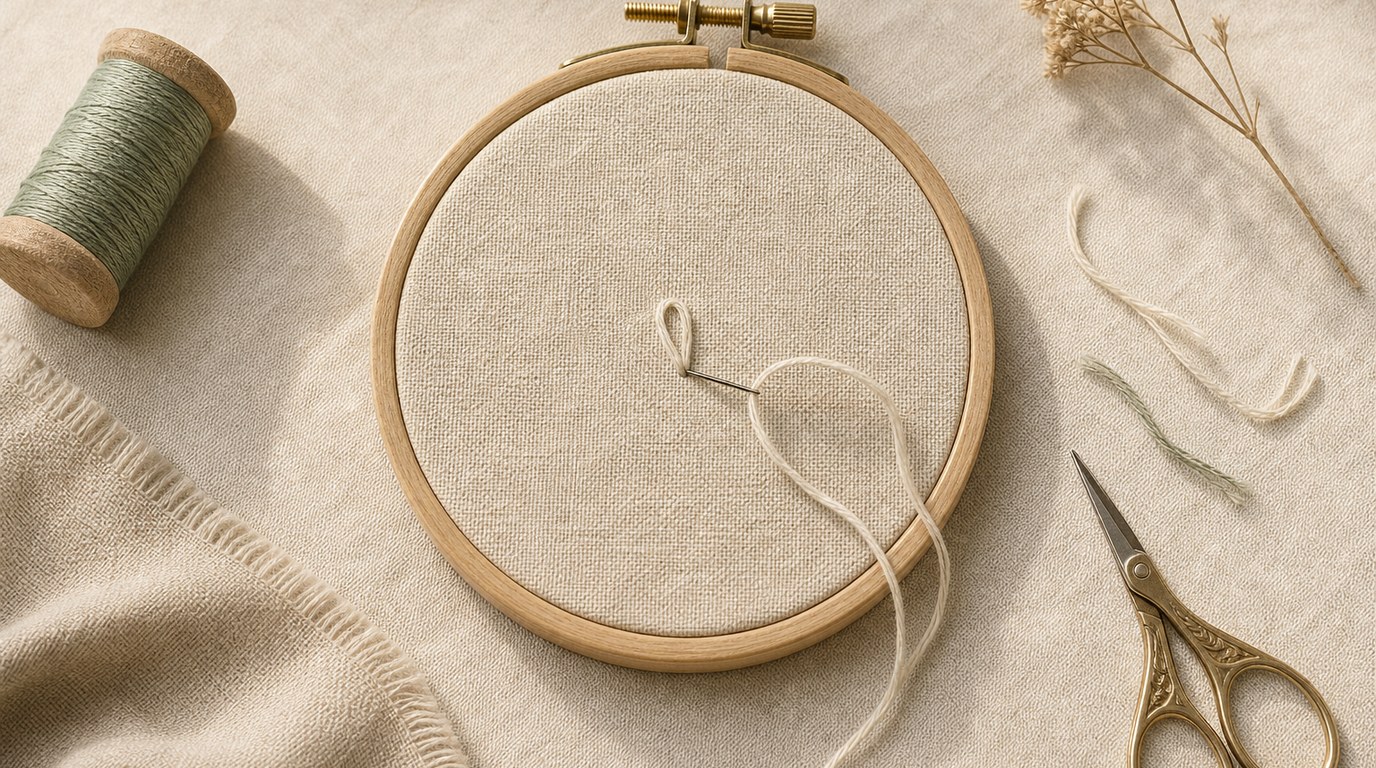
Thread your needle and knot the end, or secure the thread with your preferred no-knot method. Start with one petal shape before trying a full flower.
- Bring the needle up at the base of the petal.
This is the point where the lazy daisy loop begins. Pull the thread through gently until it rests on the fabric.
- Insert the needle back down close to the starting point.
Do not use the exact same hole if your fabric is loosely woven, or the stitch may slip through. Place the needle just beside the first hole.
- Bring the needle up at the tip of the petal.
Before pulling the needle all the way through, make sure the working thread is looped under the needle. This is the key movement. The thread should wrap around the needle so it forms a loop as you pull.
- Pull slowly to form the loop.
Stop when the loop reaches the shape you want. Do not pull too tightly. The loop should rest on the fabric, not dig into it. Think of shaping the thread rather than tightening it.
- Anchor the loop with a tiny straight stitch.
Insert the needle just outside the top of the loop, making a small stitch over the loop’s tip. This anchoring stitch holds the petal in place.
- Repeat for more petals or leaves.
For a daisy, return to the flower center and make each loop radiate outward. For leaves, place lazy daisy stitches along a stem, alternating sides.
A neat lazy daisy stitch depends on steady thread tension. If your loop is uneven, loosen it before anchoring. If it is too large, gently pull the working thread before making the anchor stitch. Once anchored, the shape is harder to adjust.
How to Make Lazy Daisy Look Modern
Modern embroidery often uses lazy daisy stitch in clean, simple ways. Instead of filling every space, let the stitch breathe. A single stem with a few detached lazy daisy leaves can look more current than a dense floral cluster.
Try these variations:
- Stitch oversized petals in muted colors for minimalist flowers.
- Use one lazy daisy at the end of a stem for a tiny bud.
- Make small scattered loops as abstract confetti.
- Work long narrow lazy daisy stitches for eucalyptus-style leaves.
- Mix thread weights, such as two strands for delicate leaves and four strands for bold petals.
Color also changes the mood. Soft neutrals feel modern and calm, while coral, mustard, teal, and dusty pink create a fresh floral palette.
Common Lazy Daisy Problems and Fixes
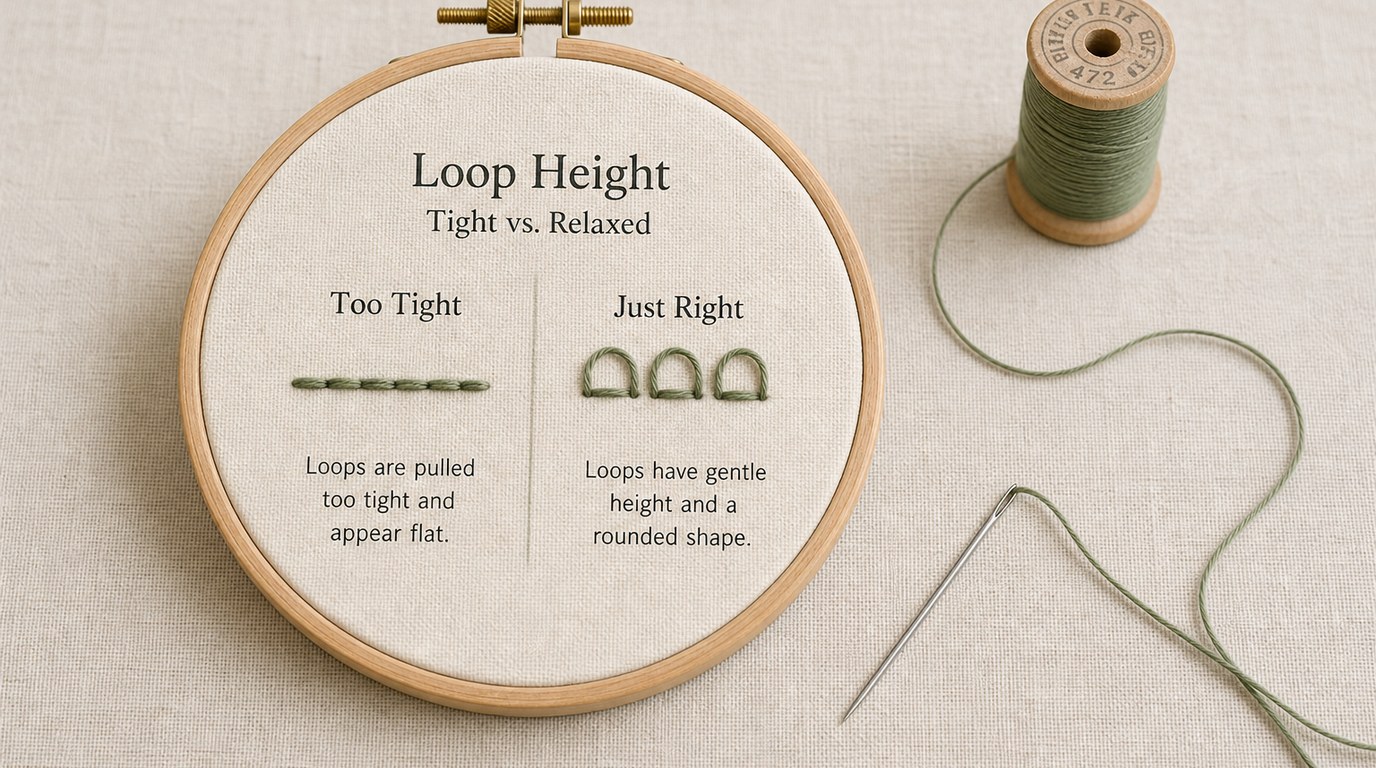
The loop disappears or pulls too tight.
You are probably pulling the thread too firmly before anchoring. Pull only until the loop lies flat. The loop should keep its rounded shape.
The petal looks floppy or too loose.
The loop may be too large for the anchor stitch, or your fabric may be loose in the hoop. Tighten the fabric and make the loop slightly smaller.
The anchor stitch is too noticeable.
Use a shorter anchoring stitch and place it just over the tip of the loop. It should secure the thread without becoming the main feature.
The petals are different sizes.
Lightly mark guide dots before stitching. For a flower, draw a small circle around the center and use it as a guide for petal tips.
The thread twists or knots.
Use a shorter thread length and let the needle dangle occasionally so the thread can untwist. Separating and recombining floss strands before stitching also helps.
The fabric puckers.
Your tension is too tight, or the fabric is not held firmly in the hoop. Relax your pull and keep the fabric evenly taut.
Practice Ideas Before Adding It to a Project
Before stitching lazy daisy on a finished design, make a small practice sampler. Try one row of identical loops, then one row of long thin leaves, then a five-petal flower. This gives you a feel for loop size and tension.
Next, practice a simple sprig: stitch a straight stem, then add lazy daisy leaves on alternating sides. You can also make a tiny floral cluster with three flowers in different sizes. These quick exercises prepare you for hoop art, clothing accents, bookmarks, and handmade gifts.
FAQ
What Should a Beginner Know First About Learn How to Do Modern Embroidery Lazy Daisy?
The most important idea is that lazy daisy is a loop held in place by a small anchoring stitch. Keep the loop relaxed, not tight. Practice with three strands of floss on taut cotton fabric before adding it to a final project.
What Matters Most When Evaluating Learn How to Do Modern Embroidery Lazy Daisy?
Look at loop shape, tension, and placement. A good lazy daisy stitch sits flat on the fabric, has a clear petal or leaf shape, and is secured neatly at the tip. Consistency matters more than making every stitch perfectly identical.
What Mistakes Should Readers Avoid with Learn How to Do Modern Embroidery Lazy Daisy?
Avoid pulling the loop too tightly, using thread that is too long, and stitching on loose fabric. Also avoid making the anchor stitch too large. Small adjustments in tension and hoop setup make a big difference in the finished look.
What Is the Next Logical Step After Learning About Learn How to Do Modern Embroidery Lazy Daisy?
After learning the basic stitch, practice using it in a small motif. Try a daisy, leafy branch, or scattered floral border. Then combine lazy daisy with back stitch stems, French knot centers, or satin stitch accents for a complete modern embroidery design.