

Pleats add a beautiful touch to any fabric project, whether you’re making a skirt, dress, or decorative pillow. These structured folds create texture and visual interest while allowing for movement in your garments. If you’ve ever wondered how to create them, you’re in the right place!
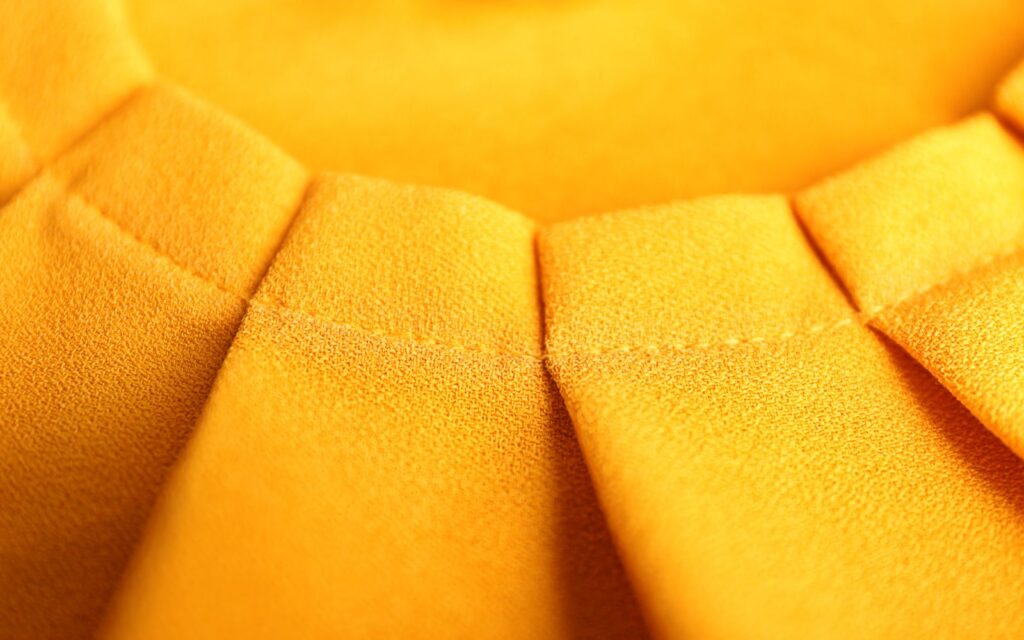
To sew a pleat, you begin on the right side of the fabric and create a fold, then secure it with stitches about 1/2 inch from the edge. Depending on the type of pleat you want—knife pleats, box pleats, or inverted pleats—the folding technique will vary slightly. Many sewers find that using plenty of pins helps keep everything aligned before stitching.
Creating pleats might seem tricky at first, but with a bit of practice, you’ll be adding these lovely details to your sewing projects in no time. The most important thing is patience and precision—taking your time to measure and mark your fabric will give you the best results.
Understanding Pleats
Pleats add beautiful structure and volume to fabric by folding it in specific ways. They create texture and movement in garments and home decor projects while allowing fabric to expand when needed.
Types of Pleats
Knife Pleats are the most common type. They fold in one direction, creating a clean, straight line. These pleats work well for skirts and drapery.
Box Pleats fold in opposite directions, creating a flat section in between. They add more fullness than knife pleats and work beautifully in skirts and curtains.
Inverted Pleats are similar to box pleats but fold inward instead of outward. You’ll often see these on the back of shirts or in tailored garments.
Accordion Pleats are small, equal folds that create a rippled effect. Think of a pleated skirt with many tiny folds.
Side Pleats are placed at specific locations rather than all around a garment. They give you extra room for movement while maintaining a sleek look.
Identifying the Wrong Side
When making pleats, knowing which side of your fabric is which is crucial. The wrong side typically shows less vibrant colors or a rougher texture.
For patterned fabrics, the wrong side often has faded or less distinct patterns. You can mark the wrong side with tailor’s chalk if you’re unsure.
In pleating, you’ll usually fold the wrong sides together. This ensures the clean edges of your pleats show on the right side of your garment.
Some fabrics, like certain crepes or twills, have a clear direction or nap. Make sure all your pleats follow the same direction for a professional finish.
Essential Sewing Supplies
Before diving into pleating, it’s important to gather the right tools for the job. Having proper equipment will make your pleating process smoother and help you achieve professional-looking results.
Choosing the Right Sewing Machine
When sewing pleats, your sewing machine needs to handle multiple layers of fabric with ease. Look for a machine with adjustable presser foot pressure – this helps when stitching through the thicker areas where pleats overlap.
A straight stitch is your main stitch for securing pleats, so ensure your machine produces even, consistent stitches. Some machines come with specialty feet that can help guide your fabric for more precise pleat placement.
If you’re working with heavier fabrics, consider a machine with extra power. For delicate fabrics, you’ll want one with gentle feed dogs that won’t damage the material.
Don’t forget about throat space! Larger projects with multiple pleats need room to maneuver under the arm of your machine.
Selecting Thread and Needles
Your thread choice matters just as much as your fabric when creating pleats. For most pleating projects, all-purpose polyester thread works well as it has slight stretch that accommodates the movement in pleated sections.
Match your thread color to your fabric for invisible seams, or choose a contrasting color for decorative topstitching on your pleats.
For needles, select the right size based on your fabric weight:
- Lightweight fabrics: 70/10 or 80/12 needles
- Medium-weight fabrics: 90/14 needles
- Heavier fabrics: 100/16 needles
Universal needles work for most pleating projects, but consider microtex needles for very precise stitching on dress shirts or fine pleats. Remember to change your needle regularly! Dull needles can damage your pleats or create uneven stitches.
Preparing the Fabric
Before you start sewing pleats, proper fabric preparation is essential. Taking time to prepare your fabric correctly will help you create crisp, even pleats that look professional and last longer.
Marking for Pleats
First, decide on the size and spacing of your pleats. For knife pleats, you’ll need to mark three lines for each pleat: the fold line, the placement line, and the return line. Use a fabric marker or tailor’s chalk that will easily wash away after sewing.
Measuring is super important! Use a ruler and mark all pleat lines with precision. For even spacing, create a template from cardboard or paper. This helps maintain consistency across all your pleats.
Press your fabric before marking to ensure it’s completely flat. This gives you a clean surface for accurate markings. If your fabric is slippery, consider using starch spray to give it more body and make it easier to work with.
Securing the Fabric
Once your markings are in place, pin the pleats along the fold lines. Use fine pins placed perpendicular to the fold to hold the pleats in position without distorting the fabric.
Press each pleat with an iron to create sharp creases. For most fabrics, use a medium-hot iron with steam. This helps set the pleats before sewing. For stubborn fabrics, try pressing with a damp cloth over the pleats.
To keep pleats in place while working, you can use fusible thread pressed into each pleat. This trick helps maintain crisp pleats without constant re-pressing.
For gathering type pleats, secure the fabric with two rows of basting stitches before pulling to create the gathers. This gives you more control over how the fabric folds.
Creating a Basic Pleat
Pleats add beautiful structure and volume to garments. They’re created by folding fabric in a specific way and securing it with stitches to maintain the shape.
Folding Techniques
To create a basic pleat, start by marking your fabric with chalk or pins where you want the pleats to appear. Measure equal distances for consistent pleats. For a basic knife pleat, fold the fabric in one direction, creating a fold that faces the same way each time.
For box pleats, make two folds that face toward each other, creating a flat section in between. Inverted box pleats are similar, but the folds face away from each other.
Try practicing on scrap fabric first. You can use an iron to press your folds, which helps keep them crisp and even. A pressing cloth can protect delicate fabrics from direct heat.
Basting Stitches
After folding your pleats, you need to secure them temporarily before permanent stitching. Pin along the top edge of your pleats to hold them in place.
Use long, loose basting stitches across the top edge to secure the pleats. These stitches can be done by hand or machine and will be removed later. For hand basting, use a contrasting thread color to make removal easier.
Once your pleats are basted, you can sew a permanent stitch line across the top. Place this stitch about 1/4 inch from the edge. For extra security, you might add a second line of stitching 1/2 inch below the first.
Sewing a Box Pleat
Box pleats create beautiful fullness and structure in garments and home decor. They look fancy but are actually simple to make once you understand the basic technique. Let’s explore how to create perfect box pleats for your sewing projects!
Measuring and Folding
First, decide how wide you want your box pleat to be. Remember that each box pleat requires three times its finished width in fabric. For example, a 1-inch box pleat needs 3 inches of fabric.
Mark your fabric with pins or disappearing ink. Place marks for the outer folds and center of each pleat. Some sewers use different symbols: | for outer folds and X for inner folds.
To form the pleat, bring the outer fold marks toward the center mark. This creates two folds facing each other with the center line between them. The finished pleat should look like an inverted letter “M” from the side.
Pin along both folds to hold them in place. Make sure your pleats are even and the folds are crisp.
Finishing the Box Pleat
Once your pleats are folded and pinned, you’ll need to secure them. Baste across the top edge of the pleats using a long, straight stitch. This temporary stitching holds everything in place while you work.
For a more permanent finish, stitch along the top edge with a regular stitch length. Some projects may require stitching down the pleats for a short distance from the top edge.
Press your pleats flat with an iron. Use steam for crisp folds that will hold their shape. Always press from the wrong side first, then lightly on the right side.
For a professional touch, topstitch along the outer edges of each pleat. This adds definition and helps maintain the pleat’s shape through washing and wearing.
Working with Side Pleats
Side pleats add structure and movement to garments. They’re easier to work with than box pleats but still need careful placement and stitching to look professional.
Placement and Alignment
Start by marking where your side pleats will go on your fabric. Use chalk or fabric markers to draw lines for both the fold and the stitch line. This helps keep everything aligned.
Measure each pleat carefully to ensure they’re the same size. Uneven pleats will make your finished project look messy.
When positioning multiple side pleats, use a ruler to keep the spacing consistent. This creates a more professional look.
Pin your pleats in place before sewing. Place pins perpendicular to the fold to make them easier to remove as you stitch.
Try the “fold, pin, and check” method – fold your pleat, pin it, then step back to see if it looks right before committing.
Sewing and Pressing
Press each pleat before sewing to create crisp folds. A little steam helps set the crease, but be careful with delicate fabrics.
Use a longer stitch length (2.5-3mm) when sewing pleats to prevent puckering. This helps the fabric lay flat after washing.
Stitch close to the fold line, usually about 1/4 inch away. For deeper pleats, you might need to stitch further from the edge.
Consider hand basting your pleats first if you’re new to this technique. This gives you more control and prevents shifting.
After sewing, press again from the wrong side of the fabric. Then flip and press from the right side for a professional finish.
Adding Pleats to Dresses
Adding pleats to dresses can transform a simple design into something elegant and sophisticated. Pleats add movement, texture, and visual interest while allowing for greater comfort and ease of movement.
Design Considerations
When adding pleats to a dress, think about placement first. Pleats work beautifully at the waistline, hemline, or as decorative elements on bodices or sleeves. Consider the type of pleat that suits your dress style – knife pleats create a sleek look, while box pleats add more volume.
The fabric choice matters tremendously. Crisp fabrics like cotton, taffeta, and wool hold pleats well. Lightweight fabrics might need interfacing to maintain their shape.
Think about the overall silhouette you want. Do you want the pleats to create fullness around the hips? Or perhaps you’d prefer them to add subtle movement at the hem?
Remember that pleats require extra fabric. For knife pleats, you’ll need about three times the finished width.
Integrating with Dress Patterns
You can add pleats to an existing dress pattern by slashing and spreading the pattern pieces. Mark where you want the pleats, then add the necessary width.
For a pleated skirt portion, you might:
- Measure your waist (or where the pleats will start)
- Decide on pleat depth (usually 1-2 inches)
- Calculate total fabric needed (waist measurement + total pleat depth)
When sewing, mark pleat positions clearly on your fabric with chalk or pins. Press each pleat carefully before stitching to ensure crisp folds.
You can also add pleats to ready-made dresses by opening side seams and inserting pleated panels, though this requires careful matching of fabrics.
Attaching a Waistband
Once you’ve created your pleats, it’s time to attach a waistband to finish your skirt. This step gives your garment structure and creates a clean, professional finish that’s comfortable to wear.
Measuring the Waistband
Start by measuring your waist or the area where you want the skirt to sit. Add 1-2 inches for overlap and seam allowance. Cut your waistband fabric to this length and make it about 3-4 inches wide.
For an elastic waistband, cut the fabric to your waist measurement plus 1 inch for seam allowance. The width should be twice your desired finished waistband width plus seam allowances.
Fold your waistband piece in half lengthwise, wrong sides together, and press. This creates a clean finish when attached to your skirt.
You can interface one side of your waistband for added structure. This helps maintain shape, especially with heavier fabrics or pleated designs.
Securing the Pleats to Waistband
Before attaching the waistband, baste along the top edge of your pleated fabric to hold pleats in place. This temporary stitch prevents shifting during attachment.
Pin your pleated skirt to one edge of the waistband, right sides together. Distribute the pleats evenly around the waistband. This might require adjustments to ensure proper fit.
Stitch the waistband to the pleated section using a straight stitch. Trim excess fabric and press the seam toward the waistband.
For elastic waistbands with pleats, you can either create a casing for the elastic or stitch directly through the elastic and pleated fabric. The second method creates a gathered effect that maintains your pleats.
Add closures like buttons, hooks, or a zipper to complete your waistband. For elastic styles, overlap the ends and stitch securely.
Finishing Touches
Once you’ve created your pleats, proper finishing is what transforms your project from homemade to professional-looking. The right finishing techniques ensure your pleats stay crisp and well-defined.
Ironing the Pleats
Pressing your pleats is absolutely essential for a polished look. Set your iron to the appropriate temperature for your fabric—cotton and linen can handle high heat, while synthetics need lower temperatures.
Place your pleated fabric on the ironing board with pleats facing down. Press each pleat firmly, moving from the top to the bottom. For deeper pleats, you can use a clapper (a wooden pressing tool) to apply pressure after ironing to set the crease more permanently.
For knife pleats, press in the direction they’re folded. Box pleats require pressing both sides. A pressing cloth can protect delicate fabrics from direct heat and prevent shine marks on darker materials.
Steam helps set the pleats better than dry heat alone. The moisture helps reshape the fabric’s fibers for a more defined texture and longer-lasting crease.
Removing Temporary Stitches
If you used basting stitches to hold your pleats in place, it’s time to carefully remove them. Use a seam ripper or small scissors designed for detailed work.
Gently slide the seam ripper under each stitch, being careful not to catch or damage your fabric. Work slowly and methodically from one end to the other. For long basting lines, remove small sections at a time rather than pulling on a long thread.
After removing all temporary stitches, give your pleats another light press to restore any areas that may have been disturbed during the removal process.
Check both sides of your fabric to ensure you haven’t missed any basting threads. Sometimes threads can hide within the folds of pleats. A lint roller can help catch any loose threads after removal.
Your pleats should now stand beautifully on their own, creating that lovely structured texture you were aiming for!