
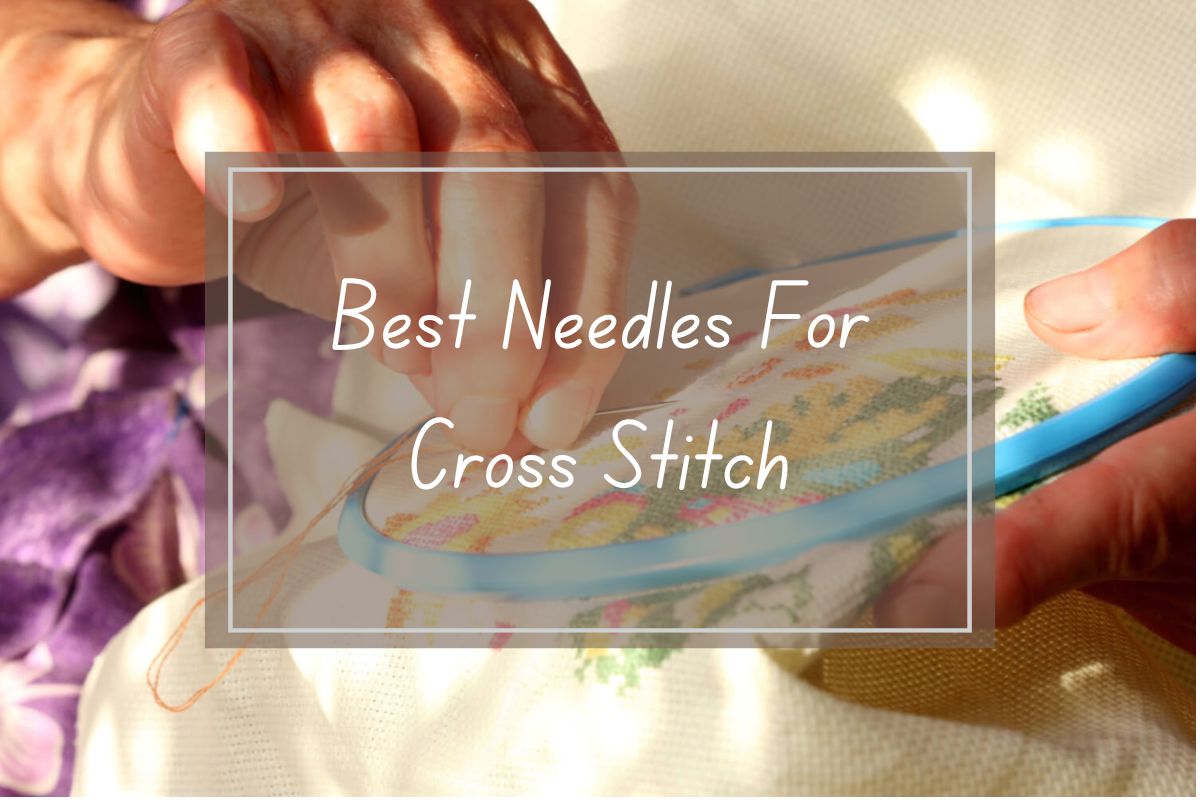
Choosing the right needles for cross stitch can make your stitching experience smoother and more enjoyable. When you’re working on a project, the needle might seem like a small detail, but it actually makes a big difference in how your stitches look and how comfortable you feel while working. Tapestry needles in sizes 24 and 26 are most commonly used for cross stitch because they have blunt tips that prevent splitting your fabric threads and larger eyes that accommodate embroidery floss easily.
If you set your needle down often, needle minders for cross-stitch can help keep it close at hand.
Different needle types offer unique benefits for your cross stitch projects. Gold-plated needles reduce friction as you stitch, making your needle glide through fabric more smoothly. Brands like Bohin, DMC, John James, and Tulip each have their fans in the stitching community. Some stitchers prefer DMC’s cat eye-shaped openings, while others find this design can create wear on your embroidery thread.
Your fabric count also matters when selecting a needle size. The higher the fabric count, the smaller needle you’ll need. Sizes range from 20 to 28, with 24 and 26 being the most versatile for everyday projects. Using the right size helps you create clean holes in your fabric without damaging it or splitting your embroidery floss.
Understanding Cross Stitch
Cross stitch is a popular form of counted thread embroidery that uses X-shaped stitches to create a pattern on fabric. It’s one of the easiest forms of hand embroidery to learn, making it perfect for beginners.
The Basics of Cross Stitch
Cross stitch works by making small X-shaped stitches on even-weave fabric. You’ll typically work with embroidery floss, which comes in hundreds of colors. Unlike other forms of surface embroidery, cross stitch follows a grid pattern.
The fabric you choose matters a lot! Aida cloth is the most popular because it has visible holes that make counting easy. You’ll see fabrics described by “count,” like 14-count or 18-count. This number tells you how many stitches fit in one inch of fabric.
When you stitch, you’ll usually separate your embroidery floss into strands. Most projects use 2 strands, but you can use more for a fuller look or fewer for delicate work.
Historical Background
Cross stitch has been around for centuries! It began as a practical skill, used to mark household linens and clothing before printed labels existed. Young girls often created samplers to practice their stitching skills.
In the 16th century, pattern books became popular throughout Europe, helping spread cross stitch techniques. Unlike today’s colorful designs, early cross stitch often used just one or two colors, usually red or black.
During the Victorian era, cross stitch became a fashionable hobby. Ladies would stitch decorative items for their homes using silk threads and finer fabrics. Unlike the more complex ribbon and cord embroidery of the time, cross stitch was accessible to almost everyone.
Today, cross stitch has evolved from necessity to a creative outlet that millions enjoy worldwide!

Types of Needles Used in Cross Stitch
Choosing the right needle for your cross stitch project can make your stitching experience much more enjoyable. Different needle types serve specific purposes in cross stitch, with variations in their tips, eyes, and sizes.
Tapestry Needles
Tapestry needles are the most commonly used needles for cross stitch. They have two key features that make them perfect for this craft: a blunt tip and a large eye. The blunt tip allows you to easily slide through the holes in your fabric without splitting threads.
These needles come in different sizes, with the most popular being sizes 24 and 26. The size you choose depends on your fabric count – the higher the fabric count, the smaller the needle you’ll need.
Size 24 works well for 14-count Aida, while size 26 is better for 16-18 count fabrics. For finer fabrics like 22-count and higher, you might want to try size 28.
Tapestry needles won’t damage your fabric since they’re designed to find the holes rather than pierce the material.
Chenille Needles
Chenille needles are similar to tapestry needles but with a slight difference. They also have a large eye for easy threading, but they feature a sharp point instead of a blunt one.
These needles are useful when you’re working on densely woven fabrics where finding the holes might be challenging. The sharp tip helps pierce through tougher materials.
Chenille needles are particularly helpful for beginners who struggle to locate holes in their fabric. They’re also great for projects that combine cross stitch with other embroidery techniques.
Like tapestry needles, chenille needles come in various sizes, typically ranging from 13 (largest) to 26 (smallest).
Embroidery and Crewel Needles
Embroidery needles, also called crewel needles, have elongated eyes and sharp points. Their design allows them to pierce through fabric cleanly, making them ideal for surface embroidery techniques.
These needles are sized from 1 to 12, with smaller numbers indicating larger needles. For cross stitch, you might occasionally use these when working on non-traditional fabrics without pre-made holes.
The sharp point of embroidery needles makes them perfect for detailed work and precision stitching. They work well when you need to incorporate other stitch types alongside your cross stitch.
If you’re working on a project that combines cross stitch with freestyle embroidery, having some embroidery needles in your collection can be very helpful.
Choosing the Right Needle Size
Selecting the proper needle size is crucial for an enjoyable cross stitch experience. The right needle will glide smoothly through your fabric while creating even, beautiful stitches.
Factors Influencing Needle Size
The fabric count is the main factor that determines which needle size you should use. Fabric count refers to the number of squares per inch in your aida or linen. The higher the count, the smaller the holes in the fabric.
For lower count fabrics (like 11-14 count aida), you’ll want a larger needle – typically sizes 22-24. These fabrics have bigger holes that accommodate thicker needles easily.
For higher count fabrics (16-18 count and above), you’ll need a smaller needle – usually sizes 24-28. The tiny holes in these fabrics require a finer needle to prevent fabric damage.
Your floss thickness also matters. If you’re using multiple strands of floss, you might need a larger needle with a bigger eye to thread it through easily.
Size Chart and Recommendations
Cross Stitch Needle Size Guide:
| Fabric Count | Recommended Needle Size |
|---|---|
| 11 count | Size 22 |
| 14 count | Size 24 |
| 16-18 count | Size 26 |
| 22+ count | Size 28 |
For beginners, sizes 7 or 8 in the general needle sizing system (which corresponds to sizes 24-26 in cross stitch needles) are recommended. These medium-sized needles work well for most standard projects.
You might prefer using a smaller needle for backstitching than for regular cross stitches. This gives you more precision for those detailed outline stitches.
Remember that comfort matters too! If a needle feels awkward in your hand or is difficult to thread, try a different size. Your stitching should be enjoyable, not frustrating.
Threads and Materials
Choosing the right thread for your cross stitch project is just as important as selecting the proper needle. The type of thread affects how your stitches look and how easy your project is to complete.
Selecting the Proper Thread for Your Project
Embroidery floss is the most common thread for cross stitch projects. The standard is six-strand cotton floss, which you can separate into individual strands depending on your project needs. For standard Aida fabric (14-count), you’ll typically use two strands.
For a fuller look, you might use three strands. For finer fabrics with higher counts, use fewer strands to avoid bulky stitches.
Thread color makes a huge difference in your final piece. Most embroidery floss comes with color numbers that help you match patterns exactly. Always buy extra of your main colors—running out midway through is frustrating!
Different brands offer varied color selections. DMC is popular, but there are many options available to match your budget and color needs.
Working with Special Threads
Metallic threads add sparkle to your projects but can be tricky to use. They tend to tangle and fray more than cotton floss. To make working with them easier, use shorter lengths (about 12-15 inches) and a larger needle eye.
Kreinik metallic threads come in different weights. Their blending filament is perfect for adding subtle shimmer when combined with regular floss. For more dramatic effects, try Kreinik braids in various thicknesses.
When using specialty threads, stitch slower and be gentle to prevent frustration. A thread conditioner can help metallic threads glide more smoothly through fabric.
For best results with metallic threads, try the “railroading” technique. This means laying each stitch flat by separating the strands with your needle before pulling through.
Needle Threading Techniques
Threading your needle properly can make your cross stitch experience much smoother and more enjoyable. Let’s explore some basic and advanced techniques to help you thread your needle efficiently and avoid those frustrating knots.
Threading Basics
The traditional way to thread your needle is to pinch the thread between your thumb and index finger, leaving just a tiny bit sticking out. Then guide this small end through the eye of the needle.
If you’re having trouble seeing the needle eye, try using a needle threader tool. These inexpensive metal or plastic devices make threading much easier, especially with smaller needle eyes.
Another helpful technique is to fold your thread over the needle, then pinch and pull it off – this creates a small loop you can easily guide through the eye.
When threading, make sure your thread isn’t too long – about 18 inches is ideal for most projects. Longer threads tend to tangle and knot more easily.
Advanced Threading Tips
To prevent knots while stitching, try the “loop method” for threading. This works with even numbers of strands. Fold your thread in half, thread the folded end through the needle, and create a loop. When you start stitching, pass your needle through this loop to secure it.
For smoother stitching, run your thread through beeswax or a thread conditioner before threading. This reduces friction and prevents tangling as you work.
If you’re using metallic or specialty threads that are prone to fraying, try threading your needle before cutting the thread from the skein. Cut it only after it’s threaded to minimize fraying.
The needle you choose affects threading ease too. Needles with larger eyes, like gold-plated tapestry needles, are easier to thread and move smoothly through fabric.
Specialty Needles and Their Uses
While tapestry needles are the workhorses of cross stitch, specialty needles can help you create special effects and add unique elements to your projects. Each type has specific features designed for particular techniques.
Milliner Needles for Bullion Knots
Milliner needles (also called straw needles) are perfect for creating bullion knots in your cross stitch projects. Unlike regular tapestry needles, these have the same thickness from eye to point, which helps the thread slide through coiled stitches more easily.
When you’re working on decorative elements like roses or detailed textures, milliner needles make the process much smoother. They come in sizes 1-10, with size 9 being a good starting point for most projects.
The long, slender shape of milliner needles helps you maintain tension while wrapping thread around the needle. This makes your bullion knots more consistent and professional-looking.
Try using milliner needles when you want to add dimensional elements to your cross stitch. They’re especially helpful for:
- Floral details
- Textured borders
- Decorative accents
Beading Needles for Adding Beads
Beading needles are extra-fine needles with narrow eyes that can pass through tiny beads while still accommodating your thread. When you want to add sparkle to your cross stitch projects, these needles are essential.
These needles are much thinner than standard tapestry needles. They come in sizes 10-15, with higher numbers indicating finer needles. Size 10 works well for most cross stitch beading projects.
You’ll notice beading needles are flexible yet strong. This combination allows them to navigate through small bead holes without breaking.
For best results when beading:
- Choose a needle slightly smaller than your bead hole
- Use shorter thread lengths to prevent tangling
- Secure beads with a tiny stitch to keep them facing forward
Beads add wonderful dimension and shine to special projects like ornaments, bookmarks, and decorative pieces.
Sharp Needles for Fine Detail Work
Sharp needles have pointed tips unlike blunt tapestry needles, making them ideal for detailed work on fine fabrics. You might need these when working on higher-count fabrics or adding precise details.
When you’re stitching on tightly-woven fabric like linen or evenweave, sharp needles help create cleaner holes without distorting the fabric. They’re also perfect for techniques like:
- Blackwork embroidery alongside your cross stitch
- Backstitch details on delicate areas
- Outlining intricate patterns
Sharp needles come in embroidery and quilting varieties. Embroidery sharps have smaller eyes and work well with fewer strands of floss. Quilting sharps are slightly stronger and can handle more challenging fabrics.
Be careful when using sharp needles! Unlike tapestry needles, they can prick your fingers more easily as you work.
Stitching Techniques
Using the right needle is just one part of cross stitch success. Your technique matters too! Let’s explore some special stitches that add texture and interest to your projects.
French Knots and Their Variations
French knots add wonderful texture to your cross stitch projects. To create a French knot, use a sharp embroidery needle rather than a tapestry needle for better control. Size 7 or 9 embroidery needles work well for this technique.
Wrap your thread around the needle 1-3 times depending on how large you want your knot. Hold the thread taut as you insert the needle back into the fabric near (but not in) the original hole.
For French knot variations, try a colonial knot which is more secure. With colonial knots, you wrap the thread in a figure-8 pattern around the needle instead of simple wraps. This creates a slightly larger, more stable knot.
When working French knots, use shorter thread lengths to reduce tangling. About 12-18 inches is ideal for maintaining control.
Mastering Bullion Knots and Stitches
Bullion knots create beautiful raised lines and swirls in your work. For these, you’ll need a longer, thinner needle with a large eye – milliner needles (size 8-10) are perfect!
To create a bullion knot:
- Bring your needle up at point A
- Insert the needle at point B, but don’t pull through completely
- Wrap thread around the needle 5-10 times (depending on desired length)
- Hold wraps firmly while pulling needle through
Bullion stitches can form roses, caterpillars, or decorative edging. Practice makes perfect with these tricky stitches!
Try keeping your wraps loose enough to slide along the needle but tight enough to form a neat coil. Waxing your thread slightly can help it slide through the wraps more easily.
Techniques for Blackwork Embroidery
Blackwork embroidery features geometric patterns traditionally worked in black thread on white fabric. For blackwork, use a blunt tapestry needle size 24 or 26 to avoid splitting threads.
The key to beautiful blackwork is consistency in your stitch tension. Work in good lighting so you can see your fabric threads clearly.
Traditional blackwork uses backstitch and double running stitch (Holbein stitch). The double running stitch creates identical patterns on both sides of your fabric – perfect for reversible pieces like cuffs or collars.
Try creating shading in blackwork by varying the density of your patterns. Areas with more stitches appear darker, while sparser areas look lighter. This technique creates beautiful dimension in your work.
Remember to count carefully when working blackwork patterns. Using a needle with a gold coating reduces friction and makes stitching more comfortable during detailed work.
Needle Care and Maintenance
Taking good care of your cross stitch needles will make them last longer and perform better. Proper storage and regular cleaning are key to maintaining the quality of your needles, whether they’re standard tapestry needles or specialty gold-plated ones.
Storage Tips for Needles
Keep your needles in a dedicated container to prevent loss and damage. Needle books, magnetic holders, or pincushions work great for organizing different sizes and types.
Don’t leave your needles in your fabric when not stitching. This can warp the needle and damage your project.
Try using a needle minder—a decorative magnet that holds your needle when you take a break. They’re cute and practical!
For your gold-plated needles, consider storing them separately from regular needles. The coating is delicate and can get scratched when mixed with other needles.
Label your storage system if you have many needle sizes. This saves time when starting new projects.
Cleaning and Preventing Rust
Wipe your needles with a soft cloth after each stitching session. Your hands produce oils that can transfer to needles and eventually cause rust.
For deeper cleaning, gently rub needles with a bit of fine steel wool to remove any buildup or tarnish.
Avoid moisture! Store needles in a dry place. Consider adding silica gel packets to your storage container if you live in a humid area.
If your tapestry needle becomes sluggish moving through fabric, run it through an emery cushion or strawberry pincushion. These contain abrasive materials that polish and clean needles.
For needlepoint and gold-plated needles, be extra gentle when cleaning. Use a soft cloth only—no abrasives that might remove the coating.
Starting and Ending Your Project
The way you begin and finish your cross stitch project is just as important as the stitching itself. Using the right techniques will keep your work neat and prevent threads from coming loose over time.
Starting Your Cross Stitch
When beginning your cross stitch project, you’ll want a clean start without knots showing on the back of your work. Instead of tying a knot, try the loop method for an easy, secure start. This works with even-stranded thread (2, 4, or 6 strands). Fold your thread in half, thread both ends through your needle, and bring it up from the back of your fabric. When you make your first stitch, catch the loop on the back with your needle.
For odd-stranded thread or when the loop method isn’t possible, you can use the “waste knot” technique. Place a knot in your thread and start from the top of your fabric, about an inch away from your starting point. As you stitch, work toward the knot and eventually stitch over the thread on the back side before snipping the knot off.
Securing Threads When Finishing
When you’re ready to finish a thread, you want to make sure your work won’t unravel. The most common way to end is by weaving your thread through the back of several stitches. Run your needle under 3-4 completed stitches on the back side of your fabric.
For extra security, change direction once or twice as you weave. This creates enough friction to hold your thread in place without bulky knots. Try to follow the path of existing stitches to keep the back neat.
If you’re working on a project that will receive heavy use, like a pillow or clothing item, you might want to weave your thread through more stitches for added durability. Avoid ending threads near the edges of your design where they might be more likely to come loose.
Advanced Needle Selection
Once you’ve mastered basic cross stitch needles, exploring specialty options can enhance your stitching experience and solve specific problems. The right needle can reduce hand fatigue and make your stitching smoother.
Exploring Gold Plated Options
Gold-plated needles might seem like a luxury, but they offer practical benefits for serious stitchers. These needles glide through fabric more smoothly than standard nickel needles because the gold coating reduces friction. This makes your stitching faster and easier on your hands, especially during long projects.
They’re particularly helpful if you tend to get sweaty hands while stitching, as gold-plated needles resist tarnishing better than regular needles. Though slightly more expensive, many stitchers find them worth the investment.
Popular brands include:
- Bohin (recommended by many experienced stitchers)
- John James
- Tulip (premium option)
Choosing Needles for Needlepoint and Crewel
When venturing beyond basic cross stitch into needlepoint or crewel embroidery, your needle needs change. For needlepoint, tapestry needles with blunt tips work best, as they won’t split the canvas threads.
Size matters here too! For:
- 14-count canvas: try sizes 18-20
- 18-count canvas: try sizes 20-22
- 22-count canvas: try sizes 22-24
Crewel embroidery requires sharp points to penetrate tightly woven fabric. Look for crewel needles (also called embroidery needles) with longer eyes to accommodate wool threads. Sizes 9-10 work well for most crewel projects.
Remember that different projects might need different needles, so building a small collection gives you flexibility.
Creative Applications
Cross stitch needles aren’t just for traditional cross stitch! You can use them for many creative projects that add texture and dimension to your work.
Incorporating Ribbon and Cord into Your Work
Using your tapestry needles for ribbon embroidery adds a whole new dimension to your projects. Look for needles with larger eyes that can accommodate ribbon widths of 2-4mm. Gold-plated needles work especially well with silk ribbons since they reduce friction that might fray delicate materials.
You can create beautiful flowers, leaves, and decorative elements that literally pop off your fabric. Try stitching a simple cross stitch pattern, then enhance it with ribbon accents for texture.
For cord work, choose a sturdy size 24 needle that can handle the weight. Couching is a great technique where you lay cord on the surface and tack it down with small stitches using your regular cross stitch needle.
Exploring Surface Embroidery
Your cross stitch needles are perfect for adding surface embroidery elements to your projects! Size 26 tapestry needles work wonderfully for French knots, lazy daisies, and backstitch details that add personality to your pieces.
Try combining cross stitch with surface embroidery to create depth. Start with a cross stitched flower, then add stem stitch stems and French knot centers for a mixed-media look.
The Easy Guide needles mentioned in search results are excellent for beginners trying surface techniques. Their ball tips help you find the right hole without damaging your fabric.
Don’t be afraid to experiment with different needle sizes for various effects. Smaller needles create delicate details while larger ones make bolder statements in your work.