
Running stitch is one of the simplest embroidery stitches: the needle moves up and down through the fabric to create a dashed line. In modern embroidery, it is used for outlines, texture, borders, lettering accents, quilting-style details, and loose sketchy effects. To sew it neatly, keep your stitch length and gaps consistent, avoid pulling the thread too tightly, and work slowly around curves. Once you understand the rhythm—stitch, gap, stitch, gap—you can use running stitch as a clean basic line or as a decorative design feature.
What Is Running Stitch in Modern Embroidery?
Running stitch is a straight stitch made by bringing the needle up through the fabric, moving forward a short distance, and taking the needle back down. Repeating that motion creates a line of separate stitches with small spaces between them.
Think of it as a dashed line drawn with thread. Each visible dash is a stitch, and each blank space is the fabric showing between stitches. In modern embroidery, running stitch can look minimal, loose, hand-drawn, or layered depending on thread, spacing, and stitch size.
It is often one of the first stitches beginners learn because it teaches control, direction, tension, and spacing without complicated wrapping or looping.
What You Need Before You Start
You only need a few basic supplies:
- Embroidery hoop: Keeps fabric taut so stitches sit evenly.
- Fabric: Cotton, linen, or a cotton-linen blend is beginner-friendly.
- Embroidery needle: Choose one with an eye large enough for your thread.
- Embroidery floss: Start with 2 or 3 strands.
- Small scissors: For clean trimming.
- Marking tool: A water-soluble or heat-erasable pen helps guide your line.
Tighten your fabric in the hoop until it feels smooth, like a drum, but not stretched out of shape. Cut about 18 inches of thread to reduce tangles.
Running Stitch Quick Reference
Use this table as a simple starting point. These are not strict rules, but they help beginners get predictable results while practicing modern embroidery running stitch.
| Element | Beginner Recommendation | Best For |
|---|---|---|
| — | —: | — |
| Stitch length | 1/8 to 1/4 inch | Outlines, borders, practice lines |
| Gap between stitches | About the same as stitch length | Clean dashed lines |
| Thread strands | 2 or 3 strands of floss | Balanced modern look |
| Fabric tension | Smooth and firm in hoop | Even stitches, less puckering |
| Needle motion | Up, forward, down | Straight and curved lines |
| Tension | Snug, not tight | Flat fabric and neat stitches |
For a delicate look, use shorter stitches and fewer strands. For a bolder handmade effect, use longer stitches or more strands. The key is consistency within the same design area.
How to Do Running Stitch Step by Step
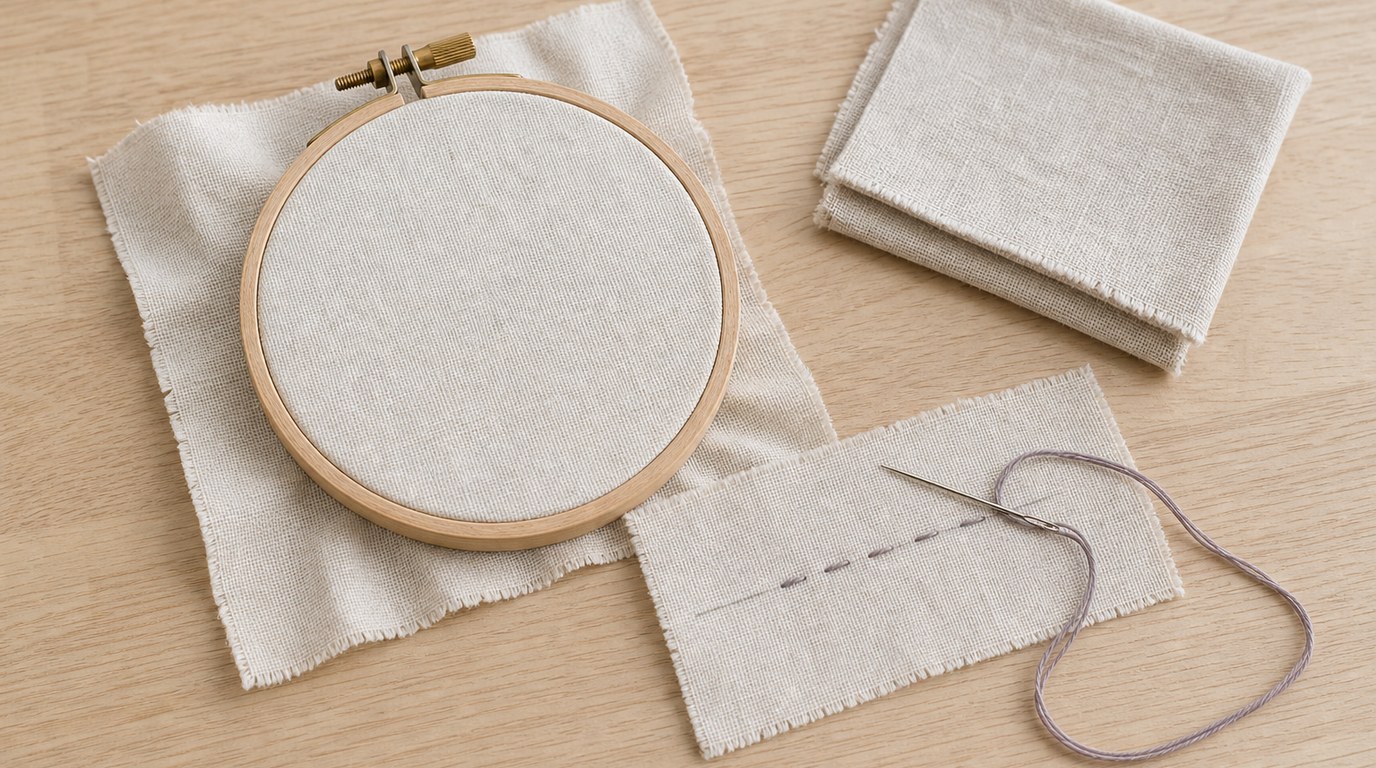
Practice on scrap fabric first. A drawn straight line is the easiest place to begin.
- Prepare your fabric. Place the fabric in the hoop and tighten it so the surface is smooth. Draw a light guideline where you want the running stitch to go.
- Thread your needle. Separate your embroidery floss and use 2 or 3 strands. Thread the needle and knot one end, or use a no-knot method if you already know one.
- Bring the needle up. Start from the back of the fabric. Push the needle up at the beginning of your marked line and pull the thread through until the knot catches.
- Make the first stitch. Move the needle forward along the line, about 1/8 to 1/4 inch. Push the needle down and pull the thread gently until the stitch lies flat.
- Leave a gap. From the back, move the needle forward by about the same distance as your stitch. Bring it up to the front. This blank space becomes the gap.
- Repeat the rhythm. Continue working: down to make a stitch, up after a gap, down to make the next stitch. Think “stitch, gap, stitch, gap.”
- Check your tension. The thread should rest smoothly on the fabric. If the fabric puckers, you are pulling too tightly. If stitches loop or sag, pull a little more firmly.
- Work curves slowly. Around curves, use shorter stitches. Small stitches turn more smoothly and prevent the line from looking angular.
- Finish the thread. When you reach the end or your thread gets short, turn the hoop over. Slide the needle under a few stitches on the back, then trim the excess thread.
You can sew running stitch one stitch at a time or load several small stitches onto the needle before pulling through. For embroidery, beginners usually get neater results by making one stitch at a time.
How to Keep Running Stitches Even
Even running stitch comes from three habits: marking the line, choosing a stitch size, and controlling tension. Draw a light guideline, then repeat the same stitch length instead of deciding fresh with every stitch.
If your stitches drift, slow down and look at the space before piercing the fabric. On straight lines, compare each stitch to the one before it. On curves, shorten the stitches slightly but keep the gaps balanced.
Do not pull hard after each stitch. The thread should sit on the surface, not squeeze the fabric. If needed, practice on woven fabric where the threads create a subtle grid.
Modern Embroidery Ideas Using Running Stitch
Running stitch is simple, but it can create many modern effects. Use it as a fine dashed outline around leaves, flowers, abstract shapes, or lettering. It gives a softer look than a solid line.
You can also build texture by stitching rows of running stitch close together. Try this for hills, water, clothing details, hair, or background shading. Varying the stitch length slightly can create an organic, hand-sketched style.
For a minimalist hoop, stitch a single-line rainbow, moon phase, plant stem, or geometric border. Running stitch also works as a decorative frame around a quote or as small accent marks around a central motif.
Common Running Stitch Mistakes and Fixes
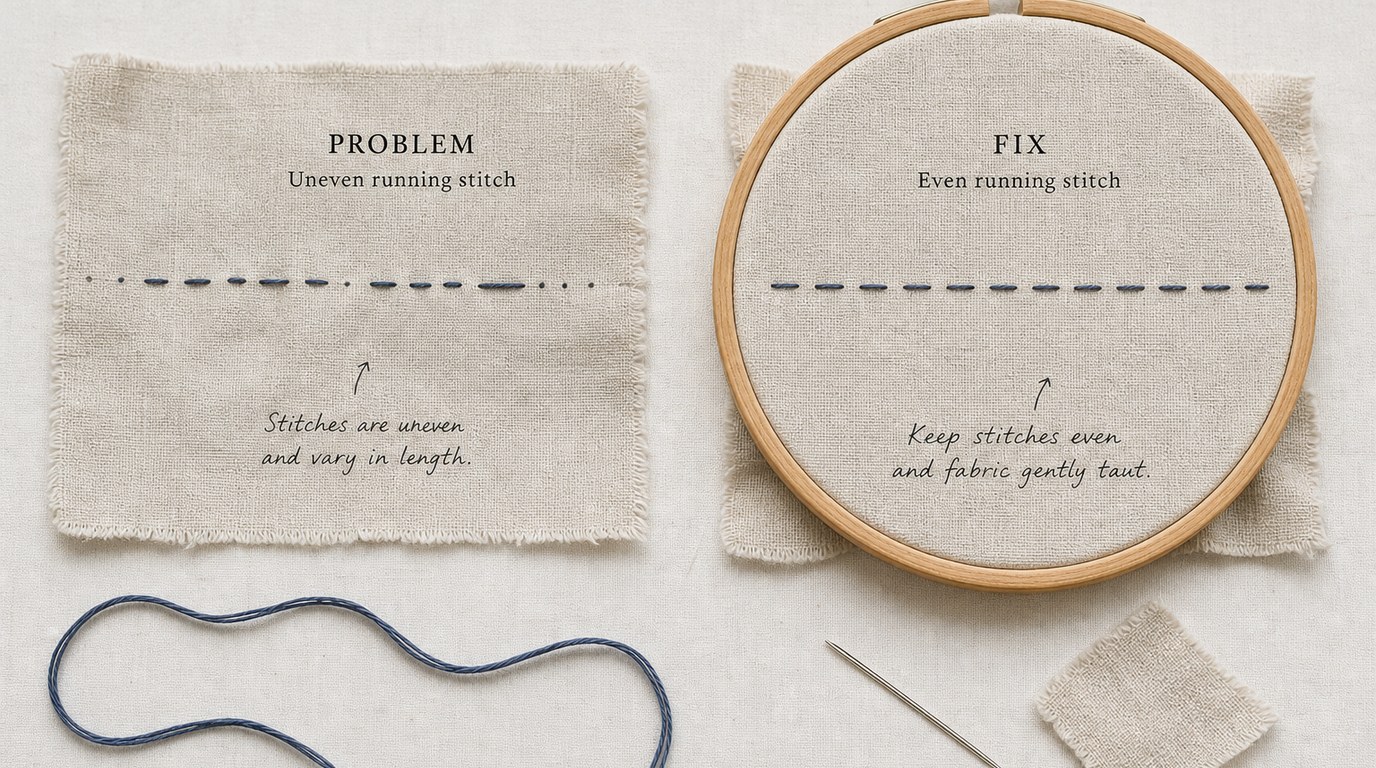
Uneven stitch lengths: Mark small dots along your line or use the fabric weave as a guide. Practice with shorter lines before stitching a full design.
Fabric puckering: Loosen your pulling tension. The thread should be snug, not tight. Also check that the fabric is firm in the hoop.
Messy curves: Shorten the stitches around bends. Long stitches make curves look squared off.
Thread tangling: Use a shorter thread length and let the needle dangle occasionally to untwist.
Gaps that look too large: Keep spaces close to the stitch length. If gaps are much longer, the line can look broken rather than intentional.
When to Use Running Stitch Instead of Back Stitch
Use running stitch when you want a light, dashed, decorative line. It is ideal for texture, soft outlines, borders, and modern sketch-style designs.
Use back stitch when you need a solid continuous line, such as crisp lettering, detailed outlines, or shapes that need stronger definition. Running stitch feels airy and simple; back stitch feels bolder and more exact.
FAQ
What Should a Beginner Know First About Learn How to Do Modern Embroidery Running Stitch?
Running stitch is an up-and-down stitch that forms a dashed line. Focus on similar stitch lengths, even gaps, and gentle tension so the fabric stays flat.
What Matters Most When Evaluating Learn How to Do Modern Embroidery Running Stitch?
Look for stitch consistency, firm fabric tension, and smooth thread tension. The stitches do not need to be perfect, but they should look intentional.
What Mistakes Should Readers Avoid with Learn How to Do Modern Embroidery Running Stitch?
Avoid pulling too tightly, using very long thread that tangles, and making oversized stitches around curves. Slow, steady placement gives neater results.
What Is the Next Logical Step After Learning About Learn How to Do Modern Embroidery Running Stitch?
Practice running stitch in simple borders, stems, waves, or geometric shapes. Then combine it with back stitch, satin stitch, or French knots for contrast and texture.