
To embroider letters and words neatly, treat each letter as a guide line, outline, or filled shape. Choose a short phrase, transfer it clearly onto fabric, then stitch slowly along the marked lines with even tension. For beginners, back stitch is the easiest modern embroidery technique for names, labels, quotes, and simple script because it creates clean, readable lines.
Follow this path: plan the words, transfer a clear design, choose a stitch that matches the letter style, embroider with controlled stitch length, then remove marks and finish the fabric neatly. Letter size, spacing, floss thickness, fabric tension, and stitch choice all affect whether the words look polished or messy.
What Makes Modern Embroidered Lettering Look Clean
Clean embroidered lettering starts with a simple mental model: text can be stitched as a path, an outline, or a filled shape.
A path is a single stitched line, such as a cursive name or small printed label. Back stitch, stem stitch, and chain stitch work well here. An outline uses stitching around the edge of thicker letters, often for block text or monograms. A filled shape is a letter with its inside area covered by satin stitch, long and short stitch, or rows of split stitch.
Modern embroidered words look best when the letter style is readable, the stitches are consistent, and the thread thickness matches the writing size. Tiny letters need fewer strands and shorter stitches; bold letters can handle heavier thread and more texture.
Supplies You Need for Embroidering Letters
You do not need many tools, but each one affects the final result.
Use woven cotton, linen, or a cotton-linen blend. These fabrics hold lettering well and are easier to mark than stretchy materials. A hoop keeps the fabric taut so stitches do not pucker. Choose embroidery floss in a color that contrasts clearly with the fabric.
You will also need embroidery needles with an eye large enough for your floss, small sharp scissors, and a marking tool. Water-soluble pens, heat-erasable pens, transfer paper, or a light source for tracing are all useful. If your fabric is thin or your lettering is detailed, lightweight stabilizer can keep the words smooth while you stitch.
Plan Your Lettering Before You Stitch
Before transferring anything, decide exactly what the words will say. Short phrases are easier to embroider cleanly than long quotes, especially for beginners. Names, dates, single words, and two- or three-word phrases are ideal practice projects.
Next, choose the size. Small letters need simple shapes. If the word is under an inch tall, avoid thin loops, tight curls, and complicated fonts. Larger letters allow more decorative stitches and filled areas.
Check spacing before stitching. Letters that look fine on paper can feel crowded once thread adds thickness. Leave extra room between letters, especially in script styles where curves and joins can blur together. Also consider placement: center the word in the hoop or on the finished item, and leave enough margin for framing, hemming, or sewing.
Print or draw the word at actual size and view it from arm’s length. If you can read it easily, it will likely embroider well.
Transfer Letters and Words Onto Fabric
A clear transfer line gives you a reliable path to follow. The best method depends on fabric color, thickness, and texture.
For light-colored fabric, place the design under the fabric and trace it with a water-soluble or heat-erasable pen. A sunny window, light box, or tablet screen set to low brightness can help you see the design. Tape both the paper and fabric in place so the letters do not shift.
For darker fabric, use white transfer paper, chalk pencil, or a water-soluble white marker. Make the lines visible but not heavy, because thick markings can be difficult to cover with fine stitches.
If the fabric is textured, slippery, or hard to mark, use stick-on water-soluble stabilizer. Draw or print the lettering onto the stabilizer, stitch through it, then rinse it away according to the product instructions.
Choose the Right Stitch for Your Letter Style
The stitch should match the shape and weight of the letters. A delicate handwritten word needs a different approach than a bold block initial. Start with readability, then add texture or decoration.
| Letter style | Best stitch choice | Why it works |
|---|---|---|
| Small printed letters | Back stitch | Creates crisp, controlled lines |
| Simple cursive words | Stem stitch or back stitch | Follows curves smoothly |
| Bold block letters | Satin stitch or split stitch fill | Covers wider shapes neatly |
| Textured modern words | Chain stitch | Adds raised, decorative lines |
| Monograms | Outline stitch plus satin fill | Defines edges and adds polish |
Back stitch is the most beginner-friendly because each stitch follows a short section of the drawn line. Stem stitch gives a slightly twisted, rope-like look and works beautifully on curves. Chain stitch is bolder and more decorative, but it can overwhelm tiny text.
For thick letters, do not just use more thread. Outline the letter first, then fill the shape with a stitch that lies smoothly inside the boundary. This keeps the word readable.
Step-by-step: How to Embroider Letters with Back Stitch
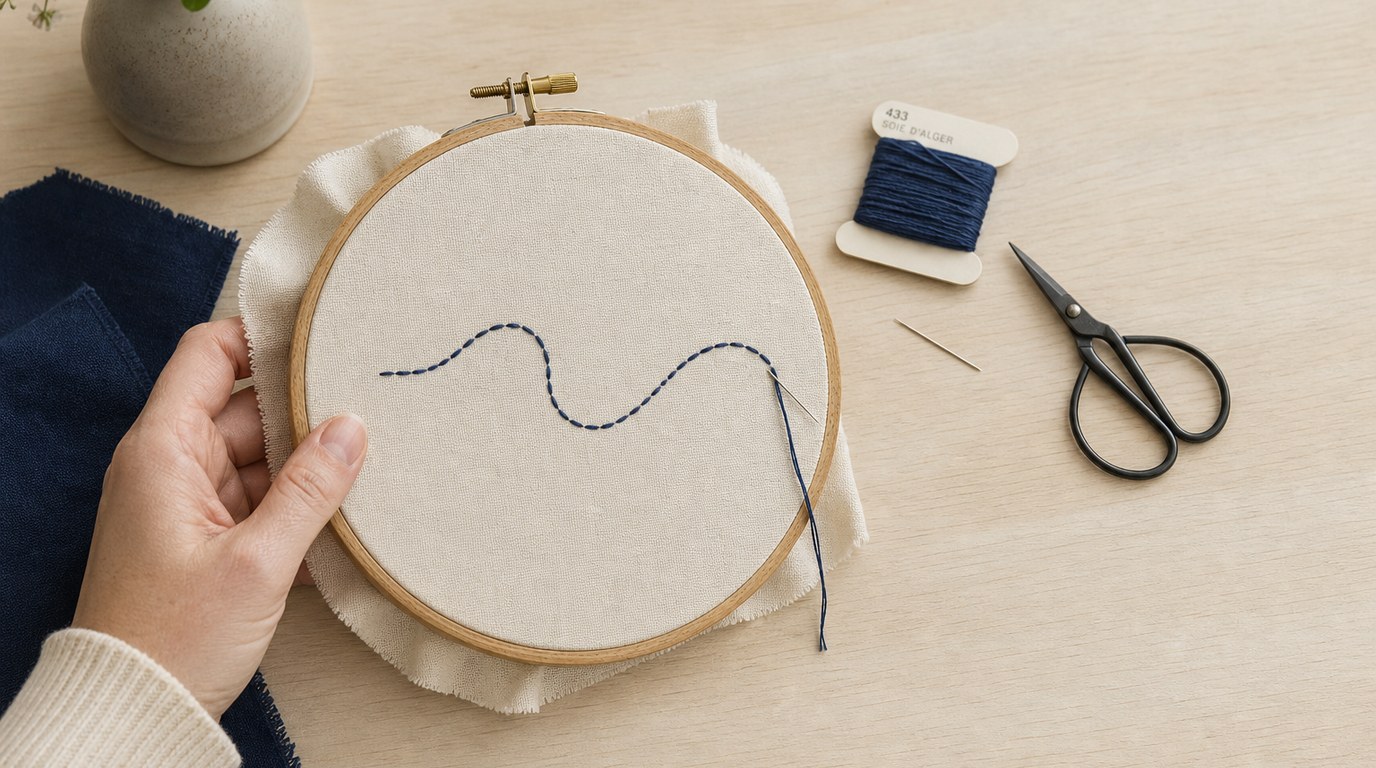
Back stitch is the best place to begin if you want to embroider letters and words neatly. It works for print, simple script, labels, initials, and short phrases.
- Prepare the fabric. Place the fabric in the hoop and tighten it until it feels firm, like a drum. The fabric should not sag.
- Thread the needle. Cut 15 to 18 inches of floss. For small lettering, use one or two strands. For larger words, use three strands. Knot the end for practice, or use a waste knot for a cleaner back.
- Start at the beginning of a letter. Bring the needle up from the back of the fabric at the start of the marked line.
- Make the first stitch. Insert the needle a short distance ahead on the line. Keep the stitch length small, especially on curves. About 1/8 inch is a good starting length.
- Come up ahead of the stitch. Bring the needle up the same distance in front of where the first stitch ended.
- Stitch backward into the previous hole. Insert the needle back into the end point of the last stitch. This creates a continuous line with no gaps.
- Repeat along the letter. Continue coming up ahead and stitching back into the previous stitch. On curves, shorten your stitches so the line bends smoothly.
- Handle corners carefully. End one stitch exactly at the corner, then begin the next stitch in the new direction. This keeps letters like A, E, K, and M crisp.
- Finish the thread. On the back, slide the needle under several nearby stitches and trim the tail. Avoid bulky knots behind small letters.
Work slowly and turn the hoop as needed so your hand follows the line comfortably. Even stitch length and gentle tension matter more than speed.
How to Embroider Thick Letters and Filled Words
For thick letters, draw the full outline of each letter instead of a single center line. Stitch the outline first with back stitch, split stitch, or stem stitch. This creates a clean boundary and helps the letter keep its shape.
To fill the letter, choose a stitch based on the width. Satin stitch works well for narrow areas, but long satin stitches can snag or loosen on wide letters. For larger block letters, use rows of split stitch, long and short stitch, or closely spaced back stitch. Keep the rows following the direction of the letter so the fill looks intentional.
If you are embroidering a bold word, fill one letter at a time and check that the edges stay readable.
Finishing Your Embroidered Words Neatly
When the stitching is complete, remove visible guide marks according to the marking tool instructions. Water-soluble marks should be rinsed or dabbed away with clean water; heat-erasable marks should be removed carefully with heat, though they may reappear in cold conditions.
Let the fabric dry flat if you used water. If needed, press from the back on a soft towel so the stitches are not crushed. Trim loose threads on the back without cutting too close to secured stitches.
Common Lettering Problems and How to Fix Them
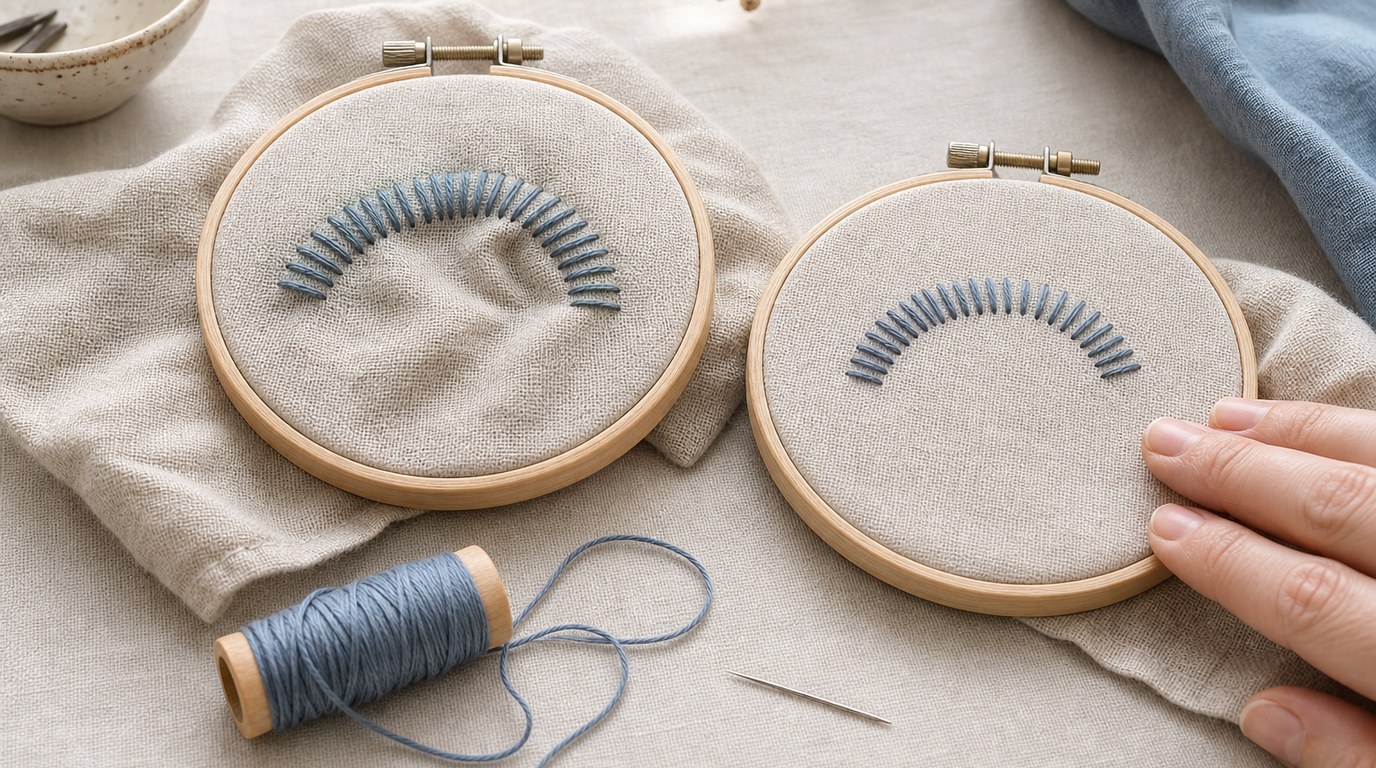
If your letters look wobbly, your stitches may be too long. Shorten the stitch length, especially around curves and small details.
If the fabric puckers, loosen your thread tension and check that the fabric is tight in the hoop. Pulling too firmly after each stitch can distort the letters.
If the words are hard to read, the design may be too small or too decorative for the thread thickness. Try fewer floss strands or enlarge the lettering.
If curves look jagged, use more stitches to travel around the bend. Think of each stitch as a small segment of the curve.
If filled letters look uneven, outline first and keep fill stitches parallel or consistently angled.
FAQ
What Should a Beginner Know First About Letters and Words Learn How to Do This Modern Embroidery Technique?
Beginners should know that embroidered lettering is about following a clear guide line with small, even stitches. Start with back stitch, simple words, and readable lettering. Avoid tiny script or thick filled letters until you are comfortable controlling stitch length and tension.
What Matters Most When Evaluating Letters and Words Learn How to Do This Modern Embroidery Technique?
Readability matters most. A beautiful stitch is not useful if the word is difficult to read. Check the letter size, spacing, thread thickness, and fabric tension. Clean transfer lines and consistent stitches are the main details that make modern embroidered words look polished.
What Mistakes Should Readers Avoid with Letters and Words Learn How to Do This Modern Embroidery Technique?
Avoid choosing overly detailed fonts, using too many floss strands on small letters, and making long stitches around curves. Do not rush the transfer step, because unclear guide lines lead to uneven words. Also avoid pulling the thread so tightly that the fabric puckers.
What Is the Next Logical Step After Learning About Letters and Words Learn How to Do This Modern Embroidery Technique?
After learning basic embroidered lettering, practice on a small project such as a name hoop, handkerchief, label, or short quote. Then try stem stitch for smoother script, satin stitch for thicker letters, or split stitch fills for bold modern words.