
Wool roving embroidery is a modern, textured way to add soft raised shapes to fabric. Instead of stitching only with thread, you use loose wool fibers and secure them with either a felting needle or visible embroidery stitches. The result can look painterly, fluffy, sculptural, or softly blended.
The easiest beginner approach is to choose a simple design, stretch sturdy fabric in a hoop, place small wisps of roving on the surface, and secure them gradually. Use a felting needle for a smooth felted look, or couching stitches for a more graphic embroidered style. Once the wool is attached, add simple detail stitches to define edges, stems, faces, outlines, or small accents.
What Makes Wool Roving Embroidery Different
Wool roving is loose, unspun fiber. In embroidery, that means you are not pulling a thread through fabric in the usual way. You are building texture on top of the fabric and then anchoring the fibers so they stay where you placed them.
It sits between traditional embroidery and needle felting. Standard embroidery uses thread to create lines and filled areas. Needle felting uses a barbed needle to tangle wool fibers into each other or into a base. Wool roving embroidery borrows from both: the design thinking of embroidery and the soft sculptural texture of felting.
The key mental model is “place, shape, secure, refine.” Place a small amount of fiber, shape it with your fingers or needle, secure it, then add thread details or more wool only where needed.
Materials You Need Before You Start
You do not need many supplies, but the right materials make the technique much easier. Choose fabric with enough body to handle repeated needle movement and raised fiber. Very loose or flimsy fabric can distort.
| Material | Best choice | Why it matters |
|---|---|---|
| Wool roving | Corriedale or medium wool roving | Easier to control than very slippery fine merino |
| Fabric | Linen, cotton canvas, denim, or sturdy cotton | Holds tension and supports raised wool |
| Hoop | Wooden embroidery hoop | Keeps fabric taut while you work |
| Felting needle | 38 or 40 gauge triangular/star needle | Tangles wool into the fabric surface |
| Foam pad or brush mat | Felting pad behind the fabric | Protects your table and needle |
| Embroidery needle | Crewel needle | Works for couching and detail stitches |
| Thread | Cotton floss, wool thread, or perle cotton | Adds outlines, accents, and structure |
| Small scissors | Sharp embroidery scissors | Trims stray fibers neatly |
If you are using a felting needle, keep a spare needle nearby. Felting needles are brittle and can snap if twisted or pushed at an angle.
Choose a Simple Modern Design
Roving works best when the design gives the fiber room to show its texture. Start with bold, simple shapes rather than tiny detailed illustrations. Good beginner motifs include abstract arches, clouds, flower heads, leaves, simple landscapes, mushrooms, moons, rainbows, sheep, or modern botanical shapes.
Avoid designs that rely on very thin lines, tiny lettering, or sharp miniature details. Roving can be shaped, but it naturally wants to stay soft and slightly fuzzy. Use embroidery thread for crisp details instead.
Think in layers: roving for large soft areas, thread for definition. For example, make a fluffy pink roving flower and add stitched stems, veins, and a few French knots in the center.
Prepare the Fabric and Transfer the Pattern
Cut your fabric several inches larger than the hoop so you have room to tighten and finish it later. Press the fabric first; wrinkles are harder to remove after the roving is attached.
Place the fabric in the hoop and pull it drum-tight. If the fabric is loose, the felting needle may push it down instead of catching the wool cleanly. For needle-felted work, place a foam felting pad or brush mat directly behind the fabric while you work.
Transfer your pattern lightly. A water-soluble pen, heat-erasable pen, or very light pencil line can work, depending on your fabric. Keep lines simple and avoid heavy marks under pale roving. If your design is abstract, you can sketch only the main placement lines and shape the wool by eye.
How to Attach Wool Roving with a Felting Needle
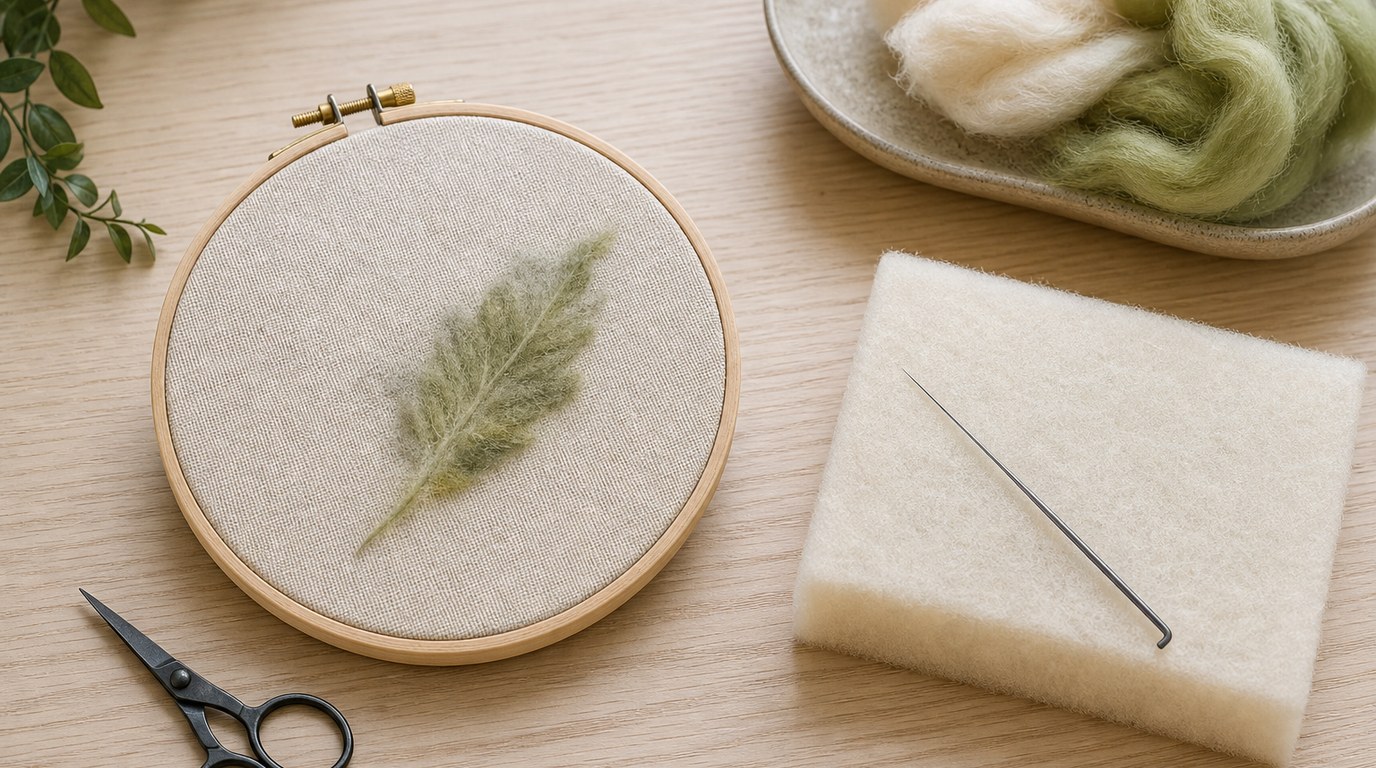
Needle felting is the best method when you want the wool to look blended into the fabric with minimal visible stitching. Work slowly and use less wool than you think you need.
- Pull off a small wisp of roving. Do not cut it if you can avoid it; pulling creates softer, more natural edges. For a leaf or petal, start with a piece about the size of a cotton ball, then thin it out.
- Lay the fiber on the fabric. Place it inside your pattern area. Use your fingers to spread, fold, or twist it into the rough shape.
- Hold the needle straight up and down. Poke through the wool into the fabric and foam pad. Do not bend or twist the needle, because that can break it.
- Tack the center first. Make several gentle pokes in the middle of the shape so the fiber grips the fabric. Then work outward toward the edges.
- Shape the edges. Fold stray fibers inward with the tip of the needle and poke along the outline. For a clean modern shape, spend extra time refining the perimeter.
- Build gradually. Add another thin layer if the color looks weak or the area is uneven. Thin layers felt more neatly than one thick clump.
- Blend colors if desired. For a sunset, flower, or abstract arch, overlap two colors slightly and felt through the overlap. The fibers will visually soften the transition.
Stop before the wool becomes overly compacted unless you want a flat felt patch. For modern embroidery, a little loft often looks more interesting.
How to Attach Wool Roving with Embroidery Stitches
If you do not want to use a felting needle, you can attach wool roving with stitches. This method is often called couching: the roving sits on the fabric surface while thread stitches hold it down.
Thread a needle with embroidery floss, perle cotton, or fine wool thread. Lay a narrow strand of roving along your design line or inside a shape. Bring the needle up on one side of the roving, cross over it, and take the needle down on the other side. Repeat at regular intervals.
For a visible modern look, make the couching stitches part of the design. Try contrasting black thread over cream roving, tonal pink stitches over a flower, or gold thread over a moon shape. For a softer look, use thread close to the roving color and make small stitches.
You can also use satin stitches, long straight stitches, or seed stitches to trap flat wisps of roving. This is useful for small clouds, fuzzy animal bodies, or textured flower centers. Keep the roving thin so the stitches do not pull too tightly or create bulky ridges.
Add Detail Stitches for a Modern Embroidery Finish
Roving often looks best when paired with clean thread details. After the wool is secure, step back and decide what needs definition. You may not need much.
Use backstitch for outlines, stems, lettering, and simple facial features. Use stem stitch for curved plant lines. Use French knots for flower centers, stars, berries, or sheep eyes. Use straight stitches for leaf veins, sun rays, grass, or abstract marks.
The contrast between fluffy wool and crisp thread is what makes the piece feel intentional. For example, a roving landscape can have stitched mountain lines, tiny seed stitches for flowers, and a simple backstitched sun outline. Keep the threadwork balanced so it supports the texture rather than covering it.
Common Wool Roving Embroidery Problems and Fixes
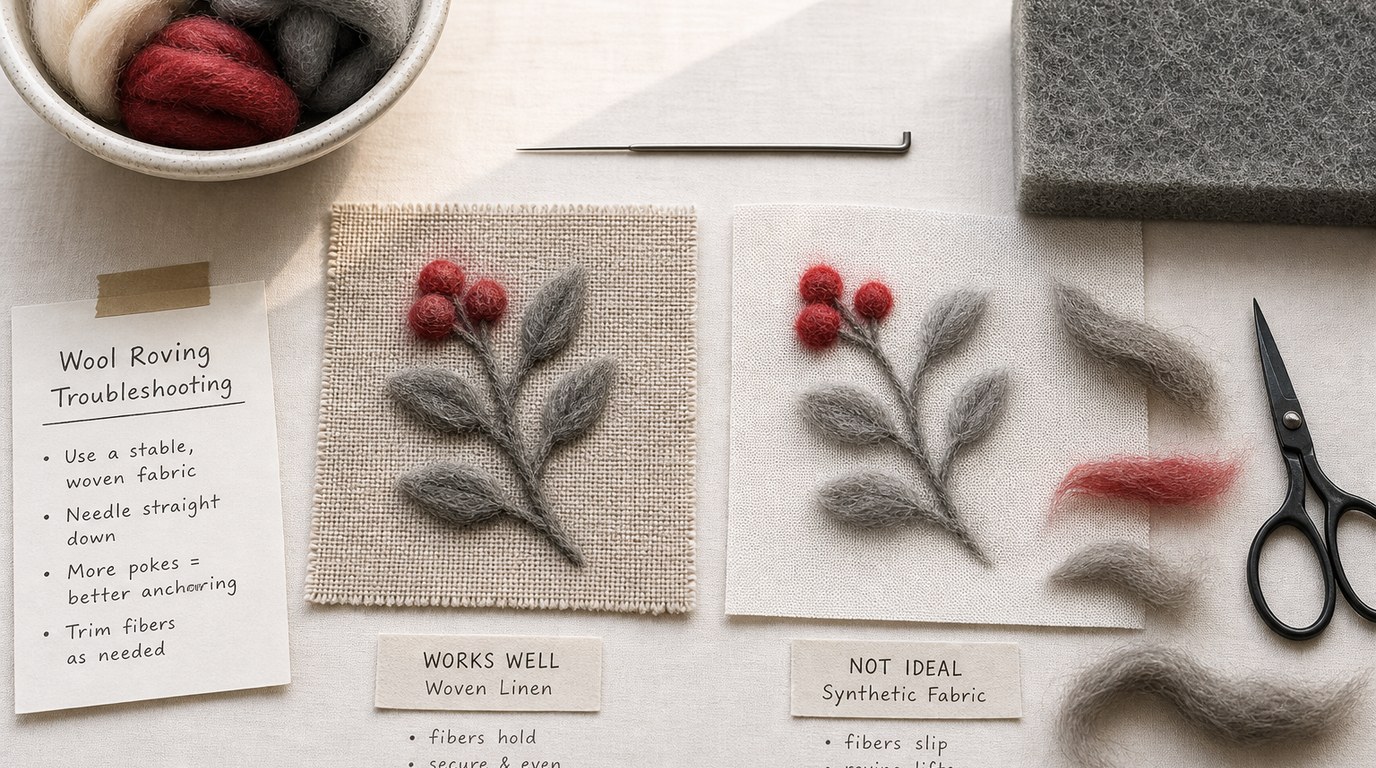
The wool will not stick to the fabric. Use a sturdier woven fabric, add a felting pad behind the work, and poke straight up and down. Very smooth synthetic fabrics can resist felting.
The shape looks lumpy. Remove extra wool before adding more. Work in thin layers and felt evenly across the area.
The edges look fuzzy. Fold loose fibers inward with the felting needle, then poke along the outline. For a sharper edge, add a stitched outline.
The fabric is puckering. Tighten the hoop and avoid pulling couching stitches too hard. If needle felting, support the fabric firmly from behind.
The roving looks too flat. Add a small wisp on top and felt it lightly. Stop while the surface still has loft.
The needle keeps breaking. Use vertical pokes only. Replace bent needles immediately.
Finishing and Caring for Wool Roving Embroidery
When the stitching is complete, remove any visible transfer marks according to the marker instructions, but avoid soaking unless you know all fibers and threads are washable. Let the piece dry fully before framing.
For hoop display, trim the excess fabric at the back and gather or glue it neatly, keeping pressure off the raised wool. For framed work, use a shadow box or spacer so the glass does not crush the texture.
To clean, dust gently with a soft brush or lint roller used very lightly. Wool roving embroidery is best treated as decorative textile art, not a frequently washed item.
FAQ
Can You Embroider with Wool Roving Without a Felting Needle?
Yes. Use couching stitches to hold the roving on the fabric surface. Lay the roving where you want it, then stitch over it at intervals with embroidery floss or wool thread. This creates a more visibly stitched, graphic style than needle-felted roving.
What Fabric Is Best for Wool Roving Embroidery?
Sturdy woven fabrics work best, such as linen, cotton canvas, denim, or medium-weight cotton. The fabric should hold tight tension in a hoop and withstand repeated needle movement. Avoid stretchy knits, slippery synthetics, and very loose weaves for your first project.
Is Wool Roving Embroidery the Same as Punch Needle?
No. Punch needle uses a special punch tool to create loops of yarn or thread through fabric. Wool roving embroidery uses loose wool fibers secured with a felting needle or stitches. Both are textured techniques, but the tools, materials, and finished surfaces are different.
Can Wool Roving Embroidery Be Washed?
It is safest not to wash finished wool roving embroidery unless you have tested every material first. Water, heat, and agitation can shrink, felt, or distort the wool. For wall art, gently dust the surface and frame it in a way that protects the raised fibers.