
Framing cross stitch well is less about hiding the fabric in a frame and more about protecting the work you have already done. The goal is to keep the weave square, hold the fabric evenly, prevent stains or rust, and choose materials that will not damage the stitches over time.
The best method for most home framers is to wash and press the piece if appropriate, mount it on acid-free foam board using lacing or rustproof pins, add a mat or spacer so glass does not press against the stitches, and place it in a frame that fits the design with a little breathing room. Avoid glue, ordinary cardboard, and tight glass contact whenever possible.
Quick Answer
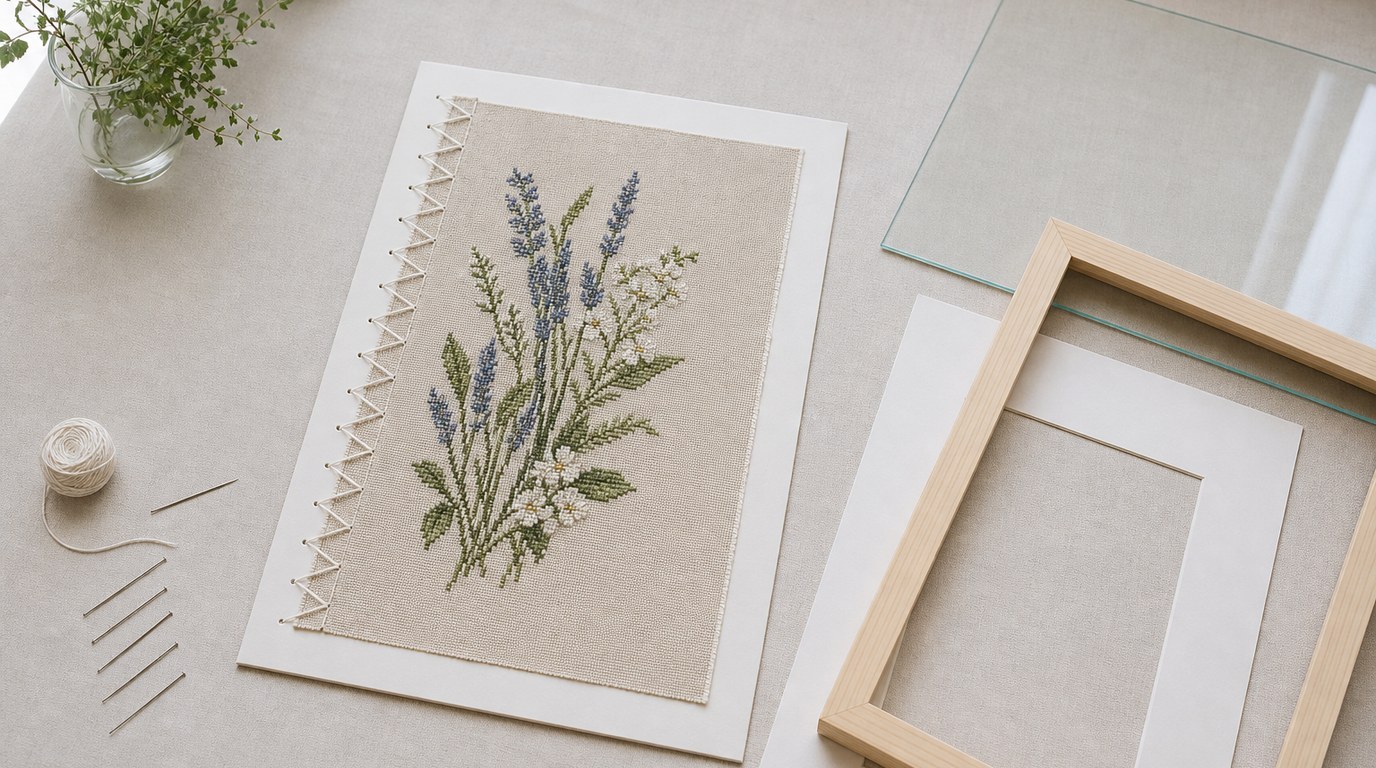
To frame cross stitch, first clean and press the finished piece, then center it over an acid-free mounting board. Stretch it gently so the fabric grain stays straight, secure it with lacing thread or rustproof pins, and place it in a frame with a mat or spacer to keep the glass away from the raised stitches. Finish by sealing the back neatly and checking that the design sits square before hanging.
A simple framing workflow looks like this:
- Check the stitching. Trim loose thread tails, remove lint, and make sure no needle or hoop marks remain.
- Wash only if the materials allow it. Many cotton floss and plain fabrics can be hand washed, but specialty threads, beads, and hand-dyed fabrics may not be washable.
- Press from the back. Place the work face down on a clean towel and press gently so the stitches are not flattened.
- Choose the mounting method. Lacing is the most reversible and secure. Pinning is easier and still tidy if you use rustproof pins. Adhesive boards are fast but less ideal for heirloom work.
- Mount squarely. Align the fabric weave with the board edges, not just the stitched design.
- Frame with space. Use a mat, spacer, or shadow box depth so the glass does not crush the stitches.
The main takeaway: good cross stitch framing should be clean, square, reversible where possible, and made with acid-free or rustproof materials.
How to Think About This Topic
A finished cross stitch piece is both fabric and artwork. That means framing has to solve two problems at once: it must present the design attractively, and it must protect the fabric structure. If you think of framing as “stretch, support, and separate,” the process becomes much easier.
Stretch means applying even tension, not pulling hard. Cross stitch fabric has a visible grid, so crooked mounting is easy to notice. If one side is tugged more than the other, borders can lean, circles can look oval, and lettering can appear slightly slanted. Your aim is not drum-tight fabric. It is smooth fabric with straight vertical and horizontal threads.
Support means choosing the right backing. Acid-free foam board or archival mat board is preferred because ordinary cardboard can yellow, stain, or become brittle. The backing should be firm enough to hold the fabric flat and cut to fit the frame opening. If the project is large, flimsy backing can bow over time, so a sturdier board matters.
Separate means keeping stitches from being pressed directly against glass. Cross stitch has texture. If glass sits on top of the stitches, it can flatten them, trap moisture, and make the fabric look compressed. A mat creates a gap between the fabric and glass. If you do not want a visible mat, use frame spacers or choose a deeper frame.
The mounting method also depends on the value and purpose of the piece. For a small seasonal design, you may accept a quicker method. For a wedding sampler, memorial piece, or project that took months to stitch, choose a more careful, reversible method.
Here is a practical comparison:
| Mounting method | Best for | Difficulty | Reversible? | Notes |
|---|---|---|---|---|
| — | — | —: | —: | — |
| Lacing | Heirloom pieces, samplers, larger work | Medium | Yes | Even tension and no adhesive on fabric |
| Rustproof pins | Small to medium projects | Easy-medium | Yes | Faster than lacing; check pins are stainless or rustproof |
| Sewing to fabric backing | Delicate or unusual shapes | Medium | Yes | Useful when mounting on padded or fabric-covered board |
| Adhesive mounting board | Quick gifts or temporary display | Easy | Usually no | Can damage or stain fabric over time |
Before you frame, decide what matters most: speed, preservation, budget, or appearance. A beginner framing a small design may choose pinning because it is manageable and tidy. A stitcher framing a family keepsake should choose lacing and archival materials. Both choices can work, but they serve different goals.
The fabric margin is another key part of the mental model. Ideally, leave enough extra fabric around the stitched design to wrap around the mounting board. Two to three inches on each side is comfortable for many projects. If your margin is narrow, you may need to sew extra plain fabric to the edges or use a mat with a smaller opening.
Finally, remember that the frame should support the stitching, not compete with it. A busy cross stitch often looks best with a simple frame and neutral mat. A small design may benefit from a wider mat to give it visual weight. When in doubt, choose materials that let the stitches remain the focus.
Practical Guidance
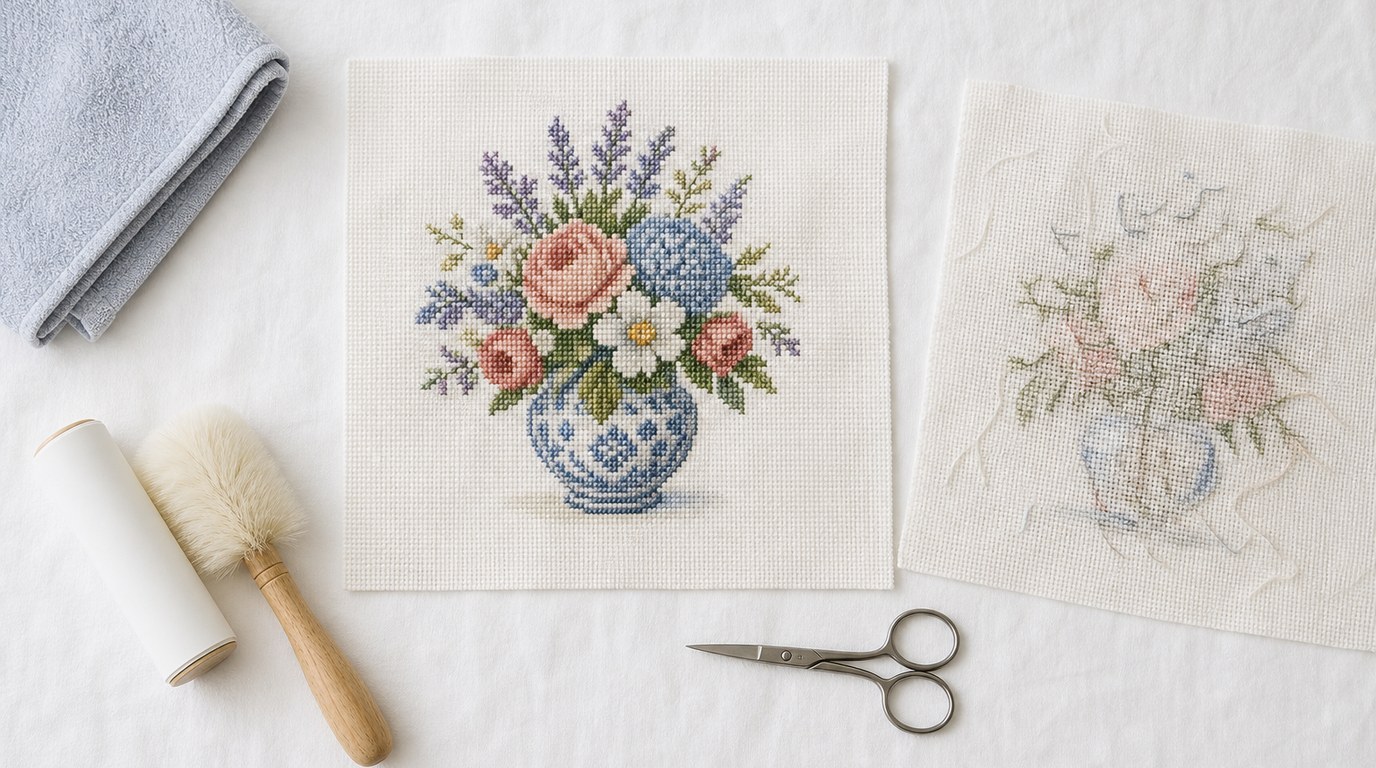
Start by preparing the piece on a clean surface. Wash your hands, clear away food or drinks, and place a white towel or clean cotton cloth under the project. Inspect the front and back for lint, pet hair, loose floss, or knots that may show as bumps. If the piece is washable, hand wash it gently in cool water with a mild, dye-free soap. Rinse well and roll it in a towel to remove water; do not wring it.
When pressing, put the cross stitch face down on a thick clean towel. The towel cushions the stitches so they do not flatten. Use the iron setting appropriate for the fabric and threads. Press rather than scrub the iron back and forth. For metallic threads, beads, hand-dyed floss, or specialty fibers, test carefully or skip washing and use only light steam from a safe distance if appropriate.
Next, cut your mounting board to the size needed for the frame or mat opening. If using a mat, the board should sit behind the mat with the stitched design centered in the window. Place the fabric over the board and align the weave with the board edges. Do not rely only on the stitched border, because stitching tension can distort a design slightly. The fabric threads are your true guide.
For lacing, turn the board over with the fabric wrapped around it. Use strong cotton thread, quilting thread, or another sturdy non-stretch thread. Lace opposite fabric edges together in a zigzag pattern, like loosely tying a corset. Work from the center outward, alternating sides and adjusting tension gradually. Then lace the remaining two sides. Check the front often. If the design starts to drift, loosen and correct it before continuing.
For pinning, center the fabric on the board and insert rustproof pins into the foam board edge, not through the front of the design. Start at the center of each side: top, bottom, left, and right. Then add pins outward toward the corners, alternating sides so tension stays even. Keep the fabric smooth but not strained. Pinning works especially well for small and medium pieces with enough fabric margin.
If you have very little fabric around the design, do not pull aggressively to make it fit. Instead, sew strips of plain cotton fabric to the edges to create a larger margin. These strips will wrap behind the board and will not show once framed. This is safer than using tape on the stitched fabric.
Once mounted, assemble the frame. Clean the inside of the glass before placing anything in the frame, because dust trapped inside is frustrating to fix later. If using a mat, position it over the mounted piece and confirm the design is centered. If not using a mat, add spacers along the frame rabbet so the glass does not touch the stitches.
Place the mounted cross stitch into the frame, add the backing, and secure it with the frame’s tabs or points. The back should be firm but not compressed. If desired, cover the back with dust paper for a neat finish, but avoid sealing in moisture. Add hanging hardware that suits the frame weight.
Common problems are usually fixable before final assembly. If the design looks crooked, remove a few pins or loosen the lacing and realign the fabric grain. If the fabric puckers, the tension may be uneven or too tight in one area. If the stitches look flattened, add more depth with a mat, spacer, or deeper frame. If the glass fogs after hanging, the piece may be in a damp location; move it to a drier wall away from bathrooms, kitchens, and direct sunlight.
For valuable or sentimental work, a professional framer is worth considering. Ask for acid-free materials, a mat or spacer, and a reversible mounting method. Make clear that you do not want the fabric glued down. A good framer should understand that needlework needs depth, careful tension, and protection from acidic backing.
FAQ
What Should a Beginner Know First About How to Frame Cross Stitch?
A beginner should know that the fabric must stay square and clean. Do not rush straight to the frame. Prepare the piece, use acid-free backing, avoid glue if possible, and keep glass from pressing directly on the stitches.
What Matters Most When Evaluating How to Frame Cross Stitch?
The most important factors are preservation, even tension, and spacing from the glass. A good frame job keeps the fabric flat without distortion, uses safe materials, and protects the raised stitches from pressure, moisture, and staining.
What Mistakes Should Readers Avoid with How to Frame Cross Stitch?
Avoid using ordinary cardboard, masking tape, hot glue, or sticky mounting boards on important pieces. Do not stretch the fabric so hard that the weave distorts, and do not let the glass sit directly on the stitches.
What Is the Next Logical Step After Learning About How to Frame Cross Stitch?
Gather your materials: frame, mat or spacers, acid-free foam board, rustproof pins or lacing thread, and a clean pressing cloth. Then test the layout before securing anything permanently so you can adjust the centering and tension.