
To frame cross stitch or embroidery using sticky board, first clean and press the finished needlework, then measure the stitched design, fabric allowance, board, and frame opening. Center the fabric carefully before exposing much adhesive, because sticky board grips quickly. Peel back a small section of the protective paper, attach the fabric from the center outward, and smooth gently without stretching the stitches. Once the front is straight and wrinkle-free, wrap the excess fabric to the back or trim it neatly, then place the mounted piece into the frame with enough depth that the glass does not crush raised stitches. The key is simple: prepare fully, align before sticking, mount gradually, and handle the stitched surface lightly.
Before You Start: When Sticky Board Is the Right Choice
Sticky board is a convenient mounting option for small to medium cross stitch and embroidery projects, especially pieces meant for everyday display rather than museum-level preservation. It works well when you want a tidy, flat finish without learning lacing or using many pins.
It is less ideal for very valuable heirlooms, antique textiles, heavily beaded work, or projects stitched on delicate fabric that may not tolerate adhesive. Some stitchers also avoid adhesive for long-term archival reasons. For modern gifts, seasonal pieces, ornaments, samplers, and hoop-to-frame projects, sticky board can be practical and neat when used carefully.
The main rule: sticky board is forgiving only before contact. Once fabric touches the adhesive, repositioning may pull threads or distort the weave.
What You Need to Frame Cross Stitch or Embroidery with Sticky Board
Gather everything before exposing the adhesive. A clean setup helps you avoid dust, crooked placement, and last-minute handling.
| Item | Why you need it |
|---|---|
| Finished cross stitch or embroidery | Clean, dry, and fully completed before framing |
| Sticky mounting board | Holds the fabric flat inside the frame |
| Frame | Choose one with enough depth for fabric and stitches |
| Ruler or tape measure | Helps center the design accurately |
| Pencil | Marks the board backing or frame reference points |
| Small scissors or rotary cutter | Trims excess fabric if needed |
| Clean towel and iron | Presses wrinkles from the back |
| Acid-free tape, optional | Secures wrapped fabric on the back |
Choose a board close to the frame size, or cut it carefully to fit. If your frame includes glass, check that the stitched surface will not be pressed tightly against it.
Step 1: Clean, Dry, and Press the Needlework
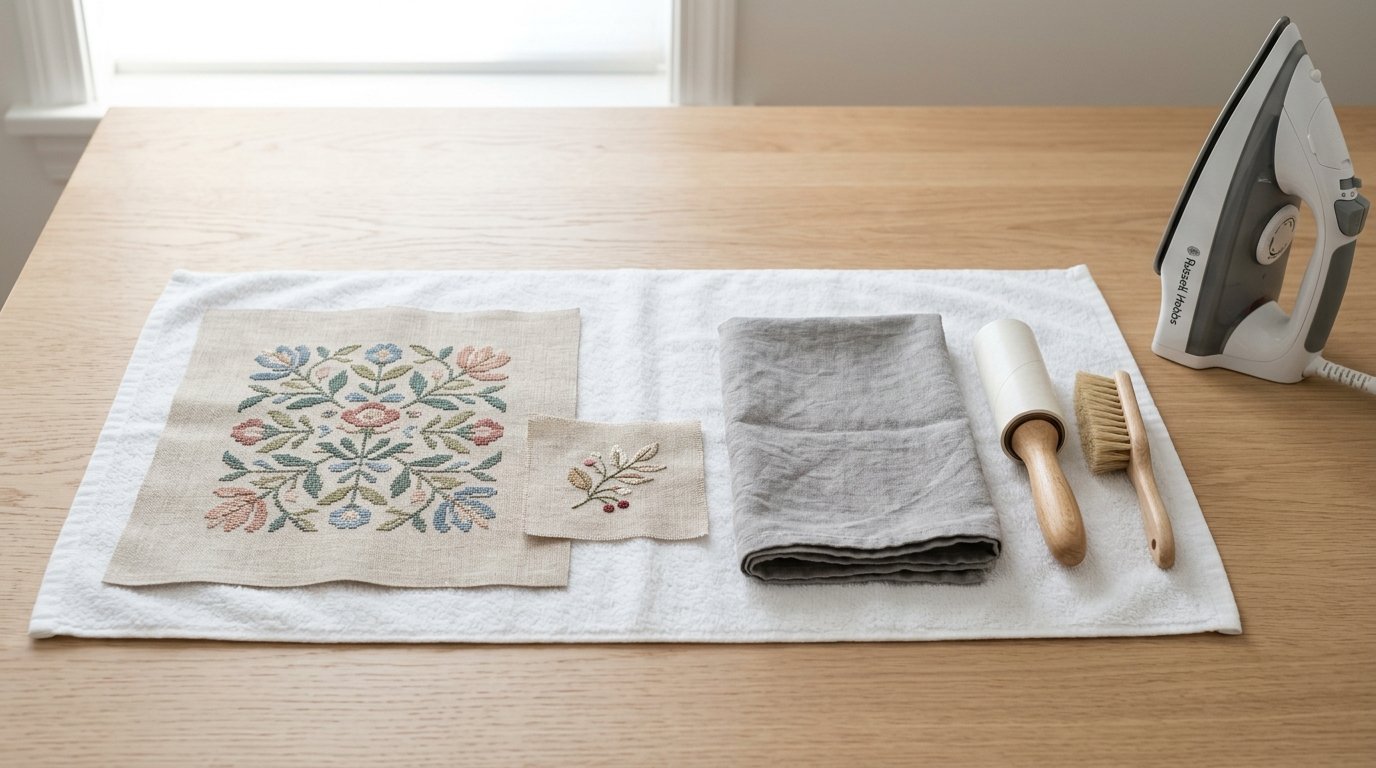
Do not mount needlework that still has hoop marks, oils from handling, pet hair, dust, or water-soluble pen residue. Framing seals those problems in place and makes them harder to correct later.
If the thread and fabric are washable, gently wash the piece according to the floss and fabric recommendations. Rinse thoroughly, blot with a clean towel, and let it dry flat. Never wring stitched fabric, because twisting can skew the weave.
Press from the back on a clean towel so the stitches sink softly into the towel instead of flattening against the ironing board. Use the correct heat setting for your fabric and thread. For embroidery with raised stitches, beads, metallics, or specialty fibers, use extra caution and press around details rather than directly over them.
The fabric should be completely dry before it touches sticky board.
Step 2: Measure the Design, Fabric, Board, and Frame
Measure before peeling the sticky board backing. Start with the stitched design itself, not just the outer fabric. Find the design width and height, then compare those measurements with the frame opening or mat opening.
Next, measure the sticky board. Decide how much empty fabric should show around the stitched area. For example, if your design is 5 inches wide and the visible opening is 7 inches wide, you have 2 inches of extra visible space, or 1 inch on each side.
Lightly mark the center of the board with pencil on the protective paper or on the back edge, not on the adhesive surface. You can also mark the horizontal and vertical center of the fabric with temporary thread, a tiny fold, or a removable fabric-safe marker. These reference points prevent an off-center finish.
Step 3: Center the Fabric Before It Touches the Adhesive
Before attaching anything, place the fabric over the still-covered sticky board and check the layout inside the frame or mat. This dry fit is your chance to correct spacing, borders, and straightness.
Line up the fabric weave with the board edges. For cross stitch on Aida or evenweave, use the grid of the fabric as your guide. If the fabric threads run at a slight angle compared with the board, the framed design will look crooked even if the stitched motif is centered.
Once you like the placement, hold it in position with light finger pressure, clips on the very outer fabric margin, or a couple of temporary tape tabs outside the visible area. Do not put tape on stitches.
Step 4: Attach the Needlework to the Sticky Board
Place the sticky board on a clean, flat surface. With the fabric positioned correctly, peel back only a small strip of the protective paper from one edge or from the center area, depending on the board style. Avoid removing the full backing at once; too much exposed adhesive invites wrinkles and accidental sticking.
Anchor the first section gently. Smooth the fabric with clean hands from the center toward the edge, following the weave rather than pulling diagonally. The goal is flat, not stretched. Over-stretching can open holes in Aida, distort round motifs, or make borders look wavy.
Continue peeling the backing a little at a time. After each section, smooth outward with light pressure. If you see a wrinkle forming, stop immediately and lift only if the fabric releases easily. Forcing it can fuzz the fabric or pull stitches.
Check the front often. Look for straight borders, even fabric tension, and balanced margins. If your piece has lettering, geometric borders, or a square cross stitch frame, use those lines as visual guides while you work.
Step 5: Finish the Edges on the Back
After the front is mounted smoothly, turn the board over and decide how to handle the extra fabric. There are two common options: wrap or trim.
Wrapping gives a cleaner back and can add a little security. Fold the excess fabric over the board edges, miter the corners neatly, and secure the fabric on the back with acid-free tape if needed. Keep the folds flat so the mounted piece still fits into the frame.
Trimming is useful when the frame is shallow or there is too much bulk. Cut the fabric evenly around the board, leaving enough margin so the front remains secure. Do not trim so close that threads can fray into the visible area.
For a gift, you can cover the back with frame backing or a neat dust cover if the frame design allows.
Step 6: Place the Mounted Needlework Into the Frame
Before closing the frame, clean the inside of the glass if you are using it. Dust or fingerprints trapped inside will be very noticeable against fabric. Let any cleaner dry fully before assembling the frame.
Place the mounted needlework into the frame and check the front before fastening the back. Make sure the design is upright, centered, and not pinched. If the piece includes French knots, beads, ribbon embroidery, or thick specialty stitches, use a spacer, mat, or deeper frame so the glass does not press against the stitching.
Secure the frame backing without forcing it. If the stack of glass, mat, sticky board, and backing is too thick, choose a deeper frame rather than crushing the needlework. Add hanging hardware or a stand, then give the front one final check.
Common Sticky Board Framing Problems and Fixes
If the design looks crooked, first check whether the stitched motif is off-center or whether the fabric weave is angled on the board. Slight issues can sometimes be hidden by a mat, but major skewing usually means remounting if the fabric can be lifted safely.
If wrinkles appear, they often come from exposing too much adhesive at once or smoothing in one direction only. Work gradually and smooth from the center outward.
If borders look stretched, the fabric was pulled too tightly. Sticky board should hold the fabric, not tension it like a drum.
If the frame will not close, do not force it. Trim bulky fabric folds, remove unnecessary layers, or switch to a deeper frame.
Sticky Board Vs. Lacing Vs. Pinning: Which Finish Should You Choose?
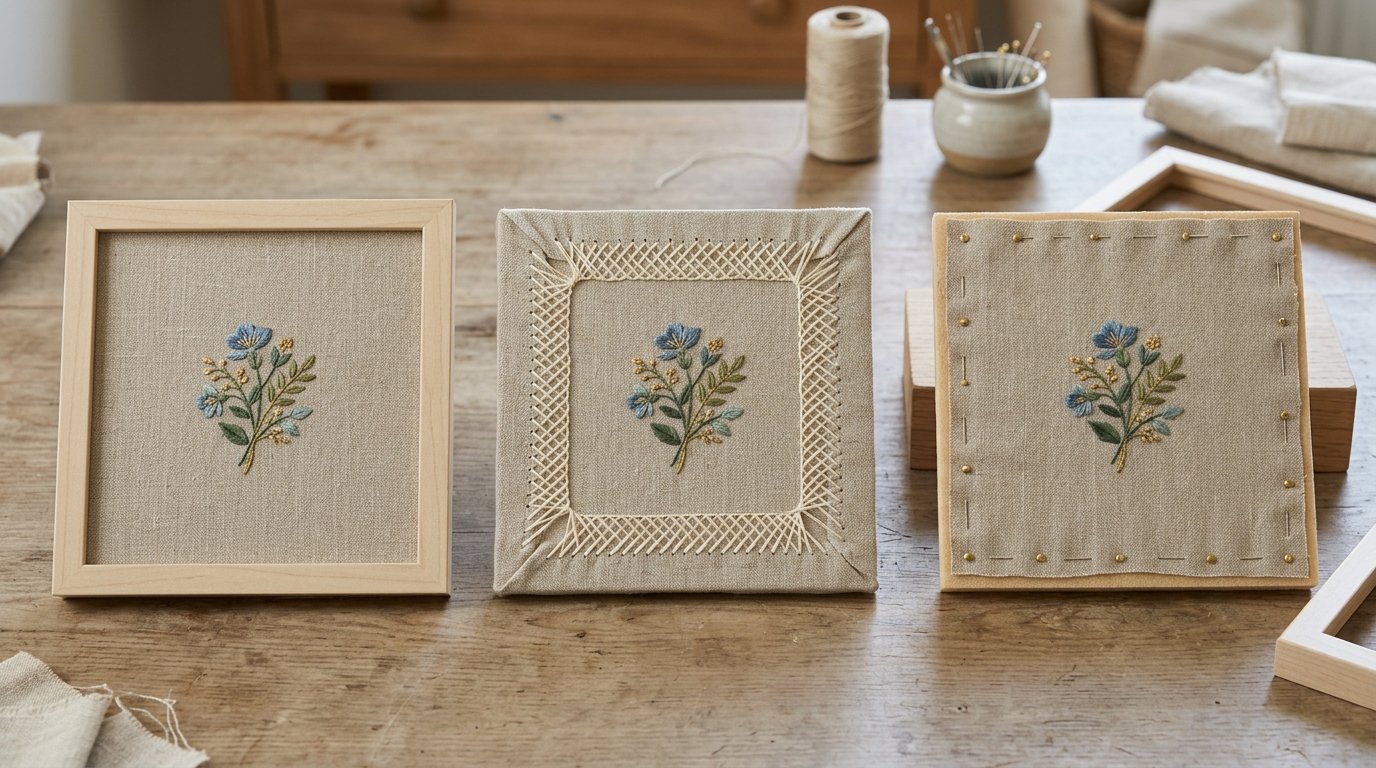
Sticky board is fastest and easiest. It suits many decorative projects, gifts, and beginner framing jobs, but it uses adhesive.
Lacing is more time-consuming but avoids adhesive on the main fabric. The fabric is stretched around a board and secured with thread on the back, making it a strong choice for special pieces.
Pinning also avoids adhesive and allows adjustment, but it requires careful spacing and rust-resistant pins.
Choose sticky board when convenience matters and the project is not highly fragile or irreplaceable. Choose lacing or pinning when reversibility, heirloom quality, or long-term textile care matters more.
FAQ
What Should a Beginner Know First About How to Frame Cross Stitch and Embroidery Using Sticky Board?
A beginner should know that alignment matters most before the fabric touches the adhesive. Clean and press the needlework, measure the design and frame opening, and do a dry fit first. Peel the backing gradually instead of exposing the whole sticky surface at once.
What Matters Most When Evaluating How to Frame Cross Stitch and Embroidery Using Sticky Board?
The most important factors are fabric condition, accurate centering, gentle smoothing, and frame depth. The finished piece should look straight and flat without stretched stitches. Also consider whether adhesive is acceptable for that particular project, especially if it is valuable or sentimental.
What Mistakes Should Readers Avoid with How to Frame Cross Stitch and Embroidery Using Sticky Board?
Avoid mounting dirty or damp fabric, skipping measurements, pulling the fabric too tightly, or pressing raised stitches flat. Another common mistake is peeling off all the backing immediately. Work slowly in sections so you can keep the design centered and wrinkle-free.
What Is the Next Logical Step After Learning About How to Frame Cross Stitch and Embroidery Using Sticky Board?
The next step is to practice on a small finished piece before framing a favorite project. Once you understand the process, compare sticky board with lacing or pinning so you can choose the best mounting method for future cross stitch and embroidery pieces.