
Cross stitch is a beginner-friendly embroidery technique where you make small X-shaped stitches on an even-weave fabric to build a picture or pattern. To get started, you need fabric, embroidery floss, a needle, scissors, and a simple pattern. Begin in the center of your fabric, follow the chart one color at a time, keep your stitches facing the same direction, and finish by securing the thread on the back without knots.
If you can count squares on a chart and bring a needle up and down through fabric holes, you can learn the basics. The easiest first project is small, uses only a few colors, and is stitched on fabric with holes that are easy to see. This guide walks through the supplies, pattern reading, first stitches, neatness tips, and finishing steps you need for a confident first cross stitch project.
How Cross Stitch Works for Beginners
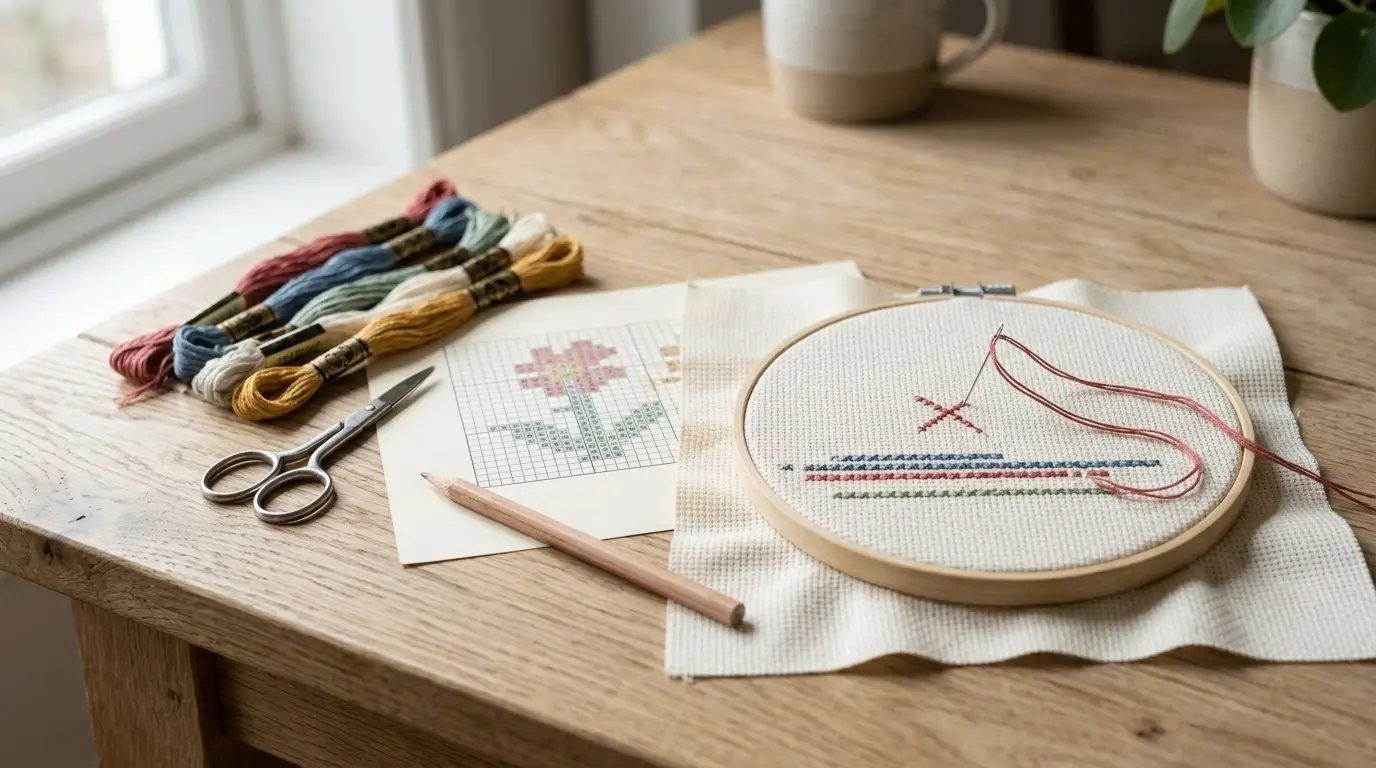
Cross stitch is a form of counted embroidery. Instead of drawing a design freehand on fabric, you follow a chart made of tiny squares. Each square on the chart usually represents one stitch on your fabric, and each symbol tells you which thread color to use.
The fabric is gridded, either visibly or by the structure of the weave. Aida cloth is the most common beginner fabric because it has clear holes and blocks that make counting easier. You create each stitch as an X, and many X-shaped stitches placed together form letters, flowers, animals, borders, or other designs.
A basic cross stitch project follows this simple workflow:
- Choose a small pattern or beginner kit.
- Prepare your fabric with extra space around the design.
- Find the center of the fabric and the center of the chart.
- Thread your needle with the required floss color.
- Stitch the design by following the chart.
- Secure thread ends neatly on the back.
- Frame, display, or turn the stitched piece into something useful.
You do not need drawing skills, sewing experience, or complicated equipment. The main skills are counting, matching symbols to colors, and keeping your stitches consistent. For a first project, choose a design with mostly full cross stitches, limited colors, and a fabric count that is easy to see.
Essential Cross Stitch Supplies
You only need a small set of tools to begin cross stitch. A complete beginner kit is often the simplest first purchase because it usually includes the fabric, floss, needle, and chart in one package. If you prefer to choose your own supplies, start with the basics below.
| Supply | What It Does | Beginner Tip |
|---|---|---|
| Aida cloth | The fabric you stitch on, with evenly spaced holes | 14-count Aida is a comfortable first choice because the holes are easy to see |
| Embroidery floss | The colored thread used to make stitches | Most floss comes in six strands; your pattern will tell you how many to use |
| Tapestry needle | A blunt needle that passes through fabric holes without splitting threads | Size 24 is commonly used with 14-count Aida |
| Hoop or frame | Holds fabric steady while you stitch | Helpful for tension, but not required if you prefer stitching in hand |
| Sharp scissors | Cuts floss cleanly | Small embroidery scissors make trimming easier |
| Pattern or kit | Shows the design, symbols, and floss colors | Choose a small pattern with few colors for your first project |
| Needle minder | Holds your needle when you pause | Optional, but useful for avoiding lost needles |
Aida cloth comes in different “counts,” which affect stitch size. For beginners, 14-count is popular because it balances detail with visibility. Lower counts have larger stitches, while higher counts have smaller stitches and can feel more detailed but harder to see.
Embroidery floss is usually sold in skeins. Each strand bundle can be separated, and patterns often call for two strands at a time rather than the full six. Always check the pattern instructions before threading your needle.
A hoop is useful if you like the fabric held taut, but it should not pull the cloth out of shape. Some stitchers prefer stitching without a hoop, especially on small pieces. Try both if you can and use what feels comfortable.
Understanding Fabric Count, Floss, and Patterns
A few cross stitch terms can sound confusing at first, but they become simple once you connect them to the project in your hands.
Fabric count means the number of squares or holes per inch of fabric. On 14-count Aida, there are 14 stitch squares per inch. A higher count means more stitches fit into the same space, so each stitch is smaller. This can create finer detail, but it also means more counting and smaller holes. That is why 14-count Aida is often a good first fabric: it is easy to handle while still giving a neat result.
Floss is the embroidery thread used for stitching. A skein usually contains six separable strands. If your pattern says “use two strands,” cut a length of floss, separate out two strands, and stitch with those together. Separating strands gently helps the thread lie smoother and reduces tangling.
Patterns are usually charts. Each square on the chart corresponds to a square on your fabric. Symbols inside the chart squares match a color key. For example, if a chart square has a blue triangle symbol, you look at the key, find the blue triangle, and stitch that square with the matching blue floss listed beside it.
Most charts also include grid lines to help you count, plus a stitch count showing how wide and tall the design is. Before you start, check the finished design size. This helps you cut fabric with enough margin for framing, hoop display, or another finishing method.
How to Start Your First Cross Stitch Project
Choose a small design for your first project. Look for a pattern with a limited number of colors, clear symbols, and mostly full cross stitches. A small floral motif, simple word, tiny animal, or beginner sampler is easier to manage than a large detailed scene.
Once you have your pattern and supplies, follow these steps.
1. Prepare the fabric
Check the stitch count and finished size of your design. Cut your fabric larger than the stitched area, leaving extra margin on all sides. A margin gives you room to hold the fabric while stitching and space for framing or finishing later.
If the fabric edges fray, you can leave them as they are for a quick beginner project, or secure them with masking tape, a simple running stitch, or a zigzag edge if you have access to a sewing machine.
2. Find the center
Many cross stitch patterns are designed to begin from the center. To find the center of your fabric, gently fold it in half one way, then the other way. The point where the folds meet is the center. Do not crease heavily; a light fold is enough.
Find the center of the chart too. Patterns often mark it with arrows on the top and side edges. Starting in the center helps keep the design positioned properly on the fabric.
3. Place the fabric in a hoop
If using a hoop, loosen the screw, place the fabric over the inner ring, and press the outer ring over it. Tighten gently and smooth the fabric until it is taut, not stretched. The fabric should feel stable but not distorted.
4. Thread the needle
Cut a manageable length of floss, about forearm length. Longer thread can seem convenient, but it tangles more easily. Separate the number of strands recommended by your pattern, then thread your tapestry needle.
5. Start without a knot
Avoid bulky knots on the back. One simple method is to bring the needle up from the back, leaving a short tail behind. As you make the next few stitches, catch that tail under the stitches on the back to secure it.
If you are stitching with two strands made from one strand folded in half, you may also be able to use a loop start. This creates a tidy beginning, but only works in certain strand setups.
6. Make consistent X stitches
A cross stitch is made in two diagonal movements. For example, you might stitch from bottom-left to top-right, then from bottom-right to top-left. You can also work the opposite direction. The important thing is to keep the top leg of every X facing the same way across the project.
Some stitchers complete each X one at a time. Others work a row of half stitches in one direction, then come back across to complete the Xs. Both methods are fine for beginners. Use the one that helps you count accurately.
7. Follow the chart carefully
Work one color or one small area at a time, checking the chart often. Count from stitches you have already completed rather than guessing. If you are stitching several blocks of the same color, pause regularly to confirm you are still in the correct row and column.
Beginner Techniques That Make Your Stitches Neater
Neat cross stitch is mostly about consistency, not perfection. A few habits will make your first project easier and cleaner.
Keep your thread tension even. Pull each stitch snug enough that it lies flat, but not so tight that the fabric puckers. If the holes start looking stretched or the fabric wrinkles around the stitches, loosen your tension slightly.
Let your needle dangle occasionally. Floss twists as you stitch, and twisted thread can create knots or uneven stitches. Dropping the needle and letting it hang for a moment allows the thread to unwind naturally.
Use a comfortable thread length. A forearm-length piece is a practical starting point. Very long pieces rub against the fabric repeatedly, which can make them fuzzy or more likely to tangle.
Avoid carrying thread across large empty areas on the back, especially dark floss behind light fabric or open unstitched spaces. It may show through from the front. Instead, end the thread and restart closer to the next area.
Check your stitch placement often. It is much easier to fix a counting mistake after a few stitches than after an entire section. If something looks off, compare your fabric to the chart before continuing.
The back of your work does not need to be flawless. Beginners sometimes worry too much about the reverse side, but the main goal is to avoid bulky knots and long loose threads so the finished piece sits flatter.
Some patterns include backstitch, a straight outline stitch often added at the end. If your first pattern includes it, treat it as a finishing detail rather than a separate skill to master immediately.
Finishing, Washing, and Choosing Your Next Project
When you finish a section of thread, secure the end by running it under several nearby stitches on the back. Trim the excess close to the fabric, being careful not to cut your stitches. This keeps the back flatter than knotting.
If you use a hoop, consider removing the fabric between stitching sessions, especially for longer projects. Hoops can leave marks if fabric stays tightly clamped for a long time. Light marks often relax, but removing the fabric is a simple precaution.
Washing is optional and depends on your materials. If your project has picked up hand oils or marks, check the care notes for your fabric and floss first. Many stitchers lightly hand wash suitable pieces in cool water with gentle soap, then rinse carefully. Avoid harsh scrubbing or twisting.
To press the piece, place it face down on a clean towel and iron from the back with gentle heat appropriate for the materials. The towel helps protect the raised stitches. Do not press aggressively, as this can flatten the texture.
Once finished, you have several simple options:
- Display it in the hoop
- Frame it in a picture frame
- Make it into a greeting card
- Turn it into a patch
- Create an ornament
- Use it as a small handmade gift
For your next project, build on what you just learned. Try a slightly larger design, a few more colors, or a pattern with backstitch details. When you feel comfortable counting and stitching on 14-count Aida, you may want to experiment with a different fabric count or a new finishing style.
FAQ
Is cross stitch easy for complete beginners?
Yes. Cross stitch is one of the most approachable embroidery techniques because you follow a chart and make repeated X-shaped stitches. Start with a small pattern, clear fabric, and only a few colors.
What is the best fabric for a first cross stitch project?
14-count Aida is a great first fabric because the holes are visible and the stitch size is manageable. It is not the only option, but it is widely used in beginner kits and patterns.
How many strands of floss should a beginner use?
Most beginner cross stitch patterns on 14-count Aida use two strands of embroidery floss. Always check your pattern first, because strand count can change depending on fabric, design style, and coverage.
Do I need a hoop to cross stitch?
No, a hoop is optional. Many beginners like using one because it keeps fabric steady, but you can also stitch in hand. If using a hoop, keep the fabric taut without stretching it out of shape.
What should I do if I make a mistake in cross stitch?
First, check whether the mistake affects the surrounding design. Small errors may not matter. If it needs fixing, carefully remove the stitches with your needle, recount from a known point, and restitch the area.