

Have you ever wondered how soft wool fibers can transform into sturdy fabric or cute little animals? That’s the magic of felting wool!
Felting is the process of turning loose wool fibers into solid, dense fabric or shapes without weaving or knitting. It works because wool fibers have tiny scales that lock together when exposed to heat, moisture, and pressure. You can create anything from warm blankets to adorable decorations.
There are different ways to felt wool. Wet felting uses water and soap to help the fibers bond, while needle felting uses special barbed needles to tangle and compact the fibers. Each method gives you unique results, making felting a versatile craft that’s both fun and rewarding for beginners and experts alike.
Understanding Felting and Its History
Felting transforms loose wool fibers into solid fabric through moisture, heat, and pressure. This ancient craft has evolved over centuries from practical necessity to artistic expression.
Defining Felting
Felting is a unique process that bonds wool fibers together without weaving or knitting. Unlike other textile methods, felting works because wool fibers have tiny scales that lock together when exposed to moisture, heat, and agitation.
There are two main felting techniques you can try:
- Wet felting: You use soap, water, and friction to mat fibers together
- Needle felting: You use barbed needles to tangle and compress dry wool
The magic happens at the microscopic level—wool fibers have tiny scales that open when wet or agitated. When these scales open, they catch on each other and become permanently interlocked as they dry or are compressed.
Historical Context of Felting
Felt is one of humanity’s oldest textiles, dating back thousands of years. Archaeological evidence suggests nomadic tribes in Central Asia first developed felting techniques around 6000 BCE.
These early felt-makers discovered that wool could transform into durable material perfect for:
- Tents
- Clothing
- Footwear
- Insulation
Felt was especially valuable to nomadic peoples like the Mongols, who used it to create their portable ger (yurt) homes. The material provided excellent protection against harsh weather.
Over time, felting spread across cultures and evolved from purely practical applications to decorative and artistic uses. Today, you can find felt in traditional crafts, modern fashion, and fine art.
Types of Felting Wool
When felting, you’ll find many wool options to choose from. Each type has different qualities that make it suitable for various projects.
Choosing the Right Wool
Merino wool is the most popular choice for felting. It’s super soft and comes in almost every color you can imagine. You’ll find it’s often sourced from Australia and New Zealand.
For beginners, pre-felt is a great option. These are partially felted sheets of wool that are already lightly carded and felted. They feel stretchy and make an excellent base for wet felting projects.
If you’re working on a larger project, consider using “core wool” for the inside parts. Core wool is less expensive and felts easily, helping you save money while still creating beautiful pieces.
Other animal fibers to explore include:
- Alpaca (very soft but felts slowly)
- Baby llama (luxurious feel)
- Camel (unique texture)
- Dog fur (yes, really!)
Comparing Wool Fibers
Different wool fibers create different effects in your felting projects. Here’s a quick comparison:
| Wool Type | Softness | Felting Speed | Best For |
|---|---|---|---|
| Merino | Very soft | Medium-fast | Fine details |
| Corriedale | Medium | Fast | Beginners |
| Romney | Coarser | Very fast | Sturdy items |
| Blue-faced Leicester | Silky | Medium | Shiny accents |
100% wool works best for felting because it has tiny scales on each fiber that lock together during the felting process. Synthetic fibers don’t have these scales, so they won’t felt properly.
The coarseness of wool affects how quickly it felts. Coarser wools with more scales felt faster than softer, finer wools. However, softer wools give a smoother finish to your project.
Prepping Wool for Felting
Before you can start felting, your wool needs proper preparation. The right prep methods make your felting projects easier and help you achieve better results.
Wool Roving
Wool roving is fiber that has been cleaned, combed, and prepared into a form ready for felting. The fibers in roving all point in the same direction, making it especially easy to work with.
Roving is super soft and silky to the touch. Many beginners prefer starting with roving because it requires less preparation. You can use it immediately for both wet and needle felting projects.
For needle felting, you might need to gently pull apart the roving into smaller tufts. This helps control how much wool you’re using at once.
Different types of wool roving offer different textures. Merino is exceptionally soft, while Corriedale provides more durability. Choose your roving based on your project needs.
Carding Wool
Carding is the process of combing and aligning wool fibers to prepare them for felting. If you’re working with raw wool, carding is an essential step.
To card wool, you’ll need either hand carders or a drum carder. These tools help remove debris, untangle fibers, and create a more uniform texture.
When carding by hand, use gentle, consistent strokes to align the fibers. Don’t rush this process! Properly carded wool makes your felting work much easier.
Carded wool is often sold as “batts” or “clouds” and is excellent for creating cores of medium to large needle felted projects. Natural undyed carded Corriedale wool is particularly popular for this purpose.
If you’re washing raw fleece before carding, soak it in warm water for about 30 minutes. Then rinse in slightly cooler water to prevent felting before you’re ready.
Exploring Felting Techniques
Felting wool involves several methods that transform loose wool fibers into solid creations. Each technique offers unique possibilities for crafters of all skill levels.
Wet Felting Basics
Wet felting is one of the oldest textile techniques known to humans. You start by layering wool fibers, then applying warm soapy water. The combination of moisture, soap, and agitation causes the wool scales to open up and interlock with each other.
To begin wet felting, lay out your wool roving in thin, overlapping layers. Sprinkle warm water with mild soap over the fibers. Gently rub the surface with your hands in circular motions, gradually increasing pressure.
The friction causes the fibers to tangle together permanently. This process typically takes 15-30 minutes depending on your project size. Wet felting works great for making flat items like:
- Wall hangings
- Scarves
- Table runners
- Seamless bags
Needle Felting Essentials
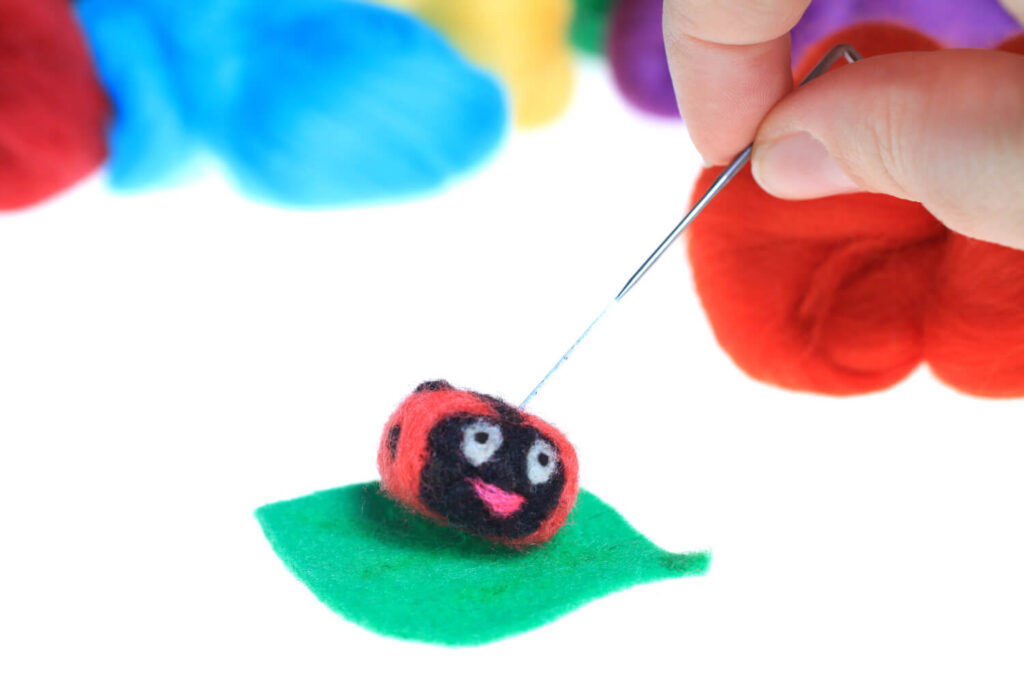
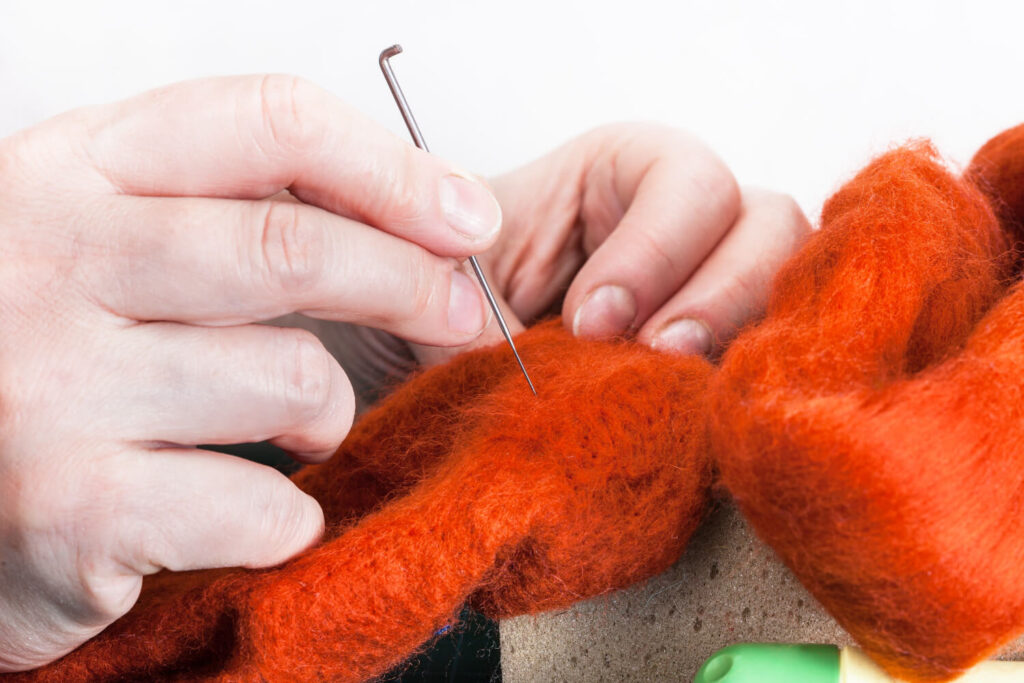
Needle felting uses special barbed needles to tangle and compact wool fibers. The tiny notches on the needles catch the fibers and push them together as you repeatedly stab the wool.
If you want a closer look at the tools involved, felting needles are the key part of needle felting.
You’ll need a foam pad as a work surface to protect your table and needle. Hold your wool roving loosely in one hand and poke the needle in and out with the other. The more you poke, the firmer your felt becomes.
Start with core wool for the inside structure of your project, then add colored wool on top for details. Needle felting allows for precise control and intricate designs.
Common needle sizes include:
- 36 gauge (thicker) for core shaping
- 38 gauge for medium work
- 40 gauge (thinner) for fine details
3D Needle Felting
3D needle felting takes the basic needle technique further by creating sculptural objects with depth and dimension. You can make animals, people, ornaments, and more using this versatile method.
Begin with a simple core shape using natural wool. Roll the wool into a ball or cylinder as your base. Use your felting needle to stab all around the shape, turning frequently to maintain evenness.
As your piece becomes firm, add features by attaching small tufts of colored wool. For animals, create legs, tails, and ears separately, then attach them to the body.
Working slowly is key to success. Complex projects might take several sessions to complete. Remember that wool shrinks as it felts, so start with more material than you think you’ll need.
The Felting Process
Felting transforms loose wool fibers into a dense fabric through moisture, heat, and friction. The process works because wool fibers have tiny scales that lock together when agitated under specific conditions.
Step-by-Step Guide
-
Prepare your materials: Gather wool roving or batting, hot water, mild soap, a workspace that can get wet, and a tool for agitation (hands work well!).
-
Create your wool layout: For flat felting, layer wool fibers in alternating directions to create strength. For 3D projects, shape the wool into your desired form.
-
Add hot water and soap: The water should be quite hot (around 140°F) but comfortable enough to touch. The soap helps the fibers slide against each other.
-
Begin agitation: Gently press and rub the wool. Start slowly to avoid distorting your design. The friction causes the wool fibers to migrate and lock together.
-
Increase agitation: As the wool begins to felt, you can increase pressure and speed. Roll, rub, and press the wool for 15-20 minutes.
-
Rinse and shape: Once fully felted, rinse out all soap and gently squeeze out excess water. Shape your felt and allow it to dry completely.
Common Mistakes to Avoid
Don’t rush the process! Moving too quickly to rough agitation can create unwanted holes or distortion in your project. Be patient with the initial gentle agitation.
Watch for proper shrinkage. Wool typically shrinks 30-50% during felting, so start with a larger piece than your desired final size. If your project isn’t shrinking, you may need more soap, hotter water, or more vigorous agitation.
Avoid changing water temperature suddenly. Dramatic temperature shifts can shock the wool and prevent proper felting. Maintain a consistent temperature throughout the fulling process.
Be careful with colored wools. Different colors may felt at different rates, and some dyes might bleed. Test your wool combinations before starting a large project.
Crafting with Felt
Once you have your felting wool, the real fun begins! Felt crafting offers endless creative possibilities for both beginners and experienced crafters.
Felting Projects for Beginners
Needle felting is a great way to start your felt crafting journey. You’ll need some unspun wool (roving) and a special barbed needle. Small, simple projects like fuzzy animals or decorative balls are perfect for beginners.
Try making a simple pin cushion by rolling wool into a ball and repeatedly stabbing it with your felting needle until firm. This helps you practice the basic technique.
Flat felt designs on fabric are another beginner-friendly option. You can create beautiful decorations for bags, pillows, or wall hangings by layering colorful wool and securing it with needle felting.
Holiday ornaments are also fun starter projects. Create snowflakes, hearts, or stars by shaping wool and adding details with contrasting colors.
Advanced Crafting Ideas
Once you’re comfortable with basic techniques, you can move to more complex 3D sculptures. Many crafters create amazingly detailed animal figures by building a wire armature and layering wool around it.
Wet felting offers different possibilities than needle felting. You can make seamless containers, bowls, or even slippers by using soap, water, and agitation to bind wool fibers together.
Try combining needle and wet felting techniques for unique results. For example, create a wet-felted background and add needle-felted details on top.
Wearable art like felt jewelry, hats, and scarves showcases your skills beautifully. You might also explore nuno felting, where wool is felted onto a fabric base like silk for lightweight, textured pieces.
Integrating Other Materials
Felting wool doesn’t have to stand alone. You can combine it with different fabrics and fibers to create unique textures and designs.
Combining Wool with Yarn Crafts
When you mix felting with yarn crafts like knitting and crochet, you open up exciting creative possibilities. Try needle felting directly onto knitted items to add decorative elements or pictures that wouldn’t be possible with knitting alone.
For crochet projects, you can felt wool embellishments separately and then attach them to your finished piece. This works great for adding 3D flowers, animals, or textured details.
You can also use a technique called nuno felting to combine wool with fabrics like silk. The wool fibers migrate through the fabric, creating an interesting textile with different properties than either material alone.
Remember that natural fibers work best with felting wool. Cotton, linen, and silk accept wool fibers nicely, while synthetic fabrics like polyester can be more challenging to felt onto.
Core Wool and Its Uses
Core wool is a special type of wool used in needle felting projects. It’s made up of shorter, lumpy wool fibers that go in different directions rather than lying neatly in the same way.
Think of core wool as being similar to toy stuffing. It helps you build volume and create shapes quickly in your felting projects.
When you’re making 3D sculptures or figures, core wool is perfect for creating the inside structure. You can use it to build up the bulk of your project before covering it with prettier colored wool.
Why use core wool?
- Creates volume fast
- Felts quickly due to its fiber direction
- More economical than using colored wool throughout
- Perfect for soft sculptures and rounded shapes
Core wool is especially useful for beginners because it’s forgiving and easy to work with. You can shape it easily with your felting needle.
For your next project, try using core wool for the inside and save your nicer colored wool for the outside layer. This approach saves money and makes your project lighter.
If you don’t have core wool, you might be able to use synthetic stuffing in a pinch. However, real core wool will felt much better and create more stable sculptures.
Finishing and Caring for Felted Items
Once you’ve created your beautiful felted project, proper finishing and maintenance will help it last for years to come. Knowing how to care for wool felt is essential as these items require special attention.
Fulling Techniques
Fulling is the final step in the felting process that gives your project that polished look. It involves using moisture, heat, and friction to tighten the wool fibers even more.
To full your project, gently rub it between your hands with warm water and mild soap. Roll it against a textured surface like a bamboo mat for more stubborn areas.
The recipe for felting is “moisture + heat + soap + friction = FELTING,” so be careful not to overdo it. You’ll know your piece is fully fulled when the fibers are tight and the surface looks smooth.
For three-dimensional pieces, you can shape them during this process while they’re still damp. Use your hands to mold them into the desired form before letting them dry.
Maintenance and Cleaning
Wool felt items need special care to stay looking their best. With proper maintenance, your creations can last for years!
Spot cleaning is best for most felt items. Use a damp cloth with a tiny bit of mild soap to gently dab at soiled areas. Avoid rubbing vigorously, as this can cause more felting or fuzziness.
For storing your felted creations, keep them in a cool, dry place away from direct sunlight. This helps prevent fading and damage from moisture.
Watch out for carpet bugs and moths! These pests love wool. Consider using cedar blocks or lavender sachets as natural repellents in your storage areas.
If your felted items get fuzzy from handling, you can carefully trim the surface with sharp scissors to restore a smooth appearance. For heavily handled pieces, occasional light re-felting with a needle can tighten loose fibers.
Creative Inspiration and Resources
Finding inspiration for your wool felting projects can help you grow as a fiber artist. The right resources make it easier to learn new techniques and connect with other enthusiasts who share your passion.
Books and Online Tutorials
If you’re looking to improve your felting skills, books are excellent resources. “The Complete Photo Guide to Needle Felting” and “Woolbuddies” are popular titles that show detailed techniques with step-by-step instructions. These guides can help you master everything from basic stabbing methods to creating complex 3D sculptures.
YouTube has countless free tutorials where you can watch experienced felters at work. Channels like “Sarafina Fiber Art” offer beginner-friendly videos that show how to create adorable animals and other projects.
Pinterest is perfect for visual inspiration. Create boards to save project ideas like seasonal decorations, wearable art, or realistic animal figures. Many pins link to free patterns or tutorials.
For quick references, downloadable PDF guides on Etsy can provide specific project instructions with material lists and detailed photos.
Communities and Workshops
Joining felting communities connects you with fellow enthusiasts who can share tips and provide feedback on your work. Facebook groups like “Needle Felting Beginners” and “Worldwide Felting” welcome crafters of all levels.
Local craft stores often host workshops where you can learn in person. These hands-on classes let you try techniques with guidance from experienced instructors. You’ll also meet other felters in your area.
Craft festivals and fiber arts shows are wonderful places to see amazing felted creations up close. Many exhibitors are happy to discuss their techniques and may offer mini-workshops during these events.
Online forums such as Reddit’s r/Needlefelting provide spaces to ask questions and share your progress pictures. Members are typically encouraging and can help troubleshoot when you’re stuck on a challenging project.
Environmental Impact and Sustainability
Wool felt is a fantastic eco-friendly choice for your crafting needs! Unlike synthetic materials, 100% wool felt is completely biodegradable, especially in moist conditions.
When you choose wool felt, you’re selecting a renewable resource that has a low environmental impact. Sheep grow new wool each year, making it a naturally sustainable material.
Water resistance is another great benefit of wool felt. This natural property means your wool projects can withstand light moisture without damage.
Traditional felting cushions are often made from styrofoam, which isn’t biodegradable and contributes to pollution. Switching to wool felting cushions is a simple way to make your crafting more environmentally responsible.
If sustainability matters to you, look for wool felt that uses non-toxic dyes. Some manufacturers use chemical-free coloring processes that reduce environmental damage.
The recyclable and repurposable nature of wool felt means your scraps don’t have to end up in landfills. You can incorporate small pieces into new projects or compost them!
German-milled wool felt is known for its quality and eco-friendly production methods. Available in different thicknesses (like 3mm and 5mm), these premium options provide durability while remaining earth-friendly.
Your choice to use wool felt helps support sustainable farming practices and reduces reliance on petroleum-based synthetic materials.