
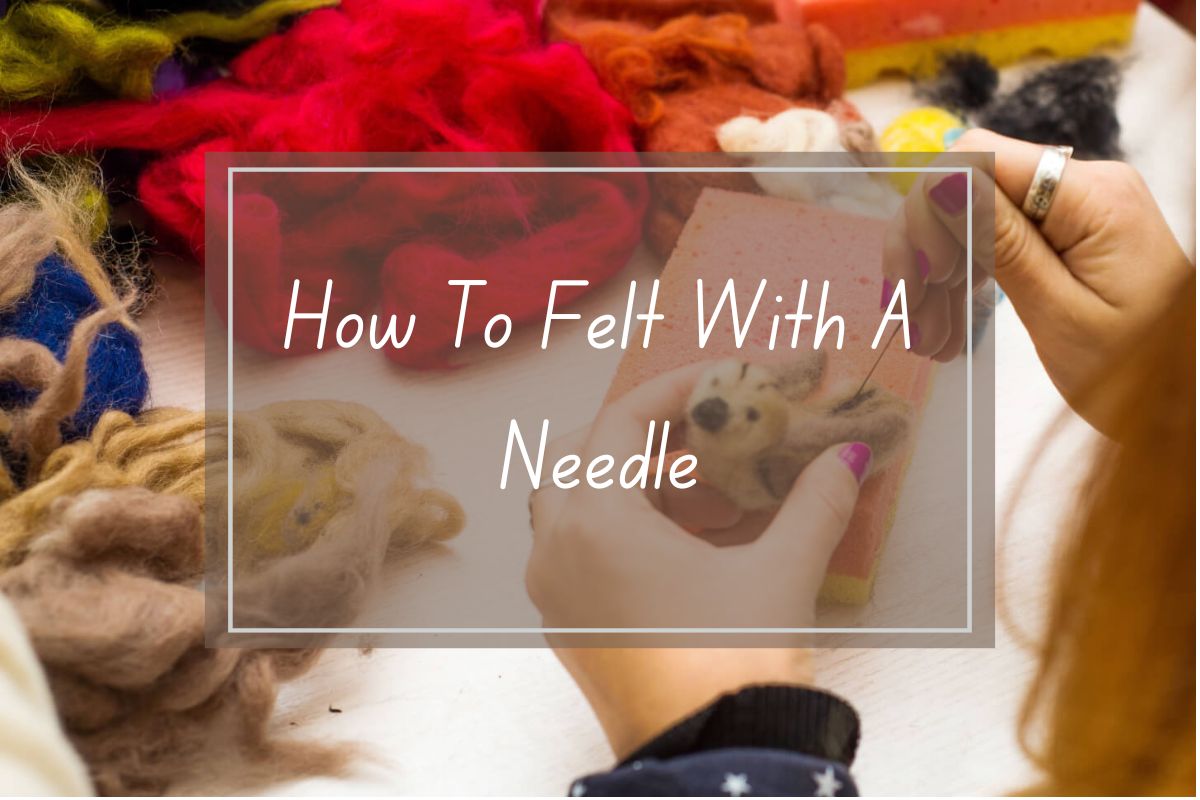
Looking to try something new and creative? Needle felting is a fun craft that turns fluffy wool into amazing shapes using a special needle. You can make cute animals, flowers, or even jewelry with just a few simple tools and some colorful wool.
If you’re new to the fiber itself, learn more about felting wool.
Needle felting works by repeatedly jabbing a barbed needle into wool, which tangles the fibers together until they become firm and hold their shape. It’s easy to learn but gives you endless creative possibilities. All you need to start is some wool roving (unspun wool), felting needles, and a foam pad to protect your work surface and fingers.
Don’t worry if your first project isn’t perfect – needle felting is forgiving! You can always add more wool or reshape areas that don’t look right. Many beginners find it relaxing to poke the needle into the wool while watching their creation slowly take shape. The process is simple enough for anyone to try, but offers enough depth to keep you interested for years.
Getting Started with Needle Felting
Needle felting is a fun craft that turns fluffy wool into cute shapes with just a special needle and some practice. You’ll be able to create adorable projects like the mouse mentioned in tutorials once you learn the basics.
Understanding the Basics
Needle felting works by using a barbed needle to tangle wool fibers together. When you poke the needle into loose wool, the tiny barbs catch the fibers and push them together, making them denser and firmer.
Start by rolling your wool roving tightly into a basic shape like an oval or ball. This gives you a foundation to work with. Then begin poking your felting needle in and out of the wool, not too deep or too fast.
Be careful not to stab too much in one spot! Over-felting can actually tear the fibers apart. When your needle starts to resist, it’s time to switch to a smaller needle for detail work.
Remember that felting is a gradual process. The more you poke, the firmer your creation becomes.
Materials and Tools Required
To begin needle felting, you’ll need just a few basic supplies:
Essential tools:
- Felting needles (sizes 36-38 are good for beginners)
- Wool roving in colors you like
- A felting mat or foam pad to protect your surface and fingers
- Finger guards (optional but recommended)
Your felting needle is special – it has tiny barbs along the shaft that do the actual felting work. Never use it without a mat underneath!
For wool, start with something that felts easily like Corriedale or Merino. These wools tangle nicely and come in beautiful colors.
Your felting mat provides a safe place to poke your needle. Some people use foam, others prefer brushes or special felting pads. Whatever you choose, make sure it’s thick enough to protect your work surface.

Selecting the Right Wool
Choosing the right wool for needle felting makes a big difference in how your project turns out. The type of wool and how it’s prepared can affect both your felting experience and the final result.
Types of Wool
Sheep wool is the most common choice for needle felting, but you have many options! Merino wool is super soft and great for detailed work like faces or small animals. It felts quickly and gives a smooth finish.
Corriedale wool is a bit coarser but very versatile and perfect for beginners. It’s easy to work with and felts well without being too expensive.
You can also try non-sheep fibers like alpaca, llama, or even camel for different textures. These specialty fibers often create interesting effects in your projects.
For those who prefer animal-free options, there are vegan alternatives available too!
Wool Preparation
Wool roving is the most popular form for needle felting. This is wool that’s been cleaned, combed, and drawn into long, fluffy strands that are easy to pull apart.
Batts are another option – these are sheets of carded wool fibers that work well for larger projects or creating backgrounds.
Core wool is perfect for the inside of your projects. It’s coarser and cheaper, making it ideal for filling shapes before covering with your nicer wool.
When buying wool fibers, look for ones that aren’t too processed. Very smooth, shiny wool can be harder to felt because the scales on the fibers have been damaged.
Store your wool in a cool, dry place to keep it in good condition until you’re ready to use it!
Essential Needle Felting Tools
To get started with needle felting, you’ll need just a few basic tools. Having the right equipment makes all the difference in creating beautiful felted pieces and keeping your fingers safe during the process.
Different Types of Needles
Felting needles are the most important tool in needle felting. These aren’t your regular sewing needles! Felting needles have tiny barbs or notches along the shaft that catch and tangle wool fibers together.
You can find them in different gauges (sizes), typically ranging from 32 to 42. The higher the number, the finer the needle. A 36 or 38 gauge needle is perfect for beginners as it works well for most projects.
Some specialty needles include:
- Star needles: Great for faster felting with multiple barbs
- Reverse needles: Help pull fibers back out if needed
- Spiral needles: Excellent for detail work
It’s good to have a variety of needles, but if you’re just starting, a pack of 36 or 38 gauge needles will work wonderfully.

Choosing a Felting Mat
Your felting mat provides a safe surface to work on and protects both your needles and furniture. Without a good mat, you’ll break needles and possibly stab your table!
The most popular options include:
- Foam mats: Affordable and lightweight, perfect for beginners
- Wool mats: More durable and help prevent needle breakage
- Brush mats: Great for detailed work and flat felting
Your mat should be at least 1-inch thick. Many crafters prefer a 4-inch foam block because it’s sturdy enough to withstand repeated needle jabs.
A good tip is to rotate your mat regularly to prevent wearing down one area too quickly. Some felters keep different mats for different types of projects.
Basic Needle Felting Techniques
Needle felting uses special barbed needles to tangle wool fibers together, creating either flat designs or three-dimensional sculptures. The basic techniques are simple to learn but take practice to master.
Flat Felting
Flat felting creates 2D designs that can become artwork, patches, or decorations for clothing. Start by placing your wool roving on a foam pad. Shape it roughly into your desired design. Hold your felting needle straight up and down, then begin poking it into the wool repeatedly.
Work from the center outward to keep your design in place. Be careful to not stab your fingers! The more you poke, the firmer your design becomes.
To add details, layer different colors of wool on top of your base. Use thinner wisps for fine details. For clean edges, felt along the border more densely.
You can create beautiful landscapes, animals, or abstract designs using this method. Try working from a simple sketch until you get comfortable with the technique.
Sculptural Felting
Sculptural felting creates 3D wool objects like animals, dolls, or decorative items. Begin with a basic core shape made from wool. Roll and compress a ball or cylinder of wool in your hands, then start needle felting to firm it up.
Poke your needle in and out at different angles to shape the wool. For small animals, create a body core first, then add legs, head, and other details. Each new piece should be attached by felting at the joining area.
Keep adding and shaping wool until you achieve your desired form. Remember that wool compacts as you felt, so start with more than you think you’ll need. For fine details like eyes or noses, use very small bits of colored wool.
Sculptural projects take more time than flat pieces, but the results are worth it! Start with simple shapes like balls or mice before trying more complex animals.
Shaping and Forming Wool
Shaping wool is where your needle felting project really comes to life. The way you handle and form the wool determines the final shape and character of your creation.
Creating Basic Shapes
Start by rolling your wool roving into a tight ball or cylinder, depending on what you want to make. For a ball, roll the wool between your palms until it forms a rough sphere. For other shapes like cylinders or ovals, roll the wool with your fingers in one direction.
Once you have your basic shape, begin stabbing with your felting needle. Work in thin layers rather than one thick chunk. This creates a more solid, well-formed shape.
You can also use cookie cutters as templates! Place your wool inside the cookie cutter and stab along the edges to create perfect shapes like hearts, stars, or animals.
Remember to rotate your wool frequently as you felt. This ensures even compaction on all sides. For flat shapes, work on a felting mat and flip your project over regularly.
Detail Work and Finishing Touches
After creating your basic shape, it’s time for the details that bring your creation to life. For detailed areas, use thinner wisps of wool and a finer gauge needle. Add small amounts at a time by gently laying the wool where you want it and securing with light needle strokes.
Create texture by varying your stabbing technique. Light, shallow stabs create a fuzzy texture while deeper, firmer stabs make a smoother surface.
To attach separate pieces together, place them where you want them to connect and felt through both pieces. The fibers will tangle together and create a strong bond.
Check your work often by gently pinching and looking for loose fibers. Any areas that feel soft or loose need more felting. Don’t rush this process—the more you felt, the stronger and more defined your shape will become!
Decorative Techniques
Needle felting offers endless creative possibilities for adding beautiful details to your projects. These techniques can transform simple wool into intricate designs that add personality and charm to your creations.
Adding Colors and Textures
When you want to make your needle felting projects more vibrant, try layering different colors of wool. Start with a base color, then add small wisps of contrasting colors on top. Gently needle these new colors into the surface to create gradients, patterns, or highlights.
You can also create interesting textures by varying your felting technique. For smooth areas, use more needling at different angles. For fuzzy textures, needle less densely and pull out small fiber tufts with your fingers.
Try adding different wool types for unique effects. Merino wool creates smooth surfaces, while coarser wools add interesting texture. Silk fibers or angelina sparkles can add shimmer to your projects.
Small amounts of differently colored wool can create details like eyes, noses, or flower centers. Just add tiny wisps where needed and needle them into place.
Applique Felting
Applique felting allows you to add decorative elements to existing fabric items. This technique is perfect for covering holes in wool sweaters or adding custom designs to bags, hats, or blankets.
To create an applique, lay wool fibers in your desired shape on top of the fabric. Use your felting needle to push the fibers through the fabric’s surface, connecting them to the base material. Work slowly around the edges first to secure the shape.
For the best results, use natural fabric bases like wool or cotton. Synthetic fabrics won’t bond as well with the wool fibers. When applying to sweaters, work with the inside of the garment facing up on your felting pad.
You can create simple shapes like hearts and stars, or more complex designs like flowers and animals. Layer colors to add details and dimension to your appliques.
Mixing Needle Felting with Other Crafts
Needle felting works beautifully with other craft techniques to create unique textile art. You can expand your creative options by combining different methods with your needle felting projects.
Incorporating Embroidery
Embroidery adds beautiful details to your needle felted pieces. You can use embroidery to create fine lines and textures that might be hard to achieve with wool alone.
Start by completing your needle felted base first. Once your wool is firmly felted, use embroidery floss to add details like flowers, leaves, or facial features.
French knots work wonderfully for eyes or small decorative elements. Running stitches can create outlines, while satin stitches add solid areas of color.
Try using contrasting thread colors against your wool for eye-catching designs. Metallic threads can add sparkle to holiday ornaments or special projects.
The combination creates texture differences that make your work more interesting and dynamic. The smooth thread stands out nicely against the fuzzy texture of felted wool.
Combining Wet Felting
Wet felting and needle felting complement each other perfectly. The search results confirm you can needle felt onto wet-felted pieces once they’re dry to add fine details.
Start with wet felting to create a solid base fabric. Wet felting involves using soap, water, and agitation to bind wool fibers together. This technique creates a smooth, strong foundation.
After your wet felted piece dries completely, use your felting needles to add detailed elements on top. The needle will push new wool fibers into the wet felted base.
This combination works great for landscapes where you might wet felt the background, then needle felt trees or flowers on top. It’s also perfect for adding facial features to dolls or animals.
If you make a mistake in your wet felting, you can use needle felting to fix it later. This technique gives you the strength of wet felting with the precision of needle work.
Troubleshooting Common Needle Felting Issues
Even experienced needle felters run into problems sometimes! Let’s look at how to fix the most common issues you might face during your felting projects.
Fixing Broken Needles
Broken needles happen to everyone, so don’t feel bad when it happens to you! The most common cause is stabbing too hard or at the wrong angle. Try using quick, shallow pokes rather than deep jabs.
Always work on a proper felting surface like foam or a special felting mat. Hard surfaces will snap your needles instantly.
If you’re working on a dense project, switch to a stronger needle. Thicker gauges (like 36 or 38) handle tough jobs better than fine needles.
Keep your wrist relaxed and use a lighter touch. Let the barbs on the needle do the work for you.
Store your needles properly in a case or needle holder when not in use. This prevents them from getting damaged between projects.
Repairing Misshapen Pieces
Is your felted creation looking lumpy or uneven? Go over the surface with a fine felting needle using shallow, angled pokes. This helps smooth out bumps without adding more wool.
If your piece has lost its shape, you can gently pull and stretch it back before re-felting. Mist it lightly with water first to make the fibers more pliable.
Using too much wool is a common mistake. Start with less than you think you need—you can always add more!
For precise shaping, try using a specialized tool like a multi-needle holder or a reverse needle to pull fibers out where needed.
Take breaks to check your progress from different angles. This helps you spot uneven areas before they become hard to fix.
Maintaining Needle Felting Equipment
Taking care of your needle felting tools will help them last longer and work better. Good maintenance ensures your projects turn out well and saves you money in the long run.
Cleaning Felting Needles
Felting needles need regular cleaning to work properly. When fibers build up around the barbs of your needles, they become less effective and can even break. To clean them, gently wipe with a small piece of wool or dense foam to remove stuck fibers.
For stubborn buildup, try rubbing the needles with fine steel wool or a dry kitchen sponge. Be careful not to bend the needles during cleaning!
Avoid using water or cleaning solutions on your needles as this can cause rusting. If your needles do get wet, dry them immediately with a soft cloth.
Replace needles when they become bent or dull. Sharp needles make felting easier and produce better results.
Storing Wool and Tools
Use a needle holder to keep your felting needles safe and easy to find. This protects the needles and your fingers too! Many crafters use cork, foam blocks, or purpose-made holders.
Store your wool in airtight containers away from sunlight, moisture, and pests. Plastic bins with secure lids work well. Consider organizing by color for easy access.
Keep your felting mat clean by gently brushing away loose fibers. For foam mats, occasional vacuuming with a handheld attachment works well.
Store all your supplies in a dedicated box or drawer to keep everything together. This makes setup quick when inspiration strikes!
Advanced Needle Felting Projects
Once you’ve mastered basic needle felting techniques, you can challenge yourself with more complex projects. Advanced needle felting allows you to create detailed sculptures and achieve smoother finishes with your wool.
Complex Shapes and Structures
Working with complex shapes in needle felting requires patience and planning. Start by creating a strong armature as your foundation – this internal structure will support your wool and help maintain the shape of your creation. Wire, pipe cleaners, or aluminum foil work well for this purpose.
For projects with multiple parts, try creating separate pieces and joining them later. This technique gives you more control over each component. You might also experiment with fabric stiffener (applied only at the very end) to help maintain delicate structures.
When working on complex projects, the Mini Clover Craft Iron can be useful for smoothing surfaces. Remember to work slowly and add wool gradually. This prevents your project from becoming too dense in some areas and helps maintain proper proportions.
Lifelike Animal Sculptures
Creating realistic animal sculptures is one of the most rewarding advanced needle felting achievements. Focus on capturing the essence of your animal by studying references of their proportions and distinctive features.
Use core wool for the main body structure and save your colored, high-quality wool for the outer layers. This approach is both economical and practical. For a lifelike finish, blend multiple similar shades of wool rather than using a single color.
Pay special attention to facial features – eyes, nose, and mouth bring your creation to life. Commercial glass eyes can add realism, or you can felt tiny eye details with fine needles.
To avoid needle marks in your finished piece, switch to finer needles for your final layers. The smoothest finishes come from patient, light felting with these smaller needles rather than aggressive stabbing.
Inspiring Your Felt Creations
Finding inspiration for your needle felting projects helps you create unique and beautiful pieces. Let’s explore ways to spark your creativity and develop your personal style in this wonderful craft.
Exploring Patterns and Ideas
Look around you for inspiration! Nature offers endless ideas – try felting small animals, flowers, or seasonal decorations. Many beginners start with simple shapes like balls or hearts before moving to more complex projects.
Browse social media platforms and crafting websites for needle felting tutorials. These resources can show you different techniques and approaches to working with wool roving.
Try keeping a small sketchbook of ideas that catch your eye. Quick drawings or photos of things you’d like to felt can build your creative library.
Don’t be afraid to experiment with color combinations! Wool roving comes in beautiful colors that you can blend for unique effects on your felting mat.
Developing Your Own Style
Your personal style will emerge naturally as you practice. Some felters prefer realistic creatures with detailed features, while others enjoy creating whimsical, cartoon-like characters.
Pay attention to what brings you joy while needle felting. Do you love creating tiny details? Or do you prefer bold shapes and colors? Follow what excites you most when working with your felting needles.
Try adding unique touches to your creations. Maybe it’s a signature color palette or a particular way of shaping ears on your felted animals.
Remember that developing your style takes time and practice. Each piece you create with your felting mat and wool helps you discover your unique creative voice.
Making mistakes is part of the journey! Sometimes the happiest accidents lead to discovering techniques that become part of your signature style.